Sharp DT300 DT-300 Operation Manual
Sharp DT300 - DLP Projector - 700 ANSI Lumens Manual
 |
UPC - 074000364073
View all Sharp DT300 manuals
Add to My Manuals
Save this manual to your list of manuals |
Sharp DT300 manual content summary:
- Sharp DT300 | DT-300 Operation Manual - Page 1
PROJECTOR PROJECTEUR PROYECTOR PROJETOR DT-300 OPERATION MANUAL MODE D'EMPLOI MANUAL DE OPERACION MANUAL DE OPERAÇÃO ENGLISH 1 - -71 FRANÇAIS 1 - -70 ESPAÑOL 1 - -69 PORTUGUÊS ...... -1 - -69 - Sharp DT300 | DT-300 Operation Manual - Page 2
. Model No.: DT-300 Serial No.: There are two important reasons for prompt warranty registration of your new SHARP Projector, using the REGISTRATION CARD packed with the projector. 1. WARRANTY This is to assure that you immediately receive the full benefit of the parts, service and labor warranty - Sharp DT300 | DT-300 Operation Manual - Page 3
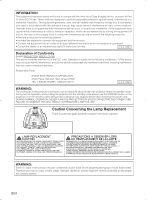
if the lamp ruptures. LAMP REPLACEMENT CAUTION BEFORE REMOVING THE SCREW, DISCONNECT POWER CORD. HOT SURFACE INSIDE. ALLOW 1 HOUR TO COOL BEFORE REPLACING THE LAMP. REPLACE WITH SAME SHARP LAMP UNIT TYPE BQC-XVZ200++1 ONLY. UV RADIATION : CAN CAUSE EYE DAMAGE. TURN OFF LAMP BEFORE SERVICING. HIGH - Sharp DT300 | DT-300 Operation Manual - Page 4
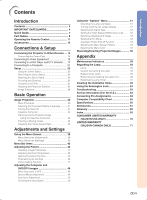
Indicators 58 Regarding the Lamp 59 Lamp 59 Caution Concerning the Lamp 59 Replacing the Lamp 59 Removing and Installing the Lamp Unit 60 Resetting the Lamp Timer 61 Cleaning the Ventilative Holes 62 Using the Kensington Lock 63 Troubleshooting 63 Service Information (For the U.S 63 - Sharp DT300 | DT-300 Operation Manual - Page 5
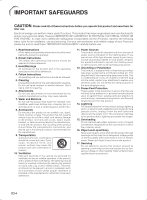
the following basic rules for its installation, use and servicing. For your own protection and reliable usage of your Projector, please be sure to read these "IMPORTANT SAFEGUARDS" carefully before use. 1. Read Instructions All the safety and operating instructions should be read before the product - Sharp DT300 | DT-300 Operation Manual - Page 6
should be mounted to a wall or ceiling only as recommended by the manufacturer. 22. Heat This product should be situated away from heat sources such as radiators, heat registers, stoves, or other products (including amplifiers) that produce heat. • Digital Light Processing, DLP, Digital Micromirror - Sharp DT300 | DT-300 Operation Manual - Page 7
Center or Dealer for replacement. See "Replacing the Lamp" on page 59. CAUTION PRECAUCIÓN PRÉCAUTION BQC-XVZ200++1 Cautions concerning the setup of the projector I For minimal servicing and to maintain high image qual- ity, SHARP recommends that this projector be installed in an area free from - Sharp DT300 | DT-300 Operation Manual - Page 8
. 2. Connect to video equipment. (Page 16) 6. Turn the projector on using control. (Page 30) on the remote ON button INPUT 4 button The power indicator illuminates green. 7. Press on the remote control to select the INPUT 4 mode. (Page 31) "On-screen Display Video cable To INPUT 4 terminal - Sharp DT300 | DT-300 Operation Manual - Page 9
main pages in this operation manual where the topic is explained. Projector (Front and Top View) Lens shift dial 25 Zoom knob 25 Exhaust ventilative hole 6 Focus ring 25 Remote control sensor 11 58 TEMPERATURE WARNING indicator 58 LAMP indicator 30 POWER indicator 6 Exhaust ventilative hole Lens - Sharp DT300 | DT-300 Operation Manual - Page 10
Introduction Projector (Rear View) Remote control sensor 11 Intake ventilative hole 62 62 Intake ventilative hole INPUT 2/DIGITAL INPUT 18 terminal INPUT 3 S-VIDEO terminal 15 (4-pin Mini DIN) RS-232C terminal (Serviceman only) 14 AC socket INPUT 1 COMPONENT 17 terminals (RCA) INPUT 4 VIDEO - Sharp DT300 | DT-300 Operation Manual - Page 11
INPUT 1 button 31 INPUT 2 button 31 INPUT 4 button 31 AUTO SYNC button 50 RGB/COMP. button 52 30 ON button 38 MENU button 39 ADJUSTMENT buttons 31 INPUT 3 button 31 DIGITAL INPUT button 35 RESIZE button 47 PICTURE SETTING button 35 FREEZE button Remote Control (Top View) Remote control signal - Sharp DT300 | DT-300 Operation Manual - Page 12
remote control may malfunction under a fluorescent lamp. Under that circumstance, move the projector away from the fluorescent lamp. 45˚ 30˚ Remote The batteries included with this projector may exhaust over a short period, depending on how they are kept. Be sure to replace them as soon as possible - Sharp DT300 | DT-300 Operation Manual - Page 13
Accessories Supplied accessories Remote control Two AA size batteries RRMCGA218WJSA Power cord QACCDA007WJPZ Video cable QCNWGA001WJZZ Lens cap Operation manual CCAPHA004WJ01 TINS-B006WJZZ Optional accessories check with your nearest Authorized SharpVision Service Center or Dealer. -12 - Sharp DT300 | DT-300 Operation Manual - Page 14
Connections and Setup Connections and Setup - Sharp DT300 | DT-300 Operation Manual - Page 15
the new digital television system in the United States. A computer using: I DVI to 15-Pin D-sub adapter (See page 21.) I A DVI cable (See page 22.) I An RS-232C cable (See page 23.) Connecting the Power Cord Plug in the supplied power cord into the AC socket on the rear of the projector. Supplied - Sharp DT300 | DT-300 Operation Manual - Page 16
an S-video cable, a VCR, DVD player or other video equipment can be connected to INPUT 3 input terminal. 1 Connect an S-video cable to the projector. 2 Connect the S-video cable to the video equipment. Note • The INPUT 3 (S-VIDEO) terminal uses a video signal system in which the picture is separated - Sharp DT300 | DT-300 Operation Manual - Page 17
video cable, a VCR, DVD player or other video equipment can be connected to INPUT 4 input terminal. 1 Connect a composite video cable to the projector. 2 Connect the composite video cable to the video equipment. To INPUT 4 terminal Composite video cable To video output terminal VCR or other video - Sharp DT300 | DT-300 Operation Manual - Page 18
Cable (INPUT 1) Use a component cable when connecting component video equipment such as DVD players and DTV decoders to INPUT 1 terminals. 1 Connect a component cable to the projector. 2 Connect the above cable to the component video equipment. Note • Make sure to turn both the - Sharp DT300 | DT-300 Operation Manual - Page 19
output terminal of the DTV decoder, select "Component" for "Signal Type" on the OSD menu or press on the remote control. (See page 52.) • Make sure to turn both the projector and the video equipment off before connecting. Optional accessories To INPUT 2 terminal 3 RCA to 15-pin D-sub cable Type - Sharp DT300 | DT-300 Operation Manual - Page 20
video equipment. • Secure the connectors by tightening the thumbscrews. Note • When connecting this projector to DVI out- put of the DTV decoder, select "RGB" for "Signal Type" on the OSD menu or press on the remote control. (See page 52.) Optional accessory DVI to 15-pin D-sub adaptor Type: AN - Sharp DT300 | DT-300 Operation Manual - Page 21
by tightening the thumbscrews. Note • Select DIGITAL INPUT mode when connecting to video equipment with the digital output terminal. (See page 31.) • Make sure to turn both the projector and the video equipment off before switching the "DIGITAL INPUT TYPE" switch and connecting. Optional accessory - Sharp DT300 | DT-300 Operation Manual - Page 22
work. • When connecting the projector to a computer in this way, select "RGB" for "Signal Type" on the OSD menu or press on the remote control. (See page 52.) • A Macintosh adaptor may be required for use with some Macintosh computers. Contact your nearest Sharp Authorized Service Center or Dealer - Sharp DT300 | DT-300 Operation Manual - Page 23
connectors by tightening the thumbscrews. Note • Select DIGITAL INPUT mode when connecting to digital output terminal of the computer. (See page 31.) • Before switching the "DIGITAL INPUT TYPE" switch and connecting, be sure to unplug the power cord of the projector from the AC outlet and turn off - Sharp DT300 | DT-300 Operation Manual - Page 24
the projected image as you want by lifting up the projec- tor and rotating the projector on the Swivel Stand. Caution • Do not hold the lens when lifting, lowering or rotating the projector. • When lowering the projector, be careful not to get your fingers caught in the area between the Swivel - Sharp DT300 | DT-300 Operation Manual - Page 25
(1). Attaching the Swivel Stand 1 Align the tabs on the front bot- tom of the projector (1). 2 While holding down the button (2), place the projector onto the Swivel Stand (3) to attach. 3 Press the projector down firmly to attach it to the Swivel Stand to make sure it is securely attached to - Sharp DT300 | DT-300 Operation Manual - Page 26
Lens Shift The picture can be adjusted within the shift range of the lens by rotating the lens shift dial on the top of the projector using your finger. Zoom knob Focus ring Lens shift dial Projected Image UP DOWN -25 - Sharp DT300 | DT-300 Operation Manual - Page 27
Adjusting the Projection Distance • Refer to pages 33 and 34 about the function of Keystone correction and placement of projector using the correction. • Decide the placement of the projector referring to the figures on the table and the diagram below according to the size of your screen and input - Sharp DT300 | DT-300 Operation Manual - Page 28
center 90° Lower edge of screen (White portion) = Standard (0) point Upper lens shift position (Desktop setup) Upper and Lower Lens Shift Position (Ceiling Mount) When the projector is in the inverted position, use the upper edge of the screen as the base line, and exchange the lower and upper - Sharp DT300 | DT-300 Operation Manual - Page 29
that you use the optional Sharp ceiling-mount bracket for this installation. I Before mounting the projector, remove the Swivel Stand. (See pages 24 and 25 for removing and attaching the Swivel Stand.) I Before mounting the projector, contact your nearest Sharp Authorized Service Center or Dealer to - Sharp DT300 | DT-300 Operation Manual - Page 30
Basic Operation Basic Operation - Sharp DT300 | DT-300 Operation Manual - Page 31
according to the procedure on page 31. 1 Plug the power cord into the wall outlet. • The POWER indicator illuminates red, and the projector enters standby mode. 2 Press on the remote control or on the projector. • The blinking green LAMP indicator shows that the lamp is warming up. Wait until the - Sharp DT300 | DT-300 Operation Manual - Page 32
remote control or on the projector to select the INPUT mode. • After pressing once on the projector, use to select the desired input mode. Note • When no signal is received, "NO SIGNAL" will be displayed. When a signal that the projector the menu screen, see pages 38 to 41. On-screen Display -31 - Sharp DT300 | DT-300 Operation Manual - Page 33
Image Projection Turning the Power off 1 Press on the remote con- trol or on the projector, then press or again while the confirmation message is displayed, to put the projec- tor into the standby mode. • A dimly-lit screen is displayed for a short time to reduce lamp damage. Note • If - Sharp DT300 | DT-300 Operation Manual - Page 34
used to adjust the Keystone settings. Note • For details about using the menu screen, see pages 38 to 41. 1 Press on the projector or on the remote control. 2 Press / to select "H Key- stone" or "V Keystone". Selected Item Description H Keystone V Keystone Horizontally adjusts the keystone - Sharp DT300 | DT-300 Operation Manual - Page 35
projection angle using the Swivel Stand to properly project images onto the screen. (See page 23). 3 Align the edge of the screen closest to the projector with the test pattern by adjusting the zoom and the Swivel Stand. (See pages 23 and 25.) 4 Adjust the Keystone function so that the size - Sharp DT300 | DT-300 Operation Manual - Page 36
Freezing a Moving Image You can instantly freeze a moving image with the remote control. 1 Press . • The projected image is frozen. 2 Press again to return to the moving image from the currently connected device. Adjusting the Picture Aspect Ratio - Sharp DT300 | DT-300 Operation Manual - Page 37
Image Projection For 4:3 aspect ratio For 16:9 aspect ratio 480I 480P 576I 576P NTSC PAL SECAM VGA SVGA XGA 480P 720P 1080I SIDE BAR 768 ן576 768 ן576 - - SMART STRETCH 1024 ן576 1024 ן576 - - CINEMA ZOOM 1024 ן576 1024 ן576 - - STRETCH 1024 ן576 1024 ן576 1024 ן - Sharp DT300 | DT-300 Operation Manual - Page 38
Adjustments and Settings Adjustments and Settings - Sharp DT300 | DT-300 Operation Manual - Page 39
allow you to adjust the image and various projector settings. The menu can be operated to achieve two functions, adjustment and setting. (For adjusting the menu items, see pages 38 and 39. For setting the menu items, see pages 40 and 41.) Menu screen (example) Menu Selections (Adjustments) 1 Press - Sharp DT300 | DT-300 Operation Manual - Page 40
2 Press \ or | to display the other menu screens. • The menu icon for the selected menu screen is highlighted. Menu icon Menu screen Picture Fine Sync Options Language PRJ Mode Note • The "Fine Sync" menu is not avail- able for INPUT 3 or 4. • For items on the menus, see the tree charts on - Sharp DT300 | DT-300 Operation Manual - Page 41
Using the Menu Screen Menu Selections (Settings) 1 Press . • The menu screen is displayed. Note • The "Picture" menu screen for the selected input mode is displayed. ", ', \, | buttons UNDO button MENU button ENTER button ", ', \, | buttons UNDO button MENU button ENTER button 2 Press \ or | - Sharp DT300 | DT-300 Operation Manual - Page 42
item displayed in the sub menu. 6 Press . • The item selected is set. 7 Press . • The menu screen will disappear. Sub menu Sub menu Adjustments and Settings -41 - Sharp DT300 | DT-300 Operation Manual - Page 43
Lamp Timer (Life) OSD Display [ON/OFF] Signal Type Background [None/Blue] Eco Mode [Eco/Standard] Auto Power Italiano Svenska Português Front CeilingםFront Rear CeilingםRear 640ן480 720ן Sharp", "Clock", "Phase", "HPos", "V-Pos", "Special Modes" and "Auto Sync" cannot be used in the DIGITAL - Sharp DT300 | DT-300 Operation Manual - Page 44
Tint Sharp Red Blue Reset CLR Temp מ30 ם30 מ30 ם30 מ30 ם30 מ30 ם30 מ30 ם30 מ30 ם30 מ30 ם30 Gamma White Emphasis [ON/OFF] Picture Setting Options ( ) Lamp Timer (Life) OSD Display [ON/OFF] Video System Background [None/Blue] Eco Mode [Eco/Standard] Auto Power Off - Sharp DT300 | DT-300 Operation Manual - Page 45
projector 41. On-screen Display Selected Item Description \ button |button Contrast Bright Color Tint Sharp of an image For less sharpness For more sharpness For adjusting the redness of For stronger blue Note • "Color", "Tint" and "Sharp" do not appear for RGB input in INPUT 2 mode. • - Sharp DT300 | DT-300 Operation Manual - Page 46
bluish and fluorescent-like. Select "CLR Temp" in the "Picture" menu on the menu screen. ➝For operating the menu screen, see pages 38 to 41. Selected Item Description 5500K 6500K 7500K 8500K 9300K 10500K The less the value is set to, the warmer, reddish, incandescent-like the image becomes. The - Sharp DT300 | DT-300 Operation Manual - Page 47
higher contrast image. Select "White Emphasis" in the "Picture" menu on the menu screen. ➝For operating the menu screen, see pages 38 to 41. Selected Item Description (ON) For emphasizing the bright portions of images (OFF) For disabling "White Emphasis" On-screen Display On-screen Display -46 - Sharp DT300 | DT-300 Operation Manual - Page 48
input mode (INPUT 1 to INPUT 4 and DIGITAL). Even when the input mode or signal is operating the menu screen, see pages 38 to 41. Selected Item Description Memory 1-5 Memory OFF Settings function can be operated using the on the projector or on the remote control, as well as the OSD menu screen - Sharp DT300 | DT-300 Operation Manual - Page 49
operating the menu screen, see pages 38 to 41. On-screen Display Selected Item Clock Phase H-Pos Phase", "H-Pos" and "V-Pos" cannot be used in the DIGITAL INPUT mode. • "Clock" and "Phase" cannot be can be made easily by pressing AUTO SYNC on the remote control. See page 50 for details. • To reset - Sharp DT300 | DT-300 Operation Manual - Page 50
" menu on the menu screen. ➝For operating the menu screen, see pages 38 to 41. Note • Avoid displaying computer patterns which repeat every other line (horizontal stripes). (Flickering ". • "Special Modes" cannot be used in the DIGITAL INPUT mode. On-screen Display Adjustments and Settings -49 - Sharp DT300 | DT-300 Operation Manual - Page 51
, use manual adjustments. (See page 48.) • The Auto Sync adjustment may take some time to complete, depending on the image of the computer connected to the projector. • "Auto Sync" cannot be used in the DIGITAL INPUT mode. • Auto Sync adjustment is also performed by pressing AUTO SYNC on the remote - Sharp DT300 | DT-300 Operation Manual - Page 52
that the lamp be changed when the remaining lamp life becomes 5%. For lamp replacement, contact your nearest Sharp Authorized Service Center or the menu screen. ➝For operating the menu screen, see pages 38 to 41. Selected Item Description (ON) All On-screen Displays are displayed. (OFF) - Sharp DT300 | DT-300 Operation Manual - Page 53
received. Note • "RGB" or "Component" can be selected with on the remote control only in INPUT 2. Setting the Video Signal (VIDEO menu only) The video menu on the menu screen. ➝For operating the menu screen, see pages 38 to 41. Note • When the system mode is set to "Auto", you may not receive - Sharp DT300 | DT-300 Operation Manual - Page 54
the projector. Select "Background" in the "Options" menu on the menu screen. ➝For operating the menu screen, see pages 38 to 41. 41. Selected Item Brightness Power consumption Lamp life (Eco mode) 80% (Standard mode) 100% 230 W 285 W Approx. 4,000 hours Approx. 3,000 hours Note • Although lamp - Sharp DT300 | DT-300 Operation Manual - Page 55
will automatically enter the standby mode if set to " " (ON). Select "Auto Power Off" in the "Options" menu on the menu screen. ➝For operating the menu screen, see pages 38 to 41. Selected Item Description Projector automatically enters the standby mode after 15 minutes without an input signal - Sharp DT300 | DT-300 Operation Manual - Page 56
of the menu screen. Select "Menu Color" in the "Options" menu on the menu screen. ➝For operating the menu screen, see pages 38 to 41. Selected Item Description (Opaque) The menu is displayed opaquely. The menu is displayed (Translucent) translucently. The part of the menu on the image becomes - Sharp DT300 | DT-300 Operation Manual - Page 57
Reversing/Inverting Projected Images This projector is equipped with a reverse/ 41. Selected Item Description Front CeilingםFront Rear CeilingםRear Normal image Inverted image Reversed image Reversed and inverted image Note • This function is used for the reversed image and ceiling-mount - Sharp DT300 | DT-300 Operation Manual - Page 58
Appendix Appendix - Sharp DT300 | DT-300 Operation Manual - Page 59
See page 59.) • Take the projector to your nearest Sharp Authorized Service Center • Burnt-out lamp or Dealer for repair. • Lamp circuit failure • Please exercise care when replacing the lamp. Power Green on/ indicator Red on • Securely install the cover. • If the power is not turned on even - Sharp DT300 | DT-300 Operation Manual - Page 60
light after replacement, take your projector to the nearest Sharp Authorized Service Center or Dealer for repair. Purchase a replacement lamp unit of type BQC-XVZ200++1 from your nearest Sharp Authorized Service Center or Dealer. Then carefully change the lamp by following the instructions described - Sharp DT300 | DT-300 Operation Manual - Page 61
Installing the Lamp Unit Caution • Be sure to remove the lamp unit by the handle. Do not touch the glass surface of the lamp unit or the inside of the projector. • To avoid injury to yourself and damage to the lamp, carefully follow the steps below. • Replace the lamp after turning off the power - Sharp DT300 | DT-300 Operation Manual - Page 62
of the arrow. • Fasten the user service screw. Resetting the Lamp Timer Reset the lamp timer after replacing the lamp. 1 Plug the power cord. • Confirm that the POWER indicator illuminates red. 2 Reset the lamp timer. • Press , , , , and in order. Then press . • "LAMP 0000H" is displayed on the - Sharp DT300 | DT-300 Operation Manual - Page 63
holes Swivel stand Bottom view Intake ventilative holes Cleaning the Ventilative Holes 1 Put the projector into the standby mode. • Press . • Wait until the cooling fan stops. 2 Unplug the power cord. Intake ventilative holes STANDBY button 3 Clean the dust off by putting the cleaner - Sharp DT300 | DT-300 Operation Manual - Page 64
a Kensington MicroSaver Security System. Refer to the information that came with the system for instructions on how to use it to secure the projector. Rear View Kensington Security Standard connector Troubleshooting Problem No picture appears. Color is faded or poor. Picture is blurred. No OSD - Sharp DT300 | DT-300 Operation Manual - Page 65
: 29 pin connector 9 ~ 16 1 2 7 8 17 24 18 23 • DVI Digital INPUT Pin No. Signal Pin No. Signal 1 T.M.D.S data 2- 16 Hot plug detection 10 Not connected 11 Not connected 12 Not connected 13 Not connected 14 +5V power 15 Ground Pin No. Signal 16 Hot plug detection 17 Not connected 18 - Sharp DT300 | DT-300 Operation Manual - Page 66
49.6 75 48.4 60 XGA 1,024 ן768 60.0 75 VESA Standard ✔ ✔ DVI Support Display Upscale ✔ ✔ ✔ ✔ ✔ ✔ ✔ ✔ ✔ ✔ ✔ Intelligent Compression ✔ ✔ ✔ ✔ ✔ Upscale Intelligent Compression Note • This projector may not be able to display images from notebook computers in simultaneous - Sharp DT300 | DT-300 Operation Manual - Page 67
on the body), Operation manual Replacement parts Lamp unit (Lamp/cage module) (BQC-XVZ200++1), Remote control (RRMCGA218WJSA), AA size batteries, Power cord (QACCDA007WJPZ), Video cable (QCNWGA001WJZZ), Lens cap (CCAPHA004WJ01), Operation manual (TINSB006WJZZ) This SHARP projector uses a DMD chip - Sharp DT300 | DT-300 Operation Manual - Page 68
Dimensions Units: inches (mm) Rear View Side View Top View Side View 12 7/8 (327) (153.8) 9/ 1 6 Appendix 4 5/8 (118) 6 Front View 14 1/2 (368) Bottom View -67 - Sharp DT300 | DT-300 Operation Manual - Page 69
distorted image when the projector is set up at an angle, smoothes out jaggies on keystone images and compresses the image not only horizontally but vertically keeping the 16 : 9 aspect ratio. DVI (Digital Visual Interface) Display digital interface that also supports analog interfaces. Gamma Image - Sharp DT300 | DT-300 Operation Manual - Page 70
Background 53 C Ceiling-mount 28 Ceiling+Rear 56 Clock 48 COMPONENT terminals 17 D DIGITAL INPUT terminal 20 DVI 20 E Eco mode 53 ENTER button 39 Exhaust ventilative hole 6 F Focus ring 25 FREEZE button 35 I INPUT buttons 31 K Kensington Lock 63 KEYSTONE button 33 L LAMP indicator 58 - Sharp DT300 | DT-300 Operation Manual - Page 71
Coverage (if any): Where to Obtain Service: What to do to Obtain Service: DT-300 Projector (Be sure to have this information available when you need service for your Product.) One (1) year parts and labor from date of purchase except for the Projector Lamp for which the warranty period is ninety - Sharp DT300 | DT-300 Operation Manual - Page 72
, negligence, accident, improper installation or inappropriate use as outlined in the owner s manual. (b) Any Sharp product tampered with, modified, adjusted or repaired by any party other than Sharp, Sharp s Authorized Service Centres or Sharp s Authorized Servicing Dealers. (c) Damage caused
-
 1
1 -
 2
2 -
 3
3 -
 4
4 -
 5
5 -
 6
6 -
 7
7 -
8
-
9
-
10
-
11
-
12
-
13
-
14
-
15
-
16
-
17
-
18
-
19
-
20
-
21
-
22
-
23
-
24
-
25
-
26
-
27
-
28
-
29
-
30
-
31
-
32
-
33
-
34
-
35
-
36
-
37
-
38
-
39
-
40
-
41
-
42
-
43
-
44
-
45
-
46
-
47
-
48
-
49
-
50
-
51
-
52
-
53
-
54
-
55
-
56
-
57
-
58
-
59
-
60
-
61
-
62
-
63
-
64
-
65
-
66
-
67
-
68
-
69
-
70
-
71
-
72
 |
 |

DT-300
OPERATION MANUAL
MODE D’EMPLOI
MANUAL DE OPERACION
MANUAL DE OPERAÇÃO
DT
-
300
PROJECTOR
PROJECTEUR
PROYECTOR
PROJETOR
ENGLISH
.............
-1 –
-71
FRANÇAIS
...........
-1 –
-70
ESPAÑOL
............
-1 –
-69
PORTUGUÊS
......
-1 –
-69