Sharp HT-SL50 HT-SL50 Operation Manual - Page 9
System preparation continued, Falling prevention - sound bar 2 1
 |
View all Sharp HT-SL50 manuals
Add to My Manuals
Save this manual to your list of manuals |
Page 9 highlights
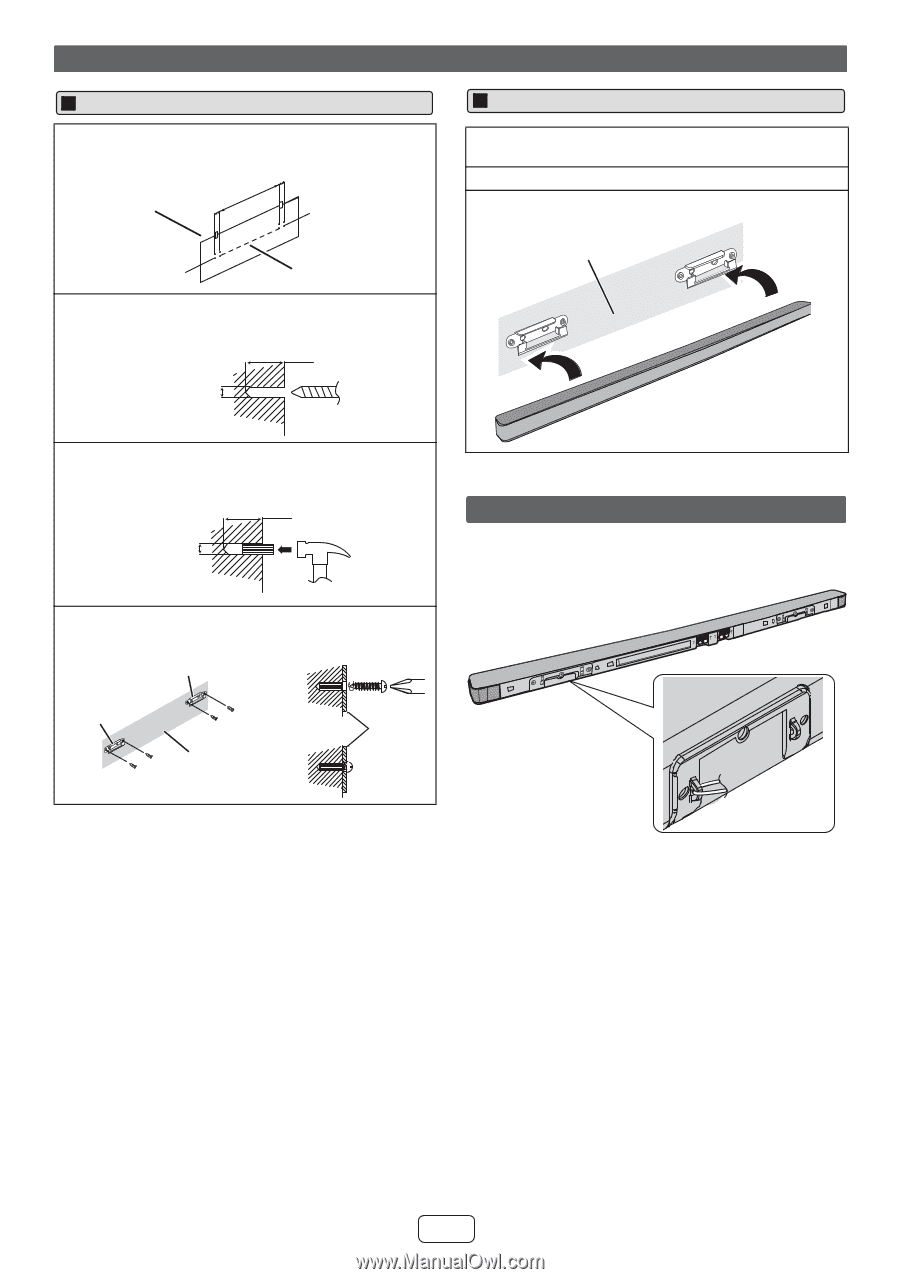
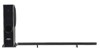
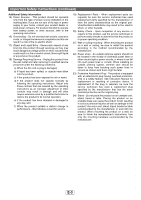
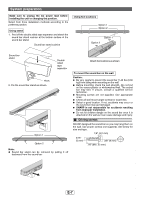
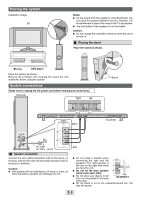
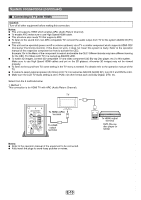
System preparation (continued) Fixing wall mount angle 1 Fix the pattern paper to the wall in horizontal position as below. 30 mm 523 mm Wall surface 30 mm Installing the sound bar 1 Align the wall mount slot at the sound bar to the wall mount angle. 2 Slot the sound bar into the wall mount angle. 3 Fix them securely. Wall surface Pattern paper 2 Make a hole on the wall following the screw point marks on the pattern paper by using a drill. 1-1/4" (32 mm) 3/8" (8-9 mm) Wall surface 3 Fix a wall mount plug (not supplied) into the hole using a hammer, until it is flush with the wall surface. 1-1/4" (32 mm) 3/8" (8-9 mm) Wall surface 4 Screw the wall mount angle to the wall as shown in the illustration. (Total screw is 4 pieces) Wall mount angle Wall mount angle Wall (screws x 2) surface Wall surface (screws x 2) Wall surface Wall mount angle Note: Make sure all screws are fully tightened. (screws are not supplied) Falling prevention Safety wires (not supplied) are useful to prevent the sound bar from falling off the table. L RL R Loop the safety wires (not supplied) into each hole as shown and tie the safety wires to the LCD TV stand. E-8
-
 1
1 -
2
-
3
-
 4
4 -
 5
5 -
 6
6 -
 7
7 -
 8
8 -
 9
9 -
 10
10 -
 11
11 -
 12
12 -
 13
13 -
 14
14 -
15
-
16
 |
 |