Sharp LC-26DA5U LC-26DA5U LC-32DA5U Operation Manual - Page 34
Output Select, Quick shoot, Color System, Sleep timer, SLEEP, ENTER
 |
View all Sharp LC-26DA5U manuals
Add to My Manuals
Save this manual to your list of manuals |
Page 34 highlights
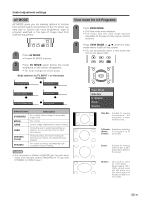
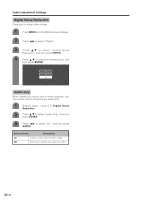
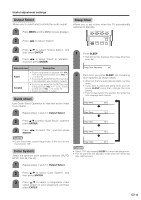
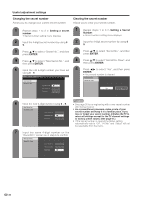
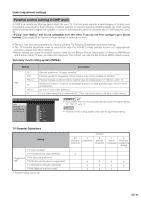
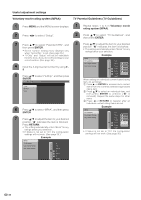
Useful adjustment settings Output Select Allows you to select what controls the audio output. 1 Press MENU and the MENU screen displays. Sleep timer Allows you to set a time when the TV automatically switches to standby. 2 Press c/d to select "Option". 3 Press a/b to select "Output Select", and then press ENTER. 4 Press c/d to select "Fixed" or "Variable", and then press ENTER. Selected item Description Fixed Variable • Sound via speaker is adjusted with VOL k/l on the remote control unit or VOL l/ k on the TV. • Sound via the MONITOR OUTPUT terminal is not adjustable and constantly outputs. • Sound via the MONITOR OUTPUT terminal is adjusted with VOL k/l on the remote control unit or VOL l/k on the TV. • Sound via speaker is muted. Quick shoot Use Quick Shoot Operation to view fast-action video more clearly. 1 Repeat steps 1 and 2 in Output Select. 1 Press SLEEP. • Remaining time displays when sleep timer has been set. Sleep Timer: Remaining 30 2 Each time you press SLEEP, the remaining time switches as shown below. • When set, the time automatically starts counting down. • If you want to adjust the sleep timer, you can press SLEEP twice then change the time setting. • Five minutes before time expires, the remaining time displays each minute. Sleep Timer: Off Sleep Timer: 30 2 Press a/b to select "Quick Shoot", and then press ENTER. Sleep Timer: 60 3 Press c/d to select "On", and then press ENTER. Sleep Timer: 90 NOTE • Quick Shoot may cause image noise. If this occurs turn the function "Off". Color System Select the optimum color systems to receive. (AUTO, NTSC, PAL-M, PAL-N) Sleep Timer: 120 NOTE • Select "Off" by pressing SLEEP to cancel the sleep timer. • The TV will enter the standby mode when the remaining time reaches zero. 1 Repeat steps 1 and 2 in Output Select. 2 Press a/b to select "Color System", and then press ENTER. 3 Press a/b to select a compatible video signal system of your equipment, and then press ENTER. 33
-
 1
1 -
2
-
3
-
4
-
5
-
6
-
7
-
8
-
9
-
10
-
11
-
12
-
13
-
14
-
15
-
16
-
17
-
18
-
19
-
20
-
21
-
22
-
23
-
24
-
25
-
26
-
27
-
28
-
 29
29 -
 30
30 -
 31
31 -
 32
32 -
 33
33 -
 34
34 -
 35
35 -
 36
36 -
 37
37 -
 38
38 -
 39
39 -
40
-
41
-
42
-
43
-
44
-
45
-
46
-
47
-
48
-
49
-
50
-
51
-
52
-
53
-
54
 |
 |