Sharp MX-B402 Starter Guide - Page 37
Follow the on-screen instructions., When the installation completed screen appears, click, the [OK]
 |
View all Sharp MX-B402 manuals
Add to My Manuals
Save this manual to your list of manuals |
Page 37 highlights
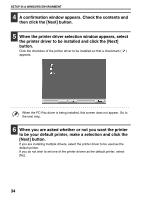
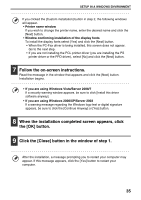
SETUP IN A WINDOWS ENVIRONMENT If you clicked the [Custom installation] button in step 2, the following windows will appear. • Printer name window If you wish to change the printer name, enter the desired name and click the [Next] button. • Window confirming installation of the display fonts To install the display fonts select [Yes] and click the [Next] button. • When the PC-Fax driver is being installed, this screen does not appear. Go to the next step. • If you are not installing the PCL printer driver (you are installing the PS printer driver or the PPD driver), select [No] and click the [Next] button. 7 Follow the on-screen instructions. Read the message in the window that appears and click the [Next] button. Installation begins. • If you are using Windows Vista/Server 2008/7 If a security warning window appears, be sure to click [Install this driver software anyway]. • If you are using Windows 2000/XP/Server 2003 If a warning message regarding the Windows logo test or digital signature appears, be sure to click the [Continue Anyway] or [Yes] button. 8 When the installation completed screen appears, click the [OK] button. 9 Click the [Close] button in the window of step 1. After the installation, a message prompting you to restart your computer may appear. If this message appears, click the [Yes] button to restart your computer. 35
-
 1
1 -
2
-
3
-
4
-
5
-
6
-
7
-
8
-
9
-
10
-
11
-
12
-
13
-
14
-
15
-
16
-
17
-
18
-
19
-
20
-
21
-
22
-
23
-
24
-
25
-
26
-
27
-
28
-
29
-
30
-
31
-
 32
32 -
 33
33 -
 34
34 -
 35
35 -
 36
36 -
 37
37 -
 38
38 -
 39
39 -
 40
40 -
 41
41 -
 42
42 -
43
-
44
-
45
-
46
-
47
-
48
-
49
-
50
-
51
-
52
-
53
-
54
-
55
-
56
 |
 |
