Sharp PN-E702 PN-E702 Professional LCD Monitor Operation Manual - Page 50
Troubleshooting - reviews
 |
View all Sharp PN-E702 manuals
Add to My Manuals
Save this manual to your list of manuals |
Page 50 highlights
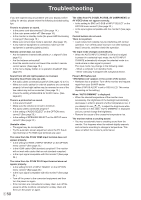
Troubleshooting If you are experiencing any problem with your display, before calling for service, please review the following troubleshooting tips. There is no picture or sound. • Is the power cord disconnected? (See page 14.) • Is the main power switch off? (See page 16.) • Is the monitor in standby mode (the power LED illuminating in orange)? (See page 16.) • Make sure correct input mode is selected. (See page 18.) • If any external equipment is connected, make sure the equipment is operating (playing back). Remote control does not work. • Are the batteries inserted with polarity (+,-) aligned? (See page 15.) • Are the batteries exhausted? • Point the remote control unit toward the monitor's remote control sensor. (See page 15.) • Is the menu display hidden or is operation disabled? (See page 29.) Sound from left and right speakers is reversed. Sound is heard from only one side. • Are audio cables connected properly? (See pages 12 to 13.) • Make sure audio cables for external speakers are connected properly: left and right cables may be reversed or one of the two cables may not be connected. (See page 13.) • Check the setting of BALANCE for AUDIO menu. (See page 22.) There is a picture but no sound. • Is the sound muted? • Make sure the volume is not set to minimum. • Are audio cables connected properly? • Is the setting of AUDIO SELECT on the OPTION menu correct? (See page 23.) • Is the setting of SPEAKER SELECT on the SETUP menu correct? (See page 23.) Unstable video. • The signal may be incompatible. • Try the automatic screen adjustment when the PC D-sub input terminal or PC RGB input terminals are used. The video from the PC/AV HDMI input terminal does not appear properly. • Is the setting for HDMI of INPUT SELECT on the OPTION menu correct? (See page 23.) • Is the HDMI cable HDMI standard compliant? The monitor will not work with cables that are not standard compliant. • Is the input signal compatible with this monitor? (See page 54.) The video from the PC/AV DVI-D input terminal does not appear properly. • Is the setting for DVI of INPUT SELECT on the OPTION menu correct? (See page 23.) • Is the input signal compatible with this monitor? (See page 54.) • Turn off the power to the connected equipment and then turn the power on again. • If the monitors are connected in a daisy chain, turn off the power to all the monitors connected in a daisy chain and then turn the power on again. E 50 The video from PC D-SUB, PC RGB, AV COMPONENT, or AV VIDEO does not appear correctly. • Is the setting for BNC or D-SUB of INPUT SELECT on the OPTION menu correct? (See page 23.) • Is the input signal compatible with this monitor? (See page 54.) Control buttons do not work. There is no picture. • Load noises from outside may be interfering with normal operation. Turn off the power and turn it on after waiting at least 5 seconds, and then check the operation. The input mode changes automatically. • When the AUTO INPUT CHANGE is ON and no signal is present in a selected input mode, the AUTO INPUT CHANGE automatically changes the selected mode to a mode where a video signal is present. The input mode may change in the following cases: - When a computer is in standby mode. - When video play is stopped with a playback device. Power LED flashes red. "STATUS [xxxx]" appears in the corner of the screen. • Hardware has a problem. Turn off the monitor and request repair from your SHARP dealer. (When STATUS ALERT is set to OSD & LED. This varies depending on the setting.) When "AUTO DIMMING" is displayed. • When the internal temperature of the monitor rises excessively, the brightness of the backlight automatically decreases in order to prevent a further temperature rise. If you attempt to use to adjust the brightness while the monitor is in this state, "AUTO DIMMING" is displayed and you cannot change the brightness. • Remove the cause of the excessive temperature rise. The monitor makes a cracking sound. • You may occasionally hear a cracking sound from the monitor. This happens when the cabinet slightly expands and contracts according to change in temperature. This does not affect the monitor's performance.
-
 1
1 -
2
-
3
-
4
-
5
-
6
-
7
-
8
-
9
-
10
-
11
-
12
-
13
-
14
-
15
-
16
-
17
-
18
-
19
-
20
-
21
-
22
-
23
-
24
-
25
-
26
-
27
-
28
-
29
-
30
-
31
-
32
-
33
-
34
-
35
-
36
-
37
-
38
-
39
-
40
-
41
-
42
-
43
-
44
-
 45
45 -
 46
46 -
 47
47 -
 48
48 -
 49
49 -
 50
50 -
 51
51 -
 52
52 -
 53
53 -
 54
54 -
 55
55 -
56
-
57
 |
 |