Sharp R1405 R-1405 , R-1406 Microwave Operation Manual - Page 18
Part Names - microwave display
 |
UPC - 074000611115
View all Sharp R1405 manuals
Add to My Manuals
Save this manual to your list of manuals |
Page 18 highlights
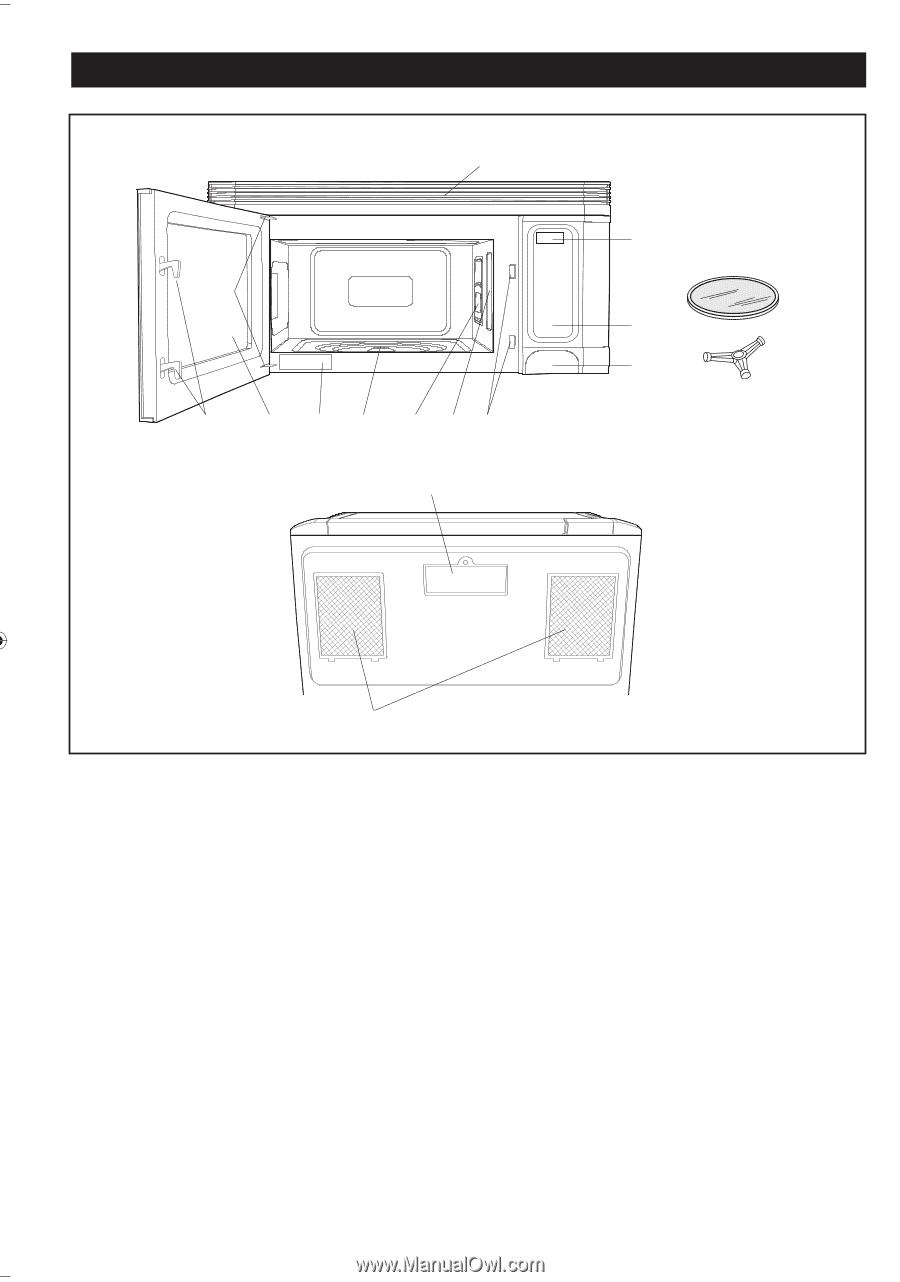
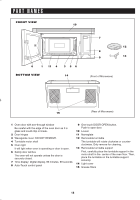
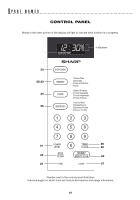
PART NAMES FRONT VIEW 10 2 6 1 11 4 3 56 BOTTOM VIEW 14 7 12 8 9 13 (Front of Microwave) 15 (Rear of Microwave) 1 Oven door with see-through window Be careful with the edge of the oven door as it is glass and could chip or break. 2 Door hinges 3 Waveguide cover: DO NOT REMOVE. 4 Turntable motor shaft 5 Oven light It will light when oven is operating or door is open. 6 Safety door latches The oven will not operate unless the door is securely closed. 7 Time display: Digital display, 99 minutes, 99 seconds 8 Auto-Touch control panel 9 One touch DOOR OPEN button. Push to open door. 10 Louver 11 Nameplate 12 Removable turntable The turntable will rotate clockwise or counter- clockwise. Only remove for cleaning. 13 Removable turntable support First, carefully place the turntable support in the motor shaft in the center of the oven floor. Then, place the turntable on the turntable support securely. 14 Light cover 15 Grease filters 18
-
 1
1 -
2
-
3
-
4
-
5
-
6
-
7
-
8
-
9
-
10
-
11
-
12
-
 13
13 -
 14
14 -
 15
15 -
 16
16 -
 17
17 -
 18
18 -
 19
19 -
 20
20 -
 21
21 -
 22
22 -
 23
23 -
24
-
25
-
26
-
27
-
28
-
29
-
30
-
31
-
32
 |
 |