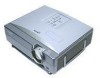
Sharp XG-C330X XGC330X|XGC430X Operation Manual
Sharp XG-C330X - XGA LCD Projector Manual
 |
View all Sharp XG-C330X manuals
Add to My Manuals
Save this manual to your list of manuals |
Sharp XG-C330X manual content summary:
- Sharp XG-C330X | XGC330X|XGC430X Operation Manual - Page 1
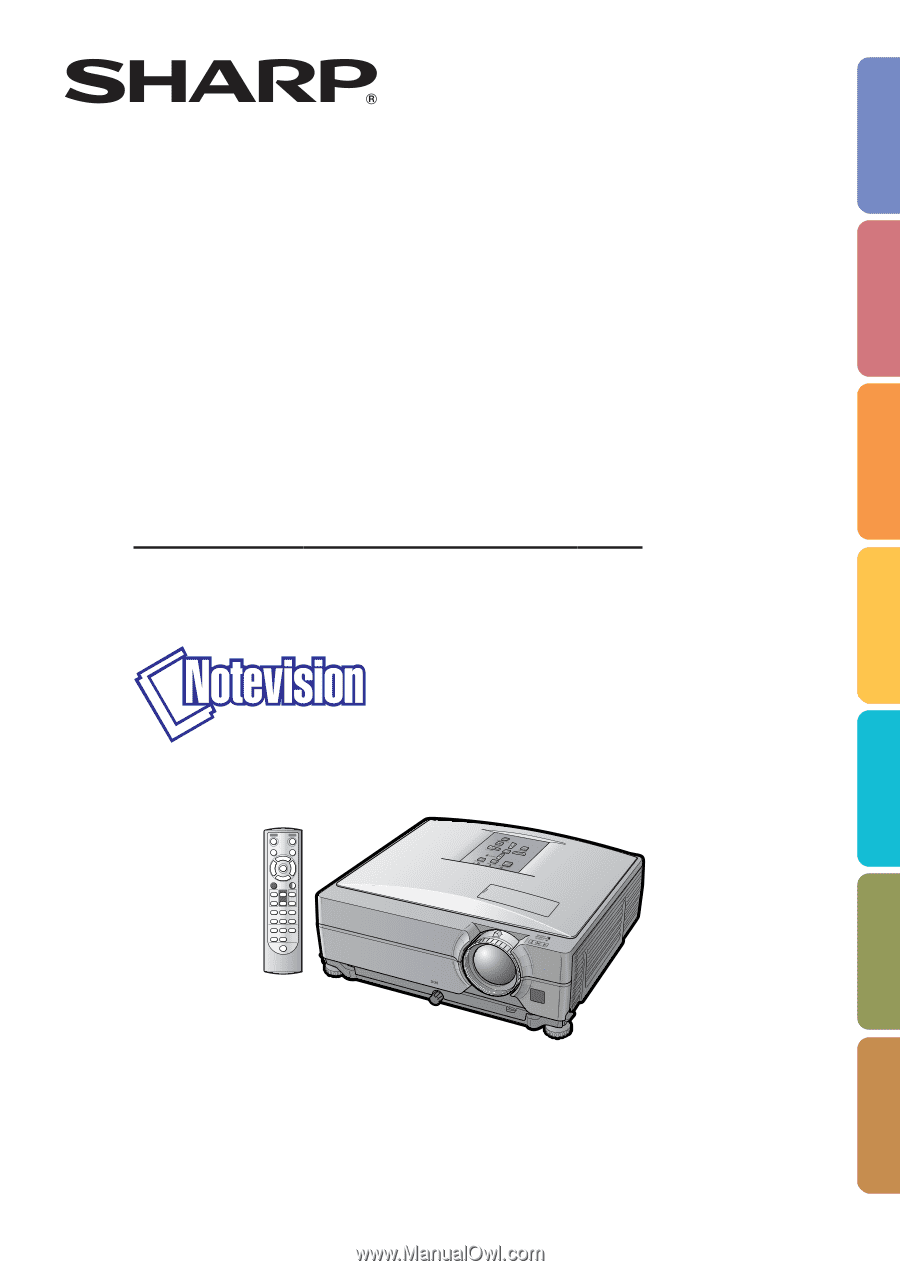
Introduction Quick Start LCD PROJECTOR MODEL XG-C430X XG-C330X OPERATION MANUAL Setup Connections Basic Operation Useful Features Appendix - Sharp XG-C330X | XGC330X|XGC430X Operation Manual - Page 2
Model No.: Serial No.: SPECIAL NOTE FOR USERS IN THE U.K. The mains lead of this product is fitted with a non-rewireable (moulded) plug incorporating a 10A fuse. Should the fuse need to be replaced read through the operation instructions before operating the projector. Die mitgelieferte CD-ROM - Sharp XG-C330X | XGC330X|XGC430X Operation Manual - Page 3
moisture. See bottom of projector. CAUTION RISK OF ELECTRIC SHOCK. DO NOT REMOVE SCREWS EXCEPT SPECIFIED USER SERVICE SCREW. CAUTION: TO REDUCE THE RISK OF ELECTRIC SHOCK, DO NOT REMOVE COVER. NO USER-SERVICEABLE PARTS EXCEPT LAMP UNIT. REFER SERVICING TO QUALIFIED SERVICE PERSONNEL. The lightning - Sharp XG-C330X | XGC330X|XGC430X Operation Manual - Page 4
projector into standby mode always use the STANDBY button on the projector or on the remote control. Ensure the cooling fan has stopped before storing the projector org . Caution Concerning Lamp Replacement See "Replacing the Lamp" on page 60. This SHARP projector uses an LCD (Liquid Crystal Display) - Sharp XG-C330X | XGC330X|XGC430X Operation Manual - Page 5
Manual • In this operation manual Bright 0 Red 0 Blue 0 CLR Temp Reset Signal Type COMP.1 Standard 7500K Auto Options1 Options2 projector. Note ........Indicates additional information for setting up and operating the projector. For Future Reference Maintenance Page 55 Troubleshooting - Sharp XG-C330X | XGC330X|XGC430X Operation Manual - Page 6
4 How to Access the PDF Operation Manuals ... 6 IMPORTANT SAFEGUARDS 7 Accessories 10 Part Names and Functions 12 Using the Remote Control 15 Usable Range 15 Inserting the Batteries 15 Quick Start Quick Start 16 Setup Setting Up the Projector 18 Setting Up the Projector 18 Projection (PRJ - Sharp XG-C330X | XGC330X|XGC430X Operation Manual - Page 7
the Lamp 60 Lamp 60 Caution Concerning the Lamp 60 Replacing the Lamp 60 Removing and Installing the Lamp Unit 61 Resetting the Lamp Timer 62 Computer Compatibility Chart 63 Troubleshooting 64 For SHARP Assistance 66 Specifications 67 Index 68 SETUP MANUAL Refer to the "SETUP MANUAL - Sharp XG-C330X | XGC330X|XGC430X Operation Manual - Page 8
click the language (name of the folder) that you want to view. 3) Double click the "C430_" pdf file to access the projector manuals. When you want to view the setup manual 1) Double click the "SETUP" folder. 2) Double click the language (name of the folder) that you want to view. 3) Double click - Sharp XG-C330X | XGC330X|XGC430X Operation Manual - Page 9
to operate from battery power, or other sources, refer to the operating instructions. 12. Grounding or Polarization This product is provided with one of the for service. 19. Replacement Parts When replacement parts are required, ensure that the service technician has used replacement parts specified - Sharp XG-C330X | XGC330X|XGC430X Operation Manual - Page 10
- ticles if lamp ruptures. In case of lamp rupture, contact your nearest Sharp Authorized Pro- jector Dealer or Service Cen- ter for replacement. See "Replacing the Lamp" on page 60. CAUTION PRECAUCIÓN PRÉCAUTION Caution concerning the setup of the projector ■ For minimal servicing and to - Sharp XG-C330X | XGC330X|XGC430X Operation Manual - Page 11
starts to over- heat due to setup problems or blockage of the air vents, " " and " " will illumi- nate in the lower left corner of the picture. If the temperature continues to rise, the lamp will turn off, the temperature warning indicator on the projector will blink, and after a 90-second - Sharp XG-C330X | XGC330X|XGC430X Operation Manual - Page 12
)) Optional accessories ■ 3 RCA to 15-pin D-sub cable (10' (3.0 m)) ■ Remote receiver ■ Lamp unit AN-C3CP2 AN-MR2 AN-C430LP Note • Some of the optional accessories may not be available depending on the region. Please check with your nearest Sharp Authorized Projector Dealer or Service Center. -10 - Sharp XG-C330X | XGC330X|XGC430X Operation Manual - Page 13
lens is attached to the projector. The optional lenses from Sharp are also available for specialized application. Please see your nearest Sharp Authorized Projector Dealer for details on all the lenses. (Refer to the SETUP MANUAL on the supplied CD-ROM for details.) Also, be sure to have service - Sharp XG-C330X | XGC330X|XGC430X Operation Manual - Page 14
fan and extending the lamp life. 33 Focus ring For adjusting the focus. 52 Speaker 15 Remote control sensor 31 Height Adjustment button 31 Adjustment foot 55·56 Air filter/Intake vent (on the bottom of the projector) Attaching the lens cap After putting the lens cap strap on the lens cap, pass the - Sharp XG-C330X | XGC330X|XGC430X Operation Manual - Page 15
or carry the projector by the lens or the lens cap as this may damage the lens. * Using the Kensington Lock • This projector has a Kensington Security Standard connector for use with a Kensington MicroSaver Security System. Refer to the information that came with the system for instructions on how - Sharp XG-C330X | XGC330X|XGC430X Operation Manual - Page 16
to connect the remote control to the projector. Now you can control the projector with the remote control. Projector (Rear view) To WIRED REMOTE terminal To WIRED R/C JACK Remote control ø3.5 mm minijack cable (commercially available or available as Sharp service part QCNWGA038WJPZ) Note • The - Sharp XG-C330X | XGC330X|XGC430X Operation Manual - Page 17
wipe them first and then remove them using a cloth. • The batteries included with this projector may run down in a short period, depending on how they are kept. Be sure to replace them as soon as possible with new batteries. • Remove the batteries from the remote control if you will not be using the - Sharp XG-C330X | XGC330X|XGC430X Operation Manual - Page 18
18 2. Connect the projector to the computer and plug the power cord into the AC socket of the projector When connecting equipment other than the computer, see pages 25, 28 and 29. Pages 23, 30 3. Remove the lens cap and turn the projector on On the projector On the remote control Page 30 -16 - Sharp XG-C330X | XGC330X|XGC430X Operation Manual - Page 19
Power off Press the STANDBY button, then press that button again while the confirmation message is displayed, to put the projector into standby mode. On the projector On the remote control " On-screen Display • Even if you unplug the power cord from the AC outlet, the cooling fan continues to - Sharp XG-C330X | XGC330X|XGC430X Operation Manual - Page 20
through the lens center Lens center H L: Projection distance Ceiling-mount Setup ■ It is recommended that you use the optional Sharp ceiling-mount bracket for this installation. Before mounting the projector, contact your nearest Sharp Authorized Projector Dealer or Service Center to obtain - Sharp XG-C330X | XGC330X|XGC430X Operation Manual - Page 21
Projection (PRJ) Mode The projector can use any of the 4 projection modes, shown in Projection Image Size and Projection Distance For details, refer to the "SETUP MANUAL" contained on the supplied CD-ROM. Example: NORMAL Mode (4:3) for standard lens Picture Size 500" 400"×300" 200" 100" 84" 60" - Sharp XG-C330X | XGC330X|XGC430X Operation Manual - Page 22
the projector into the storage case with the lens facing the handle. • Ensure the projector is held in place by using the fixing band. 3 Close the cover of the storage case. 4 Place the accessories in the front pocket of the storage case. Lens cap Fixing band Supplied accessories (Remote control - Sharp XG-C330X | XGC330X|XGC430X Operation Manual - Page 23
on the projector COMPUTER/ COMPONENT 1, 2 RGB output terminal Audio-visual equipment DVI digital video output terminal Audio output terminal DVI Digital cable (commercially available) ø3.5 mm stereo or mono audio cable (commercially available or available as Sharp service part QCNWGA038WJPZ - Sharp XG-C330X | XGC330X|XGC430X Operation Manual - Page 24
Terminal on connected equipment Cable Audio output terminal ø3.5 mm stereo minijack to RCA audio cable (commercially available) Terminal on the projector AUDIO (for COMPUTER/ COMPONENT 1, 2, DVI-D) Monitor Amplifier Terminal Connect with the cable adaptor, etc. for using the Cable adaptor - Sharp XG-C330X | XGC330X|XGC430X Operation Manual - Page 25
After making all connections, turn on the projector and then the other devices. When connecting audio cable (commercially available or available as Sharp service part QCNWGA038WJPZ) * When using the ø3.5 SHARP notebook computer). Refer to the specific instructions in your computer's operation manual - Sharp XG-C330X | XGC330X|XGC430X Operation Manual - Page 26
When connecting with a DVI digital cable The projector employs the DVI digital input terminal for direct input terminal * ø3.5 mm stereo or mono audio cable (commercially available or available as Sharp service part QCNWGA038WJPZ) * When using the ø3.5 mm mono audio cable, the volume level will - Sharp XG-C330X | XGC330X|XGC430X Operation Manual - Page 27
. If your audio-visual equipment has a component output terminal or RGB output terminal, use the COMPUTER/COMPONENT terminal 1 or 2 on the projector for video connection. When connecting video equipment with a DVI output terminal Video Equipment Connections To DVI output terminal To AUDIO input - Sharp XG-C330X | XGC330X|XGC430X Operation Manual - Page 28
RCA audio cable (commercially available) Composite video cable (commercially available) Note • When you connect video equipment with a 21-pin RGB output (Euro-scart) to the projector, use a commercially available cable that fits in the - Sharp XG-C330X | XGC330X|XGC430X Operation Manual - Page 29
is connected to a computer, the computer can be used to control the projector and check the status of the projector. Refer to the "SETUP MANUAL" contained on the supplied CD-ROM for "RS-232C Specifications and Commands". When connecting to a computer using an RS-232C serial control cable and - Sharp XG-C330X | XGC330X|XGC430X Operation Manual - Page 30
Category 5 (CAT.5) type cable (commercially available). Connecting to a Monitor with RGB Input Terminal You can display computer images on both the projector and a separate monitor using two sets of RGB cables. Monitor Computer Supplied accessory RGB cable To RGB input terminal To COMPUTER - Sharp XG-C330X | XGC330X|XGC430X Operation Manual - Page 31
case of connecting an amplifier or other audio equipment, first turn off the power of the amplifier and then turn off the power of the projector. • By using external audio components, the volume can be amplified for better sound. • For details on Variable Audio Output (VAO) and Fixed Audio Output - Sharp XG-C330X | XGC330X|XGC430X Operation Manual - Page 32
this section, connect any equipment that you use with the projector. (See pages 23-29.) Remove the lens cap and press STANDBY/ON on the projector or ON on the remote control. • The power indicator illuminates green. • After the lamp indicator illuminates, the projec- tor is ready to start operation - Sharp XG-C330X | XGC330X|XGC430X Operation Manual - Page 33
image, use the manual keystone correction. (See page 32.) Top View Height Adjustment button Info • Do not press the Height Adjustment button when the adjustment feet come out without firmly holding the projector. • Do not hold the lens when lifting or lowering the projector. • When lowering the - Sharp XG-C330X | XGC330X|XGC430X Operation Manual - Page 34
without using the Auto Keystone Correction function, you can make corrections manually using the following procedure. 1 Press KEYSTONE on the remote control to enter the Keystone Correction mode. • You can also use KEYSTONE on the projector. 2 Press ', | or ", \ on the re- mote control to adjust the - Sharp XG-C330X | XGC330X|XGC430X Operation Manual - Page 35
Adjusting the Lens The image is focused and adjusted to the screen size using the focus ring or zoom knob on the projector. Focus ring Zoom knob 1 The focus is adjusted by rotat- ing the focus ring. 2 Zooming is adjusted by moving the zoom knob. Zoom out Zoom in Basic Operation -33 - Sharp XG-C330X | XGC330X|XGC430X Operation Manual - Page 36
Projection Switching the INPUT Mode Select the appropriate input mode for the connected equipment. On the remote control Press , , , or on the remote control to select the input mode. On the projector 1 Press an INPUT ('/") button. • The INPUT list appears. 2 Press '/" to select an item on the list - Sharp XG-C330X | XGC330X|XGC430X Operation Manual - Page 37
(Enlarge/Reduce) buttons FREEZE button RETURN button Volume buttons AV MUTE button RESIZE button Adjusting the Volume Press / VOL on the projector or / VOL on the remote control to adjust the volume. "On-screen Display Note • Pressing or Pressing or VOL will lower the volume. VOL will raise - Sharp XG-C330X | XGC330X|XGC430X Operation Manual - Page 38
3 Press BREAK TIMER to cancel the break timer. Switching the Eco/Quiet Mode Press ECO/QUIET on the remote control or ECO/ QUIET on the projector to switch the and the lamp life will extend. (Projection brightness decreases 20%.) Power consumption Brightness (When using AC 100V) Lamp life On - Sharp XG-C330X | XGC330X|XGC430X Operation Manual - Page 39
1050) SXGA (1280 × 1024) 1280 × 720 1360 × 768 1366 × 768 1280 × 768 1280 × 800 Input signal Computer Image type Resolution lower than XGA XGA Resolution higher than XGA 4:3 aspect ratio NORMAL 1024 × 768 968 × 768 1024 × 576 1024 × 578 1024 × 576 1024 × 614 1024 × 640 NORMAL FULL 1024 × 768 - Sharp XG-C330X | XGC330X|XGC430X Operation Manual - Page 40
Image Projection VIDEO Input signal DVD / Video Image type NORMAL For 4:3 screen AREA ZOOM V-STRETCH For 16:9 screen BORDER STRETCH * * 480I, 480P, 576I, 576P, NTSC, PAL, SECAM 4:3 aspect ratio Squeeze * * * * Letter box 720P, 1035I, 1080I 16:9 aspect ratio * 540P 16:9 aspect - Sharp XG-C330X | XGC330X|XGC430X Operation Manual - Page 41
manual of the receiver. Connecting with a USB cable USB terminal Computer Basic Operation Point the remote control at or the USB remote receiver (AN-MR2, optional) To USB terminal USB cable (commercially available or available as Sharp service part that do not support USB. • than XGA are being - Sharp XG-C330X | XGC330X|XGC430X Operation Manual - Page 42
the projector. "Picture" menu COMPUTER/COMPONENT 1, 2, DVI-D (RGB signal) Picture Picture Mode Contrast 0 Bright 0 Red 0 Blue 0 CLR Temp Reset 0 Bright 0 Color 0 Tint 0 Sharp 0 Red 0 Blue 0 CLR Temp Progressive Reset Signal Type COMP.1 Standard 7500K 3D Progressive - Sharp XG-C330X | XGC330X|XGC430X Operation Manual - Page 43
Monitor Out LAN/RS232C RS-232C DHCP Client TCP/IP MAC Address Projector All Reset SEL./ADJ. RETURN COMP.1 Disable On FAO Front Normal Enable Enable 9600 Menu Options1 Page 47 Main Menu Options2 Page 51 Main Menu Language Page 54 Lamp Timer (Life) Page 47 Resize Page 47 Image Shift -96 +96 Page 47 - Sharp XG-C330X | XGC330X|XGC430X Operation Manual - Page 44
• This operation can also be performed by using the buttons on the projector. 1 Press MENU. • The "Picture" menu screen for the selected input Standard Contrast 0 Bright 0 Red 0 Blue 0 CLR Temp 7500K Reset Signal Type Auto Options1 Options2 Language SEL./ADJ. RETURN ENTER END Note - Sharp XG-C330X | XGC330X|XGC430X Operation Manual - Page 45
the following item ("Red" after "Bright") will be displayed. Single adjustment items Picture Picture Mode Contrast 0 Bright 0 Red 0 Blue 0 CLR Temp Reset Signal Type SEL./ADJ. RETURN COMP.1 Standard 7500K Auto ENTER END Bright 0 Note • Press RETURN to return to the previous screen - Sharp XG-C330X | XGC330X|XGC430X Operation Manual - Page 46
of images from a computer. Note • You can also press PICTURE MODE on the remote control to select the picture mode. (See page 36.) • "sRGB" is displayed 0 Color 0 2 Tint 0 Sharp 0 Red 0 Blue 0 CLR Temp 7500K 6 Progressive 3D Progressive Reset 7 Video System Component SEL./ADJ. - Sharp XG-C330X | XGC330X|XGC430X Operation Manual - Page 47
equipment. 5 Selecting the Dynamic Range An optimum picture may not be displayed if a DVI-D-capable device's output signal type and the projector's input signal type do not match. If this should occur, switch "Dynamic Range". Selectable items Description Standard When the black levels of - Sharp XG-C330X | XGC330X|XGC430X Operation Manual - Page 48
image by moving it up or down. Note • To reset all adjustment items, select "Reset" and press ENTER. 2 Resolution Setting Ordinarily, the type adjustment is also performed by pressing AUTO SYNC on the projector or AUTO SYNC on the remote control. • The Auto Sync adjustment may take some time - Sharp XG-C330X | XGC330X|XGC430X Operation Manual - Page 49
"Options1" Menu Options1 VIDEO 1 Lamp Timer (Life) 0 h ( 100%) 37 and 38. • You can also press RESIZE on the remote control to set the resize mode. (See page 37.) 3 Adjusting some RESIZE modes. (See pages 37 and 38.) • To reset this function, select "0". • When adjusting the image shift, " - Sharp XG-C330X | XGC330X|XGC430X Operation Manual - Page 50
Manual Correction \ button | button Menu operation Page 42 6 Selecting a Startup and Background Image Selectable items Description Logo SHARP and the lamp life will extend. (Projection brightness decreases 20%.) • You can also use ECO/QUIET button on the remote control or on the projector to - Sharp XG-C330X | XGC330X|XGC430X Operation Manual - Page 51
the keycode in a safe place where only authorized users have access. Info • If you lose or forget your keycode, contact your nearest Sharp Authorized Projector Dealer or Service Center (see page 66). Even if the product warranty is valid, the keycode reset will incur a charge. Setting/Changing the - Sharp XG-C330X | XGC330X|XGC430X Operation Manual - Page 52
outlet or the breaker switch is turned on. Disable The projector is turned on manually (see page 30), and does not turn on automatically when remote control buttons. • You cannot use the keylock function while the projector is warming up. ■ Taking the Keylock Off Hold down ENTER on the projector - Sharp XG-C330X | XGC330X|XGC430X Operation Manual - Page 53
9600 bps On 08:00:1F:B1:B7:74 Projector w All Reset MYPROJECTOR SEL./ADJ. ENTER RETURN END 1 Setting a projector, press: . Note • If ENTER is held down for more than 5 seconds, the operation buttons on the projector will be locked. (See page 50.) • You cannot use the buttons on the remote - Sharp XG-C330X | XGC330X|XGC430X Operation Manual - Page 54
internal speaker to "On" or "Off" such as when the projector is connected to an external amplifier. Selectable items Description On The audio SETUP MANUAL" contained on the supplied CD-ROM for RS-232C Specifications and Command Settings. • Refer to the computer's operation manual for instructions - Sharp XG-C330X | XGC330X|XGC430X Operation Manual - Page 55
Setting Connect the LAN cable before turning the projector on. If not, the DHCP Client function does not work. Selectable items Description On Obtains configuration parameters for TCP/IP network automatically. Off Sets the TCP/IP manually. Select "On" for "DHCP Client", then press ENTER - Sharp XG-C330X | XGC330X|XGC430X Operation Manual - Page 56
• For information on how to change the projector name, see "SETUP MANUAL" contained in the supplied CD-ROM. w projector can switch the on-screen display language among 11 languages. Note The following items or menu cannot be initialized. • "Fine Sync" menu Resolution • "Options1" menu Lamp Timer - Sharp XG-C330X | XGC330X|XGC430X Operation Manual - Page 57
operation, ensure you press STANDBY/ ON on the projector or STANDBY on the remote control and put the projector into standby mode. After the cooling fan has stopped, unplug the power cord from the AC socket and clean the vents. • The air filters should be cleaned every 100 hours of use. Clean - Sharp XG-C330X | XGC330X|XGC430X Operation Manual - Page 58
operating condition of the projector. • Ask your nearest Sharp Authorized Projector Dealer or Service Center to exchange the filter (PFILDA022WJKZ) when it is no longer possible to clean. Replacing the Air Filter 1 Press STANDBY/ON on the pro- jector or STANDBY on the remote control to put the - Sharp XG-C330X | XGC330X|XGC430X Operation Manual - Page 59
5 Place a replacement air filter. • Place the new air filter onto the filter cover. 6 Replace the filter cover. • Slide the filter cover in the direction of the arrow to close it. Note • Ensure the filter cover is securely installed. The power will not turn on unless it is correctly installed. -57 - Sharp XG-C330X | XGC330X|XGC430X Operation Manual - Page 60
change to " " (red), the lamp will automatically turn off and then the projector will automatically enter the standby mode. At this time, the lamp indicator will illuminate in red. ■ If you try to turn on the projector a fourth time without replacing the lamp, the projector will not turn on. -58 - Sharp XG-C330X | XGC330X|XGC430X Operation Manual - Page 61
• • The filter cover, lamp unit cover or lens housing cover is open. Cooling fan breakdown • If the power indicator blinks even when the covers are securely installed, or if the cooling fan does not run normally, then contact your nearest Sharp Authorized Projector Dealer or Service Center (see - Sharp XG-C330X | XGC330X|XGC430X Operation Manual - Page 62
by following the instructions described in this section. *If you wish, you may have the lamp replaced at your nearest Sharp Authorized Projector Dealer or Service Center. * If the new lamp does not illuminate after replacement, take your projector to the nearest Sharp Authorized Projector Dealer or - Sharp XG-C330X | XGC330X|XGC430X Operation Manual - Page 63
on the remote control to put the projector into standby mode. • Wait until the cooling fan stops. 2 Disconnect the power cord. • Unplug the power cord from the AC socket. • Leave the lamp until it has fully cooled down (about 1 hour). 3 Remove the lamp unit cover. • Loosen the user service screw - Sharp XG-C330X | XGC330X|XGC430X Operation Manual - Page 64
tighten the user service screw to secure the lamp unit cover. Info • If the lamp unit and lamp unit cover are not correctly installed, the power will not turn on, even if the power cord is connected to the projector. Resetting the Lamp Timer Reset the lamp timer after replacing the lamp. Info • Make - Sharp XG-C330X | XGC330X|XGC430X Operation Manual - Page 65
) mode. Should this occur, turn off the LCD display on the notebook computer and output the display data in "CRT only" mode. Details on how to change display modes can be found in your notebook computer's operation manual. • When this projector receives 640 × 350 VESA format VGA signals, "640 × 400 - Sharp XG-C330X | XGC330X|XGC430X Operation Manual - Page 66
Troubleshooting Problem No picture and no sound or projector does not start. Check • Projector projector. • Remote control batteries have run out. • External output has not been set when connecting notebook computer. • The filter cover, lamp unit cover or lamp the lens. If the projector is carried - Sharp XG-C330X | XGC330X|XGC430X Operation Manual - Page 67
improperly. • If this happens frequently, replace the lamp. • The lamp will eventually need to be changed. The lamp has reached the end of its life. Replace the lamp. • Operate the remote control while pointing it at the projector's remote control sensor. • The remote control may be too far away - Sharp XG-C330X | XGC330X|XGC430X Operation Manual - Page 68
If you encounter any problems during setup or operation of this projector, first refer to the "Troubleshooting" section on pages 64 and 65. If this operation manual does not answer your question, please contact the SHARP Service departments listed below. U.S.A. Sharp Electronics Corporation 1-888 - Sharp XG-C330X | XGC330X|XGC430X Operation Manual - Page 69
Projector Model XG-C430X/XG-C330X Video system NTSC3.58/NTSC4.43/PAL/PAL-M/PAL-N/PAL-60/SECAM/ DTV480I/DTV480P/DTV540P/DTV576I/DTV576P/DTV720P/DTV1035I/DTV1080I Display method LCD panel × 3, RGB optical shutter method LCD panel Panel size: 0.8" No. of dots: 786,432 dots (1,024 [H] × 768 [V]) Lens - Sharp XG-C330X | XGC330X|XGC430X Operation Manual - Page 70
mode 52 Progressive 45 Projector 54 R-CLICK/RETURN button 39, 43 Red 44 Remote control 14 Remote control sensor 15 Remote receiver 39 Replacing the lamp 60 Reset 44 Resize 47 RESIZE button 37 Resolution 46 RGB cable 23 RS-232C 52 RS-232C terminal 27 Sharp 44 Signal Info 46 Signal - Sharp XG-C330X | XGC330X|XGC430X Operation Manual - Page 71
SHARP CORPORATION
-
 1
1 -
 2
2 -
 3
3 -
 4
4 -
 5
5 -
 6
6 -
 7
7 -
8
-
9
-
10
-
11
-
12
-
13
-
14
-
15
-
16
-
17
-
18
-
19
-
20
-
21
-
22
-
23
-
24
-
25
-
26
-
27
-
28
-
29
-
30
-
31
-
32
-
33
-
34
-
35
-
36
-
37
-
38
-
39
-
40
-
41
-
42
-
43
-
44
-
45
-
46
-
47
-
48
-
49
-
50
-
51
-
52
-
53
-
54
-
55
-
56
-
57
-
58
-
59
-
60
-
61
-
62
-
63
-
64
-
65
-
66
-
67
-
68
-
69
-
70
-
71
 |
 |
LCD PROJECTOR
MODEL
XG-C430X
XG-C330X
OPERA
TION MANU
AL
Introduction
Quick Start
Setup
Connections
Basic Operation
Useful Features
Appendix