Singer 1004 VIVO Instruction Manual - Page 6
Removing / Installing Extension Bed, Connecting Machine To Power Source
 |
View all Singer 1004 VIVO manuals
Add to My Manuals
Save this manual to your list of manuals |
Page 6 highlights
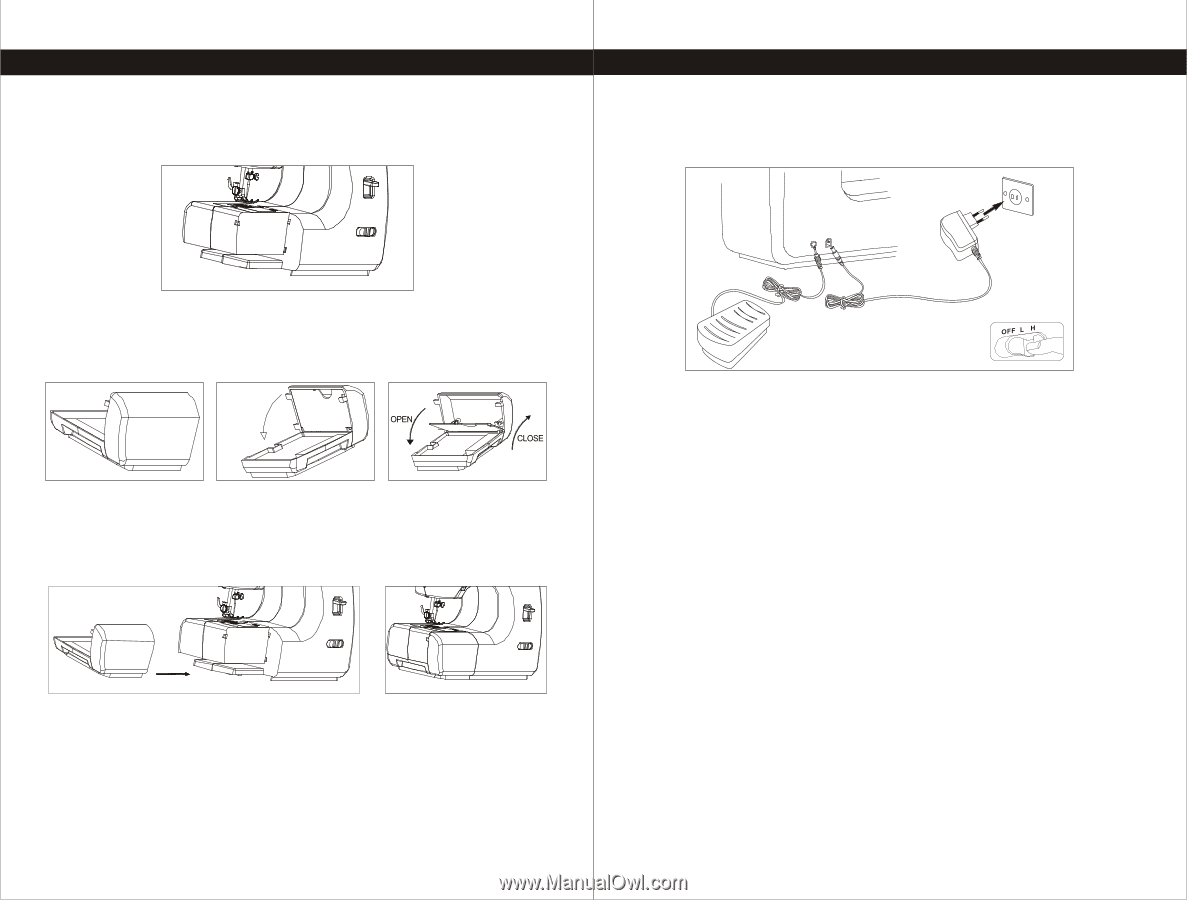
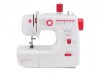
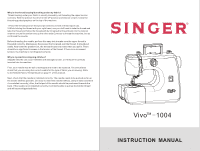
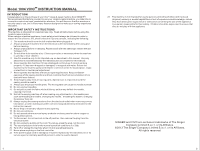
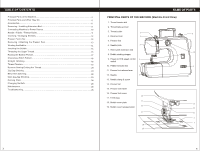
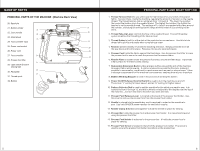
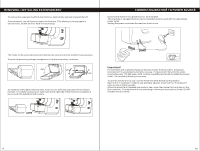
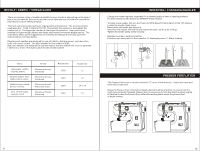
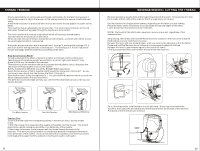
REMOVING / INSTALLING EXTENSION BED To remove the extension bed from the machine, hold it firmly and pull it toward the left. Once removed, you will have access to the free arm. This allows you to sew pants or sleeve hems, as well as other hard-to-reach areas. CONNECTING MACHINE TO POWER SOURCE Connect the machine to a power source, as illustrated. This machine is equipped with an electric plug that must be used with the appropriate power outlet. Unplug the power cord when the machine is not in use. The inside of the removable extension bed can be used to store the machine's accessories. To open the accessory storage compartment, flip the cover down, as shown. OPEN To install the removable extension bed, hold it in your left hand and push it firmly toward the right. It is helpful to place your right hand at the right side of the machine to stabilize it as you push the extension bed in place. Important! For machines with a polarized plug (one blade is wider than the other), the plug is intended to fit in a polarized outlet only one way. If it does not fit fully into the outlet, reverse the plug. If it still does not fit, contact a qualified electrician to install the proper outlet. Do not modify the plug in any way. To turn the machine on to sew, use the Power On/Off & Speed Control Switch. Set it in the "L" position in order to sew at slower speeds, or set it at the "H" position in order to sew at higher speeds. When the machine is threaded and ready to sew, lower the presser foot and step on the foot controller. The machine will sew according to where you have set the Power On/Off & Speed Control Switch. 9 10
-
 1
1 -
 2
2 -
 3
3 -
 4
4 -
 5
5 -
 6
6 -
 7
7 -
 8
8 -
 9
9 -
 10
10 -
 11
11 -
 12
12 -
13
-
14
 |
 |