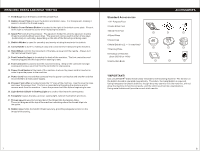
Singer 1004 VIVO Instruction Manual - Page 8
Removing / Attaching The Presser Foot, Winding The Bobbin - vivo
 |
View all Singer 1004 VIVO manuals
Add to My Manuals
Save this manual to your list of manuals |
Page 8 highlights
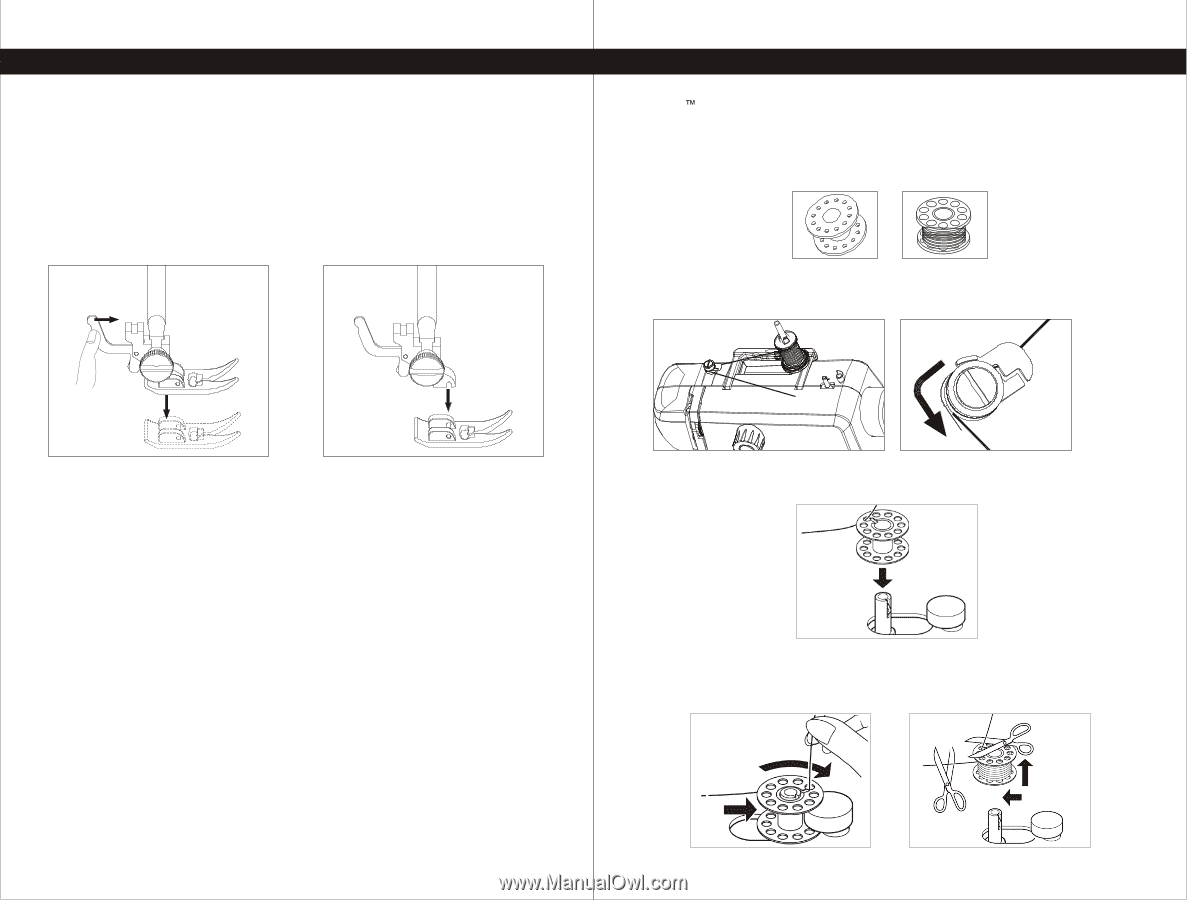
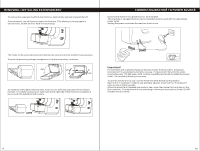
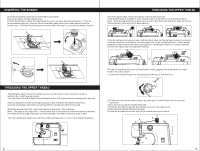
REMOVING / ATTACHING THE PRESSER FOOT Turn the Power On/Off & Speed Control Switch to the "off" position and make sure the needle is in its highest position. Removing the Presser Foot Raise the Presser Bar by lifting the Presser Foot Lifter. Press the Presser Foot Lever, located in back of the Presser Foot Holder and the foot will disengage. Attaching the Presser Foot Raise the presser foot using the Presser Foot Lifter. Place the foot under the presser foot holder, then lower the presserfoot holder until the cut-out is directly above the pin. The presser foot will engage automatically. WINDING THE BOBBIN The Vivo create & repair machine by SINGER®uses metal bobbins.The bobbin case is magnetized. When the metal bobbin is used, correct tension for the bobbin thread can be achieved. Therefore, do not use transparent or plastic bobbins - using transparent or plastic bobbins will result in poor stitch quality due to lack of tension on the bobbin thread. Always use metal bobbins. Contact your Authorized SINGER® retailer for more information, or visit www.singer.com. Place the spool base, thread and spool cap onto the spool pin. Pull the thread out from the spool. Slip it into the thread guide, then wind it around the bobbin tension guide, as illustrated. Put the end of the thread through the hole in the bobbin, as shown. Place the bobbin onto the bobbin winder as far as it will go. Holding onto the end of the thread, push the bobbin winder firmly to the right, up against the bobbin winding stopper. Step on the foot controller to begin winding the bobbin, stop to trim the thread tail. Step on the foot controller again to resume winding the bobbin. When the bobbin is full, push the spindle to the left, clip the thread and remove the bobbin from the winder. 13 14
-
 1
1 -
2
-
 3
3 -
 4
4 -
 5
5 -
 6
6 -
 7
7 -
 8
8 -
 9
9 -
 10
10 -
 11
11 -
 12
12 -
 13
13 -
14
 |
 |