Singer 9970 Instruction Manual - Page 48
Parallel Sewing Foot, Seam Guide Foot, Stitch in the Ditch Foot
 |
View all Singer 9970 manuals
Add to My Manuals
Save this manual to your list of manuals |
Page 48 highlights
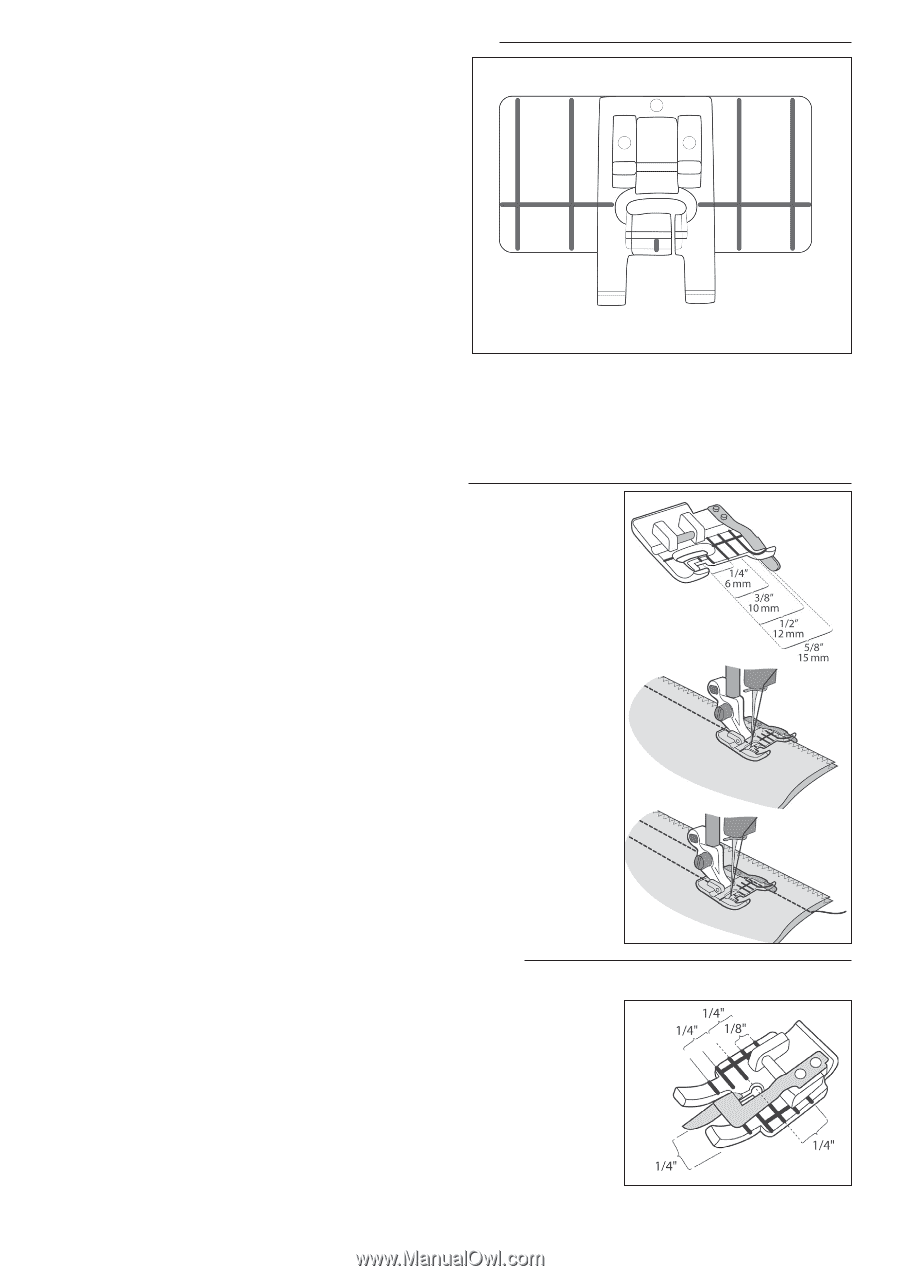
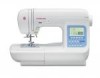
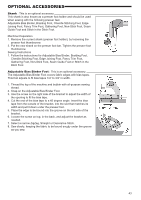
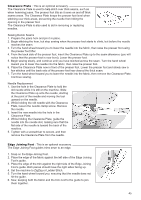
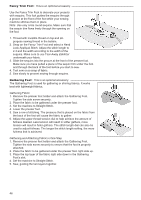
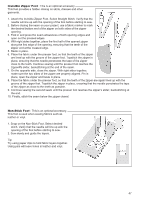
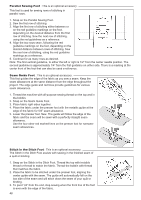
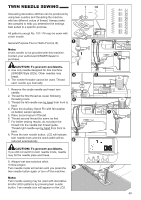
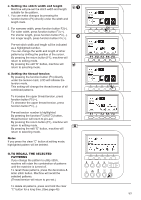
Parallel Sewing Foot : This is an optional accessory. This foot is used for sewing rows of stitching in parallel rows. 1. Snap on the Parallel Sewing Foot. 2. Sew the first row of stitching. 3. Align the first row of stitching either between or on the red guideline markings on the foot, depending on the desired distance from the first row of stitching. Sew the next row of stitching, using the red guidelines as a reference. 4. Align the two rows sewn, following the red guideline markings on the foot, depending on the desired distance between rows of stitching. Sew the next row of stitching, using the red guideline markings as a reference. 5. Continue for as many rows as desired. Note: The first vertical guideline, to either the left or right is 1/2" from the center needle position. The second guideline is approximately 1/4" from the first guideline on either side. There is a marking at the center front of the foot that can also be used a reference. Seam Guide Foot : This is an optional accessory. This foot guides the edge of the fabric as you sew a seam. Keep the seam allowances at the same distance from the edge throughout the project. The edge guide and red lines provide guidelines for various seam allowances. 1. Thread the machine with all-purpose sewing thread on the top and in the bobbin. 2. Snap on the Seam Guide Foot. 3. Place fabric right sides together. 4. Place the fabric under the presser foot with the metallic guide at the edge of the fabric for 5/8" seam allowance. 5. Lower the presser foot. Sew. The guide will follow the edge of the fabric and the seam will be sewn with a perfectly straight seam allowance. Use the four other red marked lines on the presser foot for narrower seam allowances. Stitch in the Ditch Foot : This is an optional accessory. The Stitch in the Ditch Foot assists with sewing in the finished seam of a quilt or binding. 1. Snap on the Stitch in the Ditch Foot. Thread the top with invisible thread or thread to match the fabric. Thread the bobbin with thread that matches the fabric. 2. Place the fabric to be stitched under the presser foot, aligning the center guide with the seam. The guide will automatically fall on the low side of the seam and will stitch down the seam of your quilt or binding. 3. To pivot 1/4" from the end, stop sewing when the front line of the foot is even with the edge of the fabric. 48
-
 1
1 -
2
-
3
-
4
-
5
-
6
-
7
-
8
-
9
-
10
-
11
-
12
-
13
-
14
-
15
-
16
-
17
-
18
-
19
-
20
-
21
-
22
-
23
-
24
-
25
-
26
-
27
-
28
-
29
-
30
-
31
-
32
-
33
-
34
-
35
-
36
-
37
-
38
-
39
-
40
-
41
-
42
-
 43
43 -
 44
44 -
 45
45 -
 46
46 -
 47
47 -
 48
48 -
 49
49 -
 50
50 -
 51
51 -
 52
52 -
 53
53 -
54
-
55
-
56
-
57
-
58
-
59
-
60
 |
 |