Singer CE-150 Futura Instruction Manual - Page 6

Table Of Contents - install bobbin

Page 6 highlights

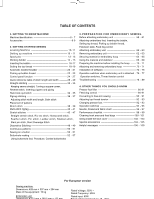
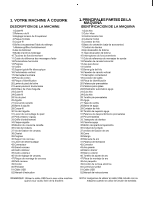
TABLE OF CONTENTS 1. GETTING TO KNOW MACHINE Machine identification 6 - 7 Accessories 8-9 2. GETTING STARTED SEWING Leveling Machine 10- 1 1 Setting up machine 10 - 11 Spool pins 12- 13 Winding bobbin 14 - 15 Inserting the bobbin 16-17 Setting the top thread 18-19 Automatic needle threader 20 - 21 Picking up bobbin thread 22 - 23 Control panel function 24 - 27 Quick reference table of stitch length and width ---------- 28 - 29 Straight stitching 30 - 35 Keeping seams straight, Turning a square corner, Reverse stitch, Inserting zippers and piping Hand-look quilt stitch 34 - 35 Zigzag stitching 36 - 37 Adjusting stitch width and length, Satin stitch Placement of patterns Blind stitch 38 - 39 Multi-stitch zigzag 40 - 41 Stretch stitches 42 - 47 Straight stretch stitch, Ric-rac stitch, Honeycomb stitch, Feather stitch, Pin stitch, Ladder stitch, Blanket stitch, Slant pin stitch, Slant Overedge Stitch Decorative Stitching 48 - 49 Continuous patterns 50 - 51 Sewing on a button 50 - 51 Buttonhole making 52 - 57 Using buttonhole foot, Procedure, Corded buttonholes 3. PRE P AR AT ION FOR E MBROIDERY SEWI NG Before attaching embroidery unit 58 - 61 Attaching embroidery foot, Inserting the bobbin, Setting top thread, Picking up bobbin thread, Extension table, Feed dog control Attaching embroidery unit 62 - 63 Removing embroidery unit 62 - 63 Securing material in embroidery hoop 64 - 65 Using the material and stabilizer 66 - 69 Preparing the machine before installing the hoop ------- 70 - 71 Attaching and removing embroidery hoop 70 - 71 Installation of software 72 - 75 Operation switches when embroidery unit is attached - 76 - 77 Operation switches, Thread tension control Troubleshooting 78 - 89 4. OTHER THINGS YOU SHOULD KNOW Presser foot lifter 90-91 Feed dog control 90-91 Converting to free-arm sewing 90 - 91 Adjusting top thread tension 92 - 93 Changing presser foot 92 - 93 Operation switches 94 - 95 Needle, thread and fabric chart 96 - 97 Performance checklist 98 - 99 Cleaning hook area and feed dogs 100- 101 Oiling inside the face cover 102 - 103 Special accessories 104 - 105 Helpful messages 106 - 109 Sewing machine Dimensions: 428 mm × 307 mm × 294 mm Mass of the equipment: 10 kg Embroidery unit For European version Rated Voltage: 230V ~ Rated Frequency: 50Hz Rated input: 60W

  • 1
  • 2
  • 3
  • 4
  • 5
  • 6
  • 7
  • 8
  • 9
  • 10
  • 11
  • 12
  • 13
  • 14
  • 15
  • 16
  • 17
  • 18
  • 19
  • 20
  • 21
  • 22
  • 23
  • 24
  • 25
  • 26
  • 27
  • 28
  • 29
  • 30
  • 31
  • 32
  • 33
  • 34
  • 35
  • 36
  • 37
  • 38
  • 39
  • 40
  • 41
  • 42
  • 43
  • 44
  • 45
  • 46
  • 47
  • 48
  • 49
  • 50
  • 51
  • 52
  • 53
  • 54
  • 55
  • 56
  • 57
  • 58
  • 59
  • 60
  • 61
  • 62
  • 63
  • 64
  • 65
  • 66
  • 67
  • 68
  • 69
  • 70
  • 71
  • 72
  • 73
  • 74
  • 75
  • 76
  • 77
  • 78
  • 79
  • 80
  • 81
  • 82
  • 83
  • 84
  • 85
  • 86
  • 87
  • 88
  • 89
  • 90
  • 91
  • 92
  • 93
  • 94
  • 95
  • 96
  • 97
  • 98
  • 99
  • 100
  • 101
  • 102
  • 103
  • 104
  • 105
  • 106
  • 107
  • 108
  • 109
  • 110
  • 111
  • 112
  • 113
  • 114
  • 115
  • 116
  • 117
  • 118
  • 119
  • 120
  • 121
  • 122
  • 123
  • 124
  • 125
  • 126
  • 127

TABLE OF CONTENTS
1. GETTING TO KNOW MACHINE
Machine identification ------------------------------------------------6 - 7
Accessories ----------------------------------------------------------------8-9
2. GETTING STARTED SEWING
Leveling Machine ------------------------------------------------10-11
Setting up machine ---------------------------------------------10 - 11
Spool pins ------------------------------------------------------------ 12- 13
Winding bobbin ---------------------------------------------------- 14 - 15
Inserting the bobbin ------------------------------------------------ 16-17
Setting the top thread ---------------------------------------------- 18-19
Automatic needle threader -------------------------------------- 20 - 21
Picking up bobbin thread ---------------------------------------- 22 - 23
Control panel function -------------------------------------------- 24 - 27
Quick reference table of stitch length and width ---------- 28 - 29
Straight stitching ---------------------------------------------------30 - 35
Keeping seams straight, Turning a square corner,
Reverse stitch, Inserting zippers and piping
Hand-look quilt stitch -------------------------------------------- 34 - 35
Zigzag stitching -----------------------------------------------------36 - 37
Adjusting stitch width and length, Satin stitch
Placement of patterns
Blind stitch ---------------------------------------------------------38 - 39
Multi-stitch zigzag --------------------------------------------------40 - 41
Stretch stitches -----------------------------------------------------42 - 47
Straight stretch stitch, Ric-rac stitch, Honeycomb stitch,
Feather stitch, Pin stitch, Ladder stitch, Blanket stitch,
Slant pin stitch, Slant Overedge Stitch
Decorative Stitching -----------------------------------------------48 - 49
Continuous patterns -----------------------------------------------50 - 51
Sewing on a button ------------------------------------------------50 - 51
Buttonhole making -------------------------------------------------52 - 57
Using buttonhole foot, Procedure, Corded buttonholes
3. PREPARATION FOR EMBROIDERY SEWING
Before attaching embroidery unit ---------------------------- 58 - 61
Attaching embroidery foot, Inserting the bobbin,
Setting top thread, Picking up bobbin thread,
Extension table, Feed dog control
Attaching embroidery unit ------------------------------------- 62 - 63
Removing embroidery unit ------------------------------------- 62 - 63
Securing material in embroidery hoop ---------------------- 64 - 65
Using the material and stabilizer ----------------------------- 66 - 69
Preparing the machine before installing the hoop ------- 70 - 71
Attaching and removing embroidery hoop ----------------- 70 - 71
Installation of software ------------------------------------------- 72 - 75
Operation switches when embroidery unit is attached - 76 - 77
Operation switches, Thread tension control
Troubleshooting --------------------------------------------------- 78 - 89
4. OTHER THINGS YOU SHOULD KNOW
Presser foot lifter --------------------------------------------------- 90-91
Feed dog control ---------------------------------------------------- 90-91
Converting to free-arm sewing -------------------------------- 90 - 91
Adjusting top thread tension ----------------------------------- 92 - 93
Changing presser foot ------------------------------------------- 92 - 93
Operation switches ----------------------------------------------- 94 - 95
Needle, thread and fabric chart ------------------------------- 96 - 97
Performance checklist ------------------------------------------ 98 - 99
Cleaning hook area and feed dogs ------------------------100- 101
Oiling inside the face cover ----------------------------------102 - 103
Special accessories -------------------------------------------104 - 105
Helpful messages ----------------------------------------------106 - 109
For European version
Sewing machine
Dimensions: 428 mm × 307 mm × 294 mm
Mass of the equipment: 10 kg
Embroidery unit
Dimensions: 433 5 mm × 269 5 mm × 133 mm
Rated Voltage: 230V ~
Rated Frequency: 50Hz
Rated input: 60W
Rated ambient temperature: 15 - 35°C