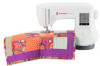
Singer Legacy C440Q Instruction Manual and Troubleshooting Guide
Singer Legacy C440Q Manual
 |
View all Singer Legacy C440Q manuals
Add to My Manuals
Save this manual to your list of manuals |
Singer Legacy C440Q manual content summary:
- Singer Legacy C440Q | Instruction Manual and Troubleshooting Guide - Page 1
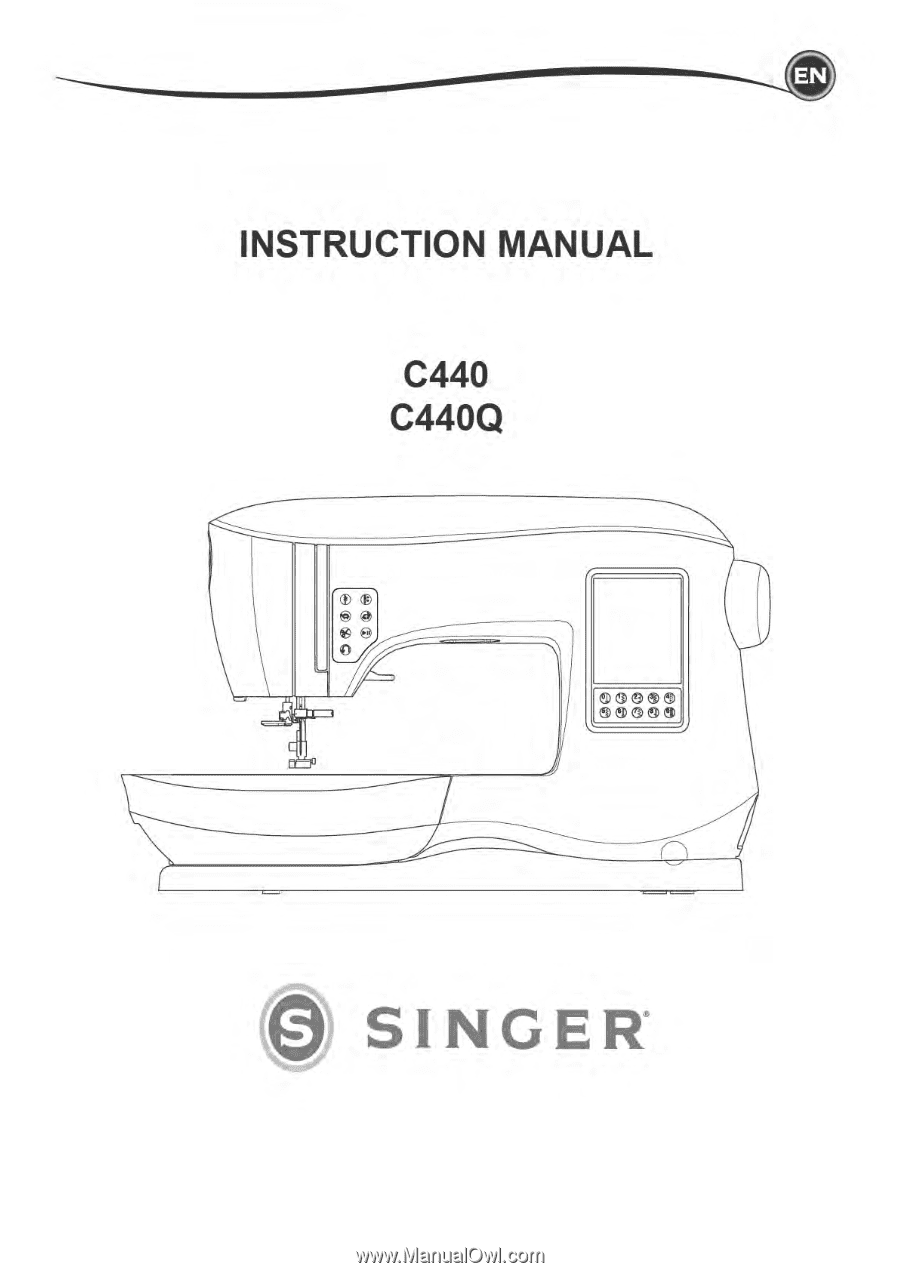
a INSTRUCTION MANUAL C440 C440Q CD (IP O 0 O 0 0 SOCISS SeSOO n SINGER 0 - Singer Legacy C440Q | Instruction Manual and Troubleshooting Guide - Page 2
be left unattended when plugged in. Always unplug this sewing machine from the electric outlet immediately after using and before cleaning, removing covers or when making any other user servicing adjustments mentioned in the instruction manual. WARNING To reduce the risk of burns, fire, electric - Singer Legacy C440Q | Instruction Manual and Troubleshooting Guide - Page 3
been given supervision or instruction concerning use of the sewing machine by a person responsible sewing machine. The noise level under normal operating conditions is less than 70db. The machine must only be used with foot control of type C-9001 manufactured by CHIEN HUNG TAIWAN Ltd. SERVICING - Singer Legacy C440Q | Instruction Manual and Troubleshooting Guide - Page 4
by-step instructions. Additional assistance, by region, may be found on the web at www.singer.com. We're ready to help and hope that you enjoy your SINGER® sewing machine. Happy Sewing! I1• •%. .0I ..1 SETTING UP THE MACHINE Sewing Preparation 13 Main Parts 6 Touch Panel LCD 13 Accessories - Singer Legacy C440Q | Instruction Manual and Troubleshooting Guide - Page 5
of Contents SETTING UP THE MACHINE SEWING Starting to Sew Where to Use Each Stitch Starting to Sew Start and End of Seam Reverse Stitching Tack Stitch Turning Corners Sewing Heavy Fabric Sewing Overlapped Areas Width of Seam Allowance Sewing Straight Stitch Sewing Straight Stitch Straight Stitch - Singer Legacy C440Q | Instruction Manual and Troubleshooting Guide - Page 6
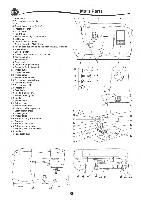
plate II 34. Bobbin cover 35. Bobbin cover latch 2 36. Hole for auxiliary spool pin 37. Stitch pattern chart 21 30 38. Thread guide 39. Thread guide 22 31 40. Bobbin winding tension disk 23 41. Spool pin 42. Bobbin winder stop 24 43. Bobbin winder spindle 25 44. Bobbin winder - Singer Legacy C440Q | Instruction Manual and Troubleshooting Guide - Page 7
SETTING UP THE MACHINE Accessories Accessories are stored in the removable storage compartment. 1. Needle pack 2.5 SINGER® Class 15 Bobbins (transparent) (one in the machine when delivered) 3. Seam ripper 4. Brush 5. Screwdriver 6. Auxiliary spool pin 7. Felt pads 8. Screwdriver for needle plate - Singer Legacy C440Q | Instruction Manual and Troubleshooting Guide - Page 8
the holder as far as it will go from bottom of presser bar. 4. Tighten the presser foot screw securely using the screwdriver. NOTE: This sewing machine is a low shank model. When shopping for optional SINGER° presser feet and accessories, make sure they are designed for low shank models. 0000 0 4 O - Singer Legacy C440Q | Instruction Manual and Troubleshooting Guide - Page 9
straightness. FABRIC, THREAD AND NEEDLE CHART Select size of thread and needle in accordance with fabric to be sewn. SINGER° brand needles are recommended for this machine. Type of Fabric Thread Size Light weight - thin georgette, organdy, voile, taffeta, silk, etc. All-purpose polyester, fine - Singer Legacy C440Q | Instruction Manual and Troubleshooting Guide - Page 10
switch to the off position (symbol O), then remove plug from outlet. O /I /I 0 0 CO a FOR UNITED STATES AND CANADA USERS: POLARIZED PLUG INFORMATION This sewing machine has a polarized plug (one blade wider than the other). To reduce the risk of electric shock, this plug is intended to fit in - Singer Legacy C440Q | Instruction Manual and Troubleshooting Guide - Page 11
4. Place all accessories in the accessory tray. Slide the tray on to the machine around the free arm. 5. Place the foot control in the space above the free arm. MACHINE CONTROL FUNCTIONS Tack Button with LED Indicator (A) Press the tack button while sewing and your machine sews a few tack stitches - Singer Legacy C440Q | Instruction Manual and Troubleshooting Guide - Page 12
are located under the needle plate, directly below the presser foot. Their function is to move the fabric forward when sewing. The feed teeth lever is located on the back of the sewing machine at the base of the free arm. Slide the lever (M) to the right to raise the feed teeth for - Singer Legacy C440Q | Instruction Manual and Troubleshooting Guide - Page 13
Sewing Mode Button By pressing this button, you can select stitch patterns to sew SEWING MODE At the Home Screen, by pressing the Sewing Mode button, machine will select straight stitch first. You can select and sew illustration is recommended for normal sewing. The presser foot recommendation may - Singer Legacy C440Q | Instruction Manual and Troubleshooting Guide - Page 14
stitch is selected. Adjusted settings are not automatically saved when the machine is turned off. a. Stitch Width/Needle Position Increase or decrease the Increase or decrease the stitch length using + and buttons. When sewing stitches from the Buttonhole or Elongation category (stitches 16-29, 142 - Singer Legacy C440Q | Instruction Manual and Troubleshooting Guide - Page 15
SETTING UP THE MACHINE Sewing Preparation MACHINE SETTINGS Setting Button (A) Before or during the sewing process, you can adjust the settings by pressing the Setting button. The Setting Screen will appear. This screen is scrolled by pressing the right side - Singer Legacy C440Q | Instruction Manual and Troubleshooting Guide - Page 16
has not completed correctly, a popup message will appear. Press the V" button and retry the calibration. Software Version Software version of this sewing machine will be indicated at the bottom of this screen. e • PP- II 0 ...LUg4.. 4:16".. " "117 1. 7 7 . I I jai l 43> LI • • • ik - Singer Legacy C440Q | Instruction Manual and Troubleshooting Guide - Page 17
SINGERS Class 15 bobbins (transparent) in this machine. 1. Pull the bobbin cover latch to the right and remove the bobbin cover. 2. Lift up the bobbin from the machine hook thread to the guide from front opening. 2. Bring thread to the right and pass it through the thread guide from the back side. - Singer Legacy C440Q | Instruction Manual and Troubleshooting Guide - Page 18
making sure the bobbin turns in a counter-clockwise direction. Threading the Machine 1.)- ..----1 2. Draw thread into notch (a) while holding the bobbin bobbin cover down until it clicks into place. NOTE: This machine can start to sew without drawing up the bobbin thread. If you want to draw - Singer Legacy C440Q | Instruction Manual and Troubleshooting Guide - Page 19
MACHINE Threading the Machine the thread guide. NOTE: the threading guides, try to Thread Machine 1. Raise thread the machine. Not machine. EN 0 0 90 0 0 to 4 00000 00000 Threading the Upper Thread 1. Hold thread in both hands and pass thread into the guide guide from right side opening. 8. Place - Singer Legacy C440Q | Instruction Manual and Troubleshooting Guide - Page 20
toward you. 3. Lower the threader slowly and draw thread through thread guide (a) and pull toward the right. 4. Push the lever as far as Drawing Up the Bobbin Thread This machine can start to sew without drawing up the bobbin thread. If you want to start sewing with longer bobbin thread, draw - Singer Legacy C440Q | Instruction Manual and Troubleshooting Guide - Page 21
-37) Basic (10.17) 31. Stem stitch for stretch fabrics 10. Straight stitch left needle position • For top stitching, for basic sewing, etc. 11. Button sewing 32.-37. Overcasting of stretch fabric, decorative stitch Decorative (38-128) 39. Ric rac stitch z 12. Straight stitch with auto-reverse - Singer Legacy C440Q | Instruction Manual and Troubleshooting Guide - Page 22
sewing. Continue to hold the thread tails for the first few stitches, then release them. Lightly guide the fabric while sewing. You can regulate the sewing located on the left side of the machine. (See page 12) • Do not use the Thread Cutter button when sewing with a twin needle or a hemstitching - Singer Legacy C440Q | Instruction Manual and Troubleshooting Guide - Page 23
under the presser foot easily. Ltu OO Turning Corners 1. Stop the machine when you reach a corner. 2. Turn the handwheel toward you to insert the needle into fabric. Sewing Overlapped Areas Guide the fabric with both hands when sewing over overlapped areas. NOTE. You can change the needle stop - Singer Legacy C440Q | Instruction Manual and Troubleshooting Guide - Page 24
you start sewing. Guide the fabric gently with your right hand as you sew. Sewing I sewing. Machine will sew 4-5 stitches forward and sew 4-5 stitches backward and continue sewing forward. 3. When you reach the end of seam, press the Reverse button. Machine will sew a few stitches backward and sew - Singer Legacy C440Q | Instruction Manual and Troubleshooting Guide - Page 25
so that the needle slightly touches the folded edge of the fabric. 4. Lower the presser foot and sew hem, guiding fabric evenly along the guide. 5. Turn the fabric over when you have completed sewing. c. Wrong side of fabric h. Right side of fabric NOTE: Test on a scrap piece of fabric similar to - Singer Legacy C440Q | Instruction Manual and Troubleshooting Guide - Page 26
MHA • 3 32 34 35 36 • • Line up the fabric against the guide plate of the overcasting foot so that the needle falls near the edge of the No. 1 For narrower zigzag width (width=2.0-4.5). No. 4, 7, 15, 33, 37 when sewing easy to ravel or stretch fabrics. 1 4 7 15 33 37 Ir NOTE: If desired, - Singer Legacy C440Q | Instruction Manual and Troubleshooting Guide - Page 27
Foot (A) NOTE: The illustration to the right shows the look of the stitches when sewn on the fabric edge. A. Elastic sewing Pull elastic in front and back of needle while sewing. B. Overcast stitching Used for easy to ravel and knit fabrics. Refer to previous page for overcasting. • III lu 7y CD - Singer Legacy C440Q | Instruction Manual and Troubleshooting Guide - Page 28
presser foot lifter. 5. Holding the upper thread, pull the required amount of fabric to the rear and lower the presser foot lifter. 6. Start to sew. Machine will sew two stitches. 7. Repeat them as many times as you need to finish the row of basting stitches. NOTE: To prevent the fabric layers from - Singer Legacy C440Q | Instruction Manual and Troubleshooting Guide - Page 29
often have a thread shank to make them stand away from the fabric. Insert a straight pin or sewing machine needle under the center slit of the foot from the front, to add space for making the shank. Sew over the pin or needle. To create a thread shank, pull thread to the back side of - Singer Legacy C440Q | Instruction Manual and Troubleshooting Guide - Page 30
cause the needle to hit the presser foot, which could break the needle or damage the machine. If adjusting the needle position make sure the needle moves away from the center of the Zipper Foot. Before sewing, turn the handwheel toward you very slowly, making sure the needle does not hit the - Singer Legacy C440Q | Instruction Manual and Troubleshooting Guide - Page 31
the needle or damage the machine. Joining the Pieces of Fabric Join the pieces of fabric using pattern No. 0 with a seam allowance of 1/4 inch (6.3 mm). Quilting Sew three layers of material (topper, batting, backing). Use quilting guide to sew successive rows. Insert quilting guide into the hole of - Singer Legacy C440Q | Instruction Manual and Troubleshooting Guide - Page 32
or Buttonhole Foot is not positioned correctly. ' - Singer Legacy C440Q | Instruction Manual and Troubleshooting Guide - Page 33
you. NOTE: It is suggested that you use interfacing on the backside of the fabric. 5. Lower the buttonhole lever completely. NOTE: Machine will not start to sew if buttonhole lever is not lowered properly or frame ofButtonhole Foot is not positioned all the way forward. 6. Hold upper thread lightly - Singer Legacy C440Q | Instruction Manual and Troubleshooting Guide - Page 34
7. Machine will sew the buttonhole in the order as shown and stop automatically after sewing. O 12 3 4 5 2 3 4 11 20 2 3 4 gg 21 11fi 1 2 3 4 11 22 2 r3 4 44e E F. 23 8. Raise the presser foot to remove the fabric. 9. Use a seam ripper to cut open - Singer Legacy C440Q | Instruction Manual and Troubleshooting Guide - Page 35
Right side of fabric b. Wrong side of patch 2. Lower the Buttonhole Lever and sew buttonhole. (See previous pages) Machine will sew the buttonhole in the order as shown and stop automatically after sewing. 3. Raise the presser foot to remove the fabric. 0 0 12 3 4 4. Carefully cut through - Singer Legacy C440Q | Instruction Manual and Troubleshooting Guide - Page 36
similar applications. 0 30 30 Eyelet Satin Foot (B) 1. Place the fabric under the presser foot and lower the O presser foot. Start the machine. Machine will sew the eyelet and stop automatically. 2. Press the Thread Cutter button and raise the presser foot. 3. Make a hole in the center of - Singer Legacy C440Q | Instruction Manual and Troubleshooting Guide - Page 37
Satin Foot (page 24). It may be helpful to place a fabric stabilizer underneath your work, which may help prevent any fabric puckering. FREE ARM SEWING By simply taking off the removable storage compartment, you can access the free arm, making it easier to stitch hard- to-reach areas like pant - Singer Legacy C440Q | Instruction Manual and Troubleshooting Guide - Page 38
only SINGERS branded twin needles for this machine. Other needles may break. b. The needle threader cannot be used. Thread each needle eye manually. 10 thread same as first. 8. For better sewing results, do not place the thread into the needle bar thread guide. 9. Thread right needle eye by hand - Singer Legacy C440Q | Instruction Manual and Troubleshooting Guide - Page 39
. LCD will show the Sequence Screen. Selecting Stitch Patterns 1. Select the desired stitch patterns in the same manner as that used for normal sewing. (See page 14 for information on selecting stitch patterns) The selected patterns will display at the top left side of the LCD screen. 2. After - Singer Legacy C440Q | Instruction Manual and Troubleshooting Guide - Page 40
Deleting Pattern or Letter 1. Shift the cursor to the pattern or letter you want to delete. 2. Press the Delete button (d) quickly (less than 0.5 sec.). Machine will delete the pattern or letter and cursor will d 141.0 shift to next pattern or letter. (If it was last pattern or letter, cursor - Singer Legacy C440Q | Instruction Manual and Troubleshooting Guide - Page 41
sequences. Memorized sequences remain in the memory if you turn off the machine. To Memorize or Save a Sequence 1. Press the Memory button press "X" button) Aa AB O 177 hB Ei 7.0 14.0 CD 06 Ci • Singer Sewing 0 eeeecogcssoeeooacs:ooeeggooeg(ge4ee3es) A alma./ 06i177 Cs • C:B ed 7.0 14.0 o• S - Singer Legacy C440Q | Instruction Manual and Troubleshooting Guide - Page 42
decorative & letter stitches. 2. Lower the presser foot and start sewing. Machine will start sewing from first entered pattern, and sew the sequence repeatedly. NOTE: By pressing the Thread Cutter button while sewing, machine will stop at the end of sequence and cut threads. Single Sequence Mode - Singer Legacy C440Q | Instruction Manual and Troubleshooting Guide - Page 43
jam and reset needle plate. Press the "✓" button. i Main Motor Overload If you are sewing on very heavy fabric or if the machine is blocked when sewing, the main motor can get overloaded and the machine will stop sewing. The pop-up message will close when the main motor and power supply are - Singer Legacy C440Q | Instruction Manual and Troubleshooting Guide - Page 44
not require replacement. In the unlikely event it does not light up, go to wwwsingercom for more information about machine service. There is no need to lubricate this machine. Bobbin Holder Remove the bobbin cover and bobbin. Clean the bobbin holder with a brush. Maintenance O Hook Race and Feed - Singer Legacy C440Q | Instruction Manual and Troubleshooting Guide - Page 45
PROBLEM Upper thread breaks Lower thread breaks Machine skips stitches Fabric puckers Machine makes loose stitches or loops Stitch pattern is distorted Threader does not thread through needle eye Machine does not feed properly Needle breaks Machine runs with difficulty Machine while sewing. Do - Singer Legacy C440Q | Instruction Manual and Troubleshooting Guide - Page 46
Light Sewing speed Machine dimensions Length (mm) Width (mm) Height (mm) Net weight (kg) Foot Control Model Rated voltage 100-240V -50/60Hz 55W LED 800 rpm maximum 241 512 310 8.4 C-9001 DC 15V, max. 3mA Technical Specification _ • The technical specifications and this Instruction manual can - Singer Legacy C440Q | Instruction Manual and Troubleshooting Guide - Page 47
MANUAL DE INSTRUCCIONES C440 C440Q SOCISS Sele08 n D SINGER - Singer Legacy C440Q | Instruction Manual and Troubleshooting Guide - Page 48
inmediatamente despues de utilizarla y antes de limpiarla, guitar las tapas, lubricarla o realizar cualquier otro ajuste o mantenimiento mencionado en el manual de instrucciones. ADVERTENCIA Para reducir el riesgo de quemaduras, incendio, descarga electrica o datios personales: • No permita que se - Singer Legacy C440Q | Instruction Manual and Troubleshooting Guide - Page 49
Instrucciones Importantes de Seguridad • Si el cable de alimentaciOn conectado con el pedal est6 datiado, debe ser reemplazado por el fabricante o su agente de servicio o una persona igualmente cualificada, para evitar riesgos. • Esta maquina de coser esta provista de un doble aislamiento. Use - Singer Legacy C440Q | Instruction Manual and Troubleshooting Guide - Page 50
experiencia en la costura de lo mas facil y exitosa. Proporcionamos un manual de instrucciones con graficas faciles de comprender e instrucciones paso a paso. nuestro sitio web www.singer.com. Estamos listos para ayudar y esperamos que disfrute su nueva maquina de coser SINGER' . iFelices Costuras! - Singer Legacy C440Q | Instruction Manual and Troubleshooting Guide - Page 51
Traslapada Coser Alrededor de la Pestana del Cierre Acolchado Uniendo las Piezas de Tela Acolchado Puntada de Acolchado de Apariencia Manual Remate y Zurcido Automatico Cosiendo Ojales Ojal Unido Ojal Patron Decorativo Continuo Aplicacion Costura a Brazo Libre Costura con Aguja Doble SECUENCIADO - Singer Legacy C440Q | Instruction Manual and Troubleshooting Guide - Page 52
Partes Principales 1. Placa Frontal 12 3 4 5 6 2. PeriIla de presiOn del prensatelas 3. Tapa 4. Palanca tira hilo (interior) 5. Elova prensatelas 6. Pantalla touch LCD 7. Volante ® @ 8. Compartimiento removible ®® 9. Luces LED 10. Botones de selecciOn directa 11. Bot6n de refuerzo con - Singer Legacy C440Q | Instruction Manual and Troubleshooting Guide - Page 53
LA MAQUINA Partes Principales Los accesorios estan guardados en el compartimiento removible. 1. Paquete de agujas 2. 5 bobinas transparentes SINGER® clase 15 (una colocada en la maquina) 3. Descosedor 4. Cepillo 5. Destornillador 6. Porta carrete auxiliar 7. Fieltros 8. Destornillador para placa - Singer Legacy C440Q | Instruction Manual and Troubleshooting Guide - Page 54
. 4. Apriete bien el pie prensatelas usando el destornillador. NO TA: Esta maquina de coser es de modelo de zanco bajo. Cuando compre prensatelas y accesorios opcionales SINGER, asegarese que estan disenados para el modelo de zanco bajo. 1,1 IQ - Singer Legacy C440Q | Instruction Manual and Troubleshooting Guide - Page 55
aguja de acuerdo con la tela a coser. Se recomienda el uso de agujas SINGER° para esta maquina de coser. Tipo de Tela Delgada - crepe delgado, organdin, todo uso Poliester todo uso, uso rudo, hilo para pespunte. SINGER® Estilo 2001 o 2045 SINGER® 2032 Piel Taman() Aguja 9/70-11/80 11/80-14/90 - Singer Legacy C440Q | Instruction Manual and Troubleshooting Guide - Page 56
Ajustando Ia Maquina DESEMPACANDO 1. Coloque la caja en una superficie plana y estable. Saque la maquina de la caja y quite el empaque exterior. 2. Quite el demas material de empaque y la bolsa de plastico. CONEXION ELECTRICA 0 1. Coloque la maquina en una superficie estable. 2. Conecte el - Singer Legacy C440Q | Instruction Manual and Troubleshooting Guide - Page 57
AJUSTANDO LA MAQUINA _ Ajustando la Maquina 5. Los LEDs se iluminaran cuando se enciende el interruptor. 6. Entre mas presione el pedal, mas rapido cosera la maquina. La maquina se detendra cuando se libere el pedal. 0 /1 /A EIJI 3 GUARDADO DESPUES DE COSER 1. Apague el interruptor. 2. Quite - Singer Legacy C440Q | Instruction Manual and Troubleshooting Guide - Page 58
Elevador Prensatelas (H) El prensatelas baja o sube con el elevador del prensatelas. Si esta cosiendo tela gruesa o varias capas de tela, el prensatelas puede levantarse para facilitar el colocar la tela debajo del prensatelas. NOTA: La maquina no cosera cuando el prensatelas este arriba (excepto - Singer Legacy C440Q | Instruction Manual and Troubleshooting Guide - Page 59
ilustraciOn se recomienda para costura normal. La recomendaci6n del prensatelas puede cambiar dependiendo la puntada seleccionada. El use del prensatelas incluido se describe en este manual. d. Ancho puntada/posici6n de la aguja e. Largo puntada/densidad b c ito elA a 0.0 2.5 °'° B. o - Singer Legacy C440Q | Instruction Manual and Troubleshooting Guide - Page 60
SELECCIONANDO UNA PUNTADA Al presionar uno de los botones de SelecciOn Directa (0-9), puede seleccionar dicha puntada de inmediato. Presione dos o tres digitos en r8pida sucesiOn para seleccionar una puntada del 10 en adelante. Si no existe el nUmero de puntada, escuchar8 un bip y quedara - Singer Legacy C440Q | Instruction Manual and Troubleshooting Guide - Page 61
AJUSTANDO LA MAQUINA Preparaci6n para Coser AJUSTES DE LA MAQUINA Bob:5n de Ajuste (A) Antes o durante el proceso de costura, puede regular los ajustes presionando el bot6n Ajuste. Aparece la Pantalla de Ajuste. Esta pantalla puede paginarse presionando los botones de flecha B en el lado - Singer Legacy C440Q | Instruction Manual and Troubleshooting Guide - Page 62
Preparacitin para Coser Aguja Doble Active el programa de aguja doble presionando los botones - 6 + para ajustar el ancho de la aguja doble. Cuando se selecciona el ancho de una aguja doble, el ancho de todas las puntadas se limita para evitar que se rompa la aguja. Para desactivar, presione el - Singer Legacy C440Q | Instruction Manual and Troubleshooting Guide - Page 63
AJUSTANDO LA MAQUINA Ensartando la Maquina PREPARANDO LA BOBINA AsegUrese de usar solo bobinas SINGERS Clase 15 (transparentes) en esta maquina. 1. Jale el seguro de la cubierta de la bobina a la derecha y quite la cubierta de la bobina. 2. Saque Ia - Singer Legacy C440Q | Instruction Manual and Troubleshooting Guide - Page 64
. NOTA: Esta maquina puede comenzar a coser sinjalar el hilo bobina. Si desea jalar el hilo bobina, consulte la pagina 20. AsegOrese de usar s616 bobinas SINGER° clase 15 (transparentes) para esta maquina. - Singer Legacy C440Q | Instruction Manual and Troubleshooting Guide - Page 65
Ensartando Ia Maquina Colocando Carrete de Hilo en Porta Carrete 1. _fele el extremo izquierdo del porta carrete y coloque el fieltro y el carrete de hilo de modo que el hilo se desenrolle desde el frente del carrete. 2. Coloque hasta adentro el sujetador de hilo en el porta carrete. a. Invierta la - Singer Legacy C440Q | Instruction Manual and Troubleshooting Guide - Page 66
Ensartando el Ojo de Ia Aguja A No baje la palanca del ensartador mientras la maquina esta operando. NOTA: El ensartador de aguja se usa para agujas de 11/80 14/90 y 16/100. 1. Baje el prensatelas. 2. Revise que la aguja este Ievantada a su posici6n mas aita. Si no, levOntela girando el volante - Singer Legacy C440Q | Instruction Manual and Troubleshooting Guide - Page 67
40. Puntada doble Ric Rac 43. Puntada de espina Satin (129-141) ElongaciOn (142-159) Acolc hado (160-176) 160. Puntada de acoichado de apariencia manual Antigua ( 177-199) Patrones de Puntadas de Letras Costura de secuencia (Ver pagina 39) 6 III 84 9i C> COSIENDO OCa CD 10 11 a) EEEEEEEE6BaE - Singer Legacy C440Q | Instruction Manual and Troubleshooting Guide - Page 68
COMENZANDO A COSER Seleccione puntada recta position aguja al centro (0) C:) Comienzo y Final de Ia Costura 0 1. Revise el prensatelas (Prensatelas MultipropOsito). Refierase a la pagina 8 para cambiar el prensatelas. 2. Coloque la tela debajo del prensatelas y baje el prensatelas. 3. - Singer Legacy C440Q | Instruction Manual and Troubleshooting Guide - Page 69
Comenzando a Coser Puntada de Refuerzo Puede coser puntadas de refuerzo al inicio y final de la puntada. 1. Presione el bot6n Refuerzo. Se ilumina el LED. 2. Comience a coser. La maquina cose puntadas de refuerzo y se detiene automaticamente. 0 0 cro Cosiendo Tela Gruesa Cuando cose telas - Singer Legacy C440Q | Instruction Manual and Troubleshooting Guide - Page 70
COSIENDO PUNTADA RECTA Los patrones de puntada recta deben seleccionarse para adaptarse al tipo de tela que se cose. PosiciOn aguja izquierda (No. 10, 13) es lo mas adecuado para telas delgadas. No. 0. PosiciOn aguja al centro No. 10. PosiciOn aguja a la izquierda No. 12. PosiciOn aguja al centro - Singer Legacy C440Q | Instruction Manual and Troubleshooting Guide - Page 71
Cosiendo Puntada Satin Para coser puntada satin, acorte el largo puntada y cotoque el Pie Satin (B). Refierase a la siguiente pagina para usar el zig zag para ribetear. PUNTADA DOBLADILLO INVISIBLE El dobladillo se cose sin puntadas visibles en el lado derecho de la tela. La ilustraciOn de la - Singer Legacy C440Q | Instruction Manual and Troubleshooting Guide - Page 72
Cosiendo RIBETEADO Y SOBREHILADO Usando el Pie de Ribeteado No. 1 (ancho puntada 5.0) No. 3, 32, 34, 35, 36 (ancho puntada 5.0 - 7.0) Pie de Ribeteado (C) NOTA: La ilustracion a la derecha muestra la apariencia de las puntadas cuando se cosen en el borde de la tela. MIA 3 32 34 35 36 Alinee Ia - Singer Legacy C440Q | Instruction Manual and Troubleshooting Guide - Page 73
Cosiendo PARCHES Cree interesantes embellecimientos mediante puntadas decorativas sobre las costuras. Intente mezclar varios tipos de tela para m8s variedad, No. 0 Pie MultipropOsito (A) O 0 5 43 1. Coloque dos piezas de tela por el lado derecho juntas y O cosa una puntada recta larga. 2. Abra - Singer Legacy C440Q | Instruction Manual and Troubleshooting Guide - Page 74
HILVANADO El hilvanado es una puntada temporal usada para sujetar prendas y para sostener y marcar la tela. No. 14 Puntada de hilvanado Pie MultipropOsito (A) 1. Jale el hilo bobina para buenos resultados. (ver pug. 20) Baje el impelente moviendo la palanca del impelente a la izquierda. (aparece un - Singer Legacy C440Q | Instruction Manual and Troubleshooting Guide - Page 75
COSIENDO Cosiendo 3. Ajuste el ancho de puntada de modo que Ia aguja entre en el orificio izquierdo del bot6n. 4. Revise el balanceo izquierdo y derecho de la aguja girando el volante hacia usted muy lentamente, asegurandose que er ,rsari 0 la aguja no golpee el bot6n. r O 5. Ajuste el - Singer Legacy C440Q | Instruction Manual and Troubleshooting Guide - Page 76
Cosiendo PEGANDO CIERRES InserciOn Centrada No. 0 Puntada recta (posicion de aguja al centro) 0 Pie de Cierres (E) A El cambiar la posicion de la aguja en la direcci6n erronea cuando esti colocado el Pie de Cierres puede hacer que la aguja golpee el prensatelas, que puede romper la aguja o - Singer Legacy C440Q | Instruction Manual and Troubleshooting Guide - Page 77
forma por piezas de telas unidas, creando la cubierta del acolchado. No. 0 Puntada recta (posicibn aguja centro) No. 160 Puntada acolchado apariencia manual Puntada recta / Pie de Parches Acolchado Gula de acolchado A Para evitar accidentes, no cambie la posicion de la aguja. Cambiar la posici6n de - Singer Legacy C440Q | Instruction Manual and Troubleshooting Guide - Page 78
Cosiendo Puntada Acolchado Apariencia Manual (No. 160) Use hilo de nylon o hilo delgado que combine o se mezcle bien con la tela en la cubierta. Ponga hilo que contraste al color - Singer Legacy C440Q | Instruction Manual and Troubleshooting Guide - Page 79
Cosiendo PEGADO DE BOTONES Seleccione el estilo de ojal que desee coser. Esta maquina puede coser 12 tipos de ojales. 18. Ojal de refuerzo (amplio) 19. Ojal de refuerzo (estrecho) 20. Ojal de cerradura 21. Ojal de cerradura con cruce 22. Ojal de cerradura conico 23. Ojal de extremo redondo ( - Singer Legacy C440Q | Instruction Manual and Troubleshooting Guide - Page 80
7. La m6quina coser el ojal en el orden mostrado a continuacion y se detendra autornaticamente despues de coserlo. O 12 34 5 6 11 2 3 4 20 2 3 4 5 INT 21 2 3 22 2 Avk Si 23 8. Levante el pie prensatelas para guitar la tela. 9. Use un descosedor para abrir el centro del ojal, - Singer Legacy C440Q | Instruction Manual and Troubleshooting Guide - Page 81
Cosiendo OJAL ATADO Un ojal atado proporciona un toque profesional a prendas de sastrerta, como trajes, abrigos y sacos. 29. Ojal atado Pie de Ojales 29 0 1. Corte un pedazo de tela de 2.5 cm (1") de ancho, 1 cm (1/3") mas largo que el ojal terminado. Hilvane un parche de modo que Ia Ilnea de - Singer Legacy C440Q | Instruction Manual and Troubleshooting Guide - Page 82
10. Doble la tela y cosa a lo largo de las costuras en cada lado, solo el ancho de una aguja de la linea de la puntada original. Quite el hilvanado. c. Lado reverso de la tela 11. Doble la tela a lo largo del extremo del ojal y cosa extremos triangulares en la linea de puntada original. Cosiendo at - Singer Legacy C440Q | Instruction Manual and Troubleshooting Guide - Page 83
Cosiendo PATRON DECORATIVO CONTINUO Use el Pie Satin para patrones de puntada decorativa continua. El pie tiene una ranura debajo que permite que las puntadas de satin (u otras puntadas muy juntas) pasen con libertad debajo del pie. No. 38-199 Pie Satin (B) NOTA: La ilustracion a la derecha muestra - Singer Legacy C440Q | Instruction Manual and Troubleshooting Guide - Page 84
el primer hilo como de costumbre. 3. Ensarte el ojo izquierdo de la aguja de adelante para atras. 0 Para evitar accidentes: a. Use solo agujas dobles SINGER® con esta maquina. Otras podrian romperse. b. El ensartador de aguja no puede usarse. Ensarte cada ojo de la aguja doble a mano. 10. Presione - Singer Legacy C440Q | Instruction Manual and Troubleshooting Guide - Page 85
agDOCCXDO 000@0008 @COXXE 80e(DOCDO 800 (a) a b c I Sinrger 0 080@@e0C) OCCUD@CO CXDOCCXDOg C @eXaX( ~X))(2®, A */ e Cs • • 0 i177 Cs 6, Aa AB I Singeri 0 ((CaDmpOeoaXcsmoEemDoaceX:iog)) 000 (€1 ) A Iva I Singer' 0 COMCCOD Cog@eeE0aa0Cse3oe0c0m(u8aee8) A a SECUENCIADO - Singer Legacy C440Q | Instruction Manual and Troubleshooting Guide - Page 86
Secuenciado Cuando regresa a Ia Pantalla Secuencia, Ia Ultima letra ingresada sera mostrada en el lado izquierdo de la pantalla LCD. NOTA: 1. Si es seleccionada una letra, qua tenga una alineaciOn To diferente (como Ia "g'), el ancho y largo de otras letras se ajusta en proporciOn autoingticamente - Singer Legacy C440Q | Instruction Manual and Troubleshooting Guide - Page 87
despues de haber seleccionado patrones o letras. • 2. Seleccione una de las dos memorias presionando directamente. (Para cancelar, presione el botOn "X") Singer Sewing 0 ecuaecoc) CODOCOD8 CEMOSCO CO@CDCXD @GO 413 ) A alma./ 06i177 Cs • CIB ed 7.0 14.0 • amS 06 2 X NOTA: Si la - Singer Legacy C440Q | Instruction Manual and Troubleshooting Guide - Page 88
Secuenciado Para Recordar una Secuencia Memorizada 1. Presione el botOn Cargar en la Pantalla Secuencia. 2. Las memorias se indican con nUmeros. Presione la secuencia/Memoria deseada. 06 Cs 06 2 3. Cuando el nOmero de archivo esta resaltado, presione 'V". 4. La secuencia cargada se muestra en el - Singer Legacy C440Q | Instruction Manual and Troubleshooting Guide - Page 89
Mensajes Emergentes Levantar Aguja Si la aguja esta en posicion abajo y necesita levantarse antes que la funciOn IN pueda ejecutarse, se muestra este mensaje. Levante Ia aguja y presione el botOn "J" para cerrar el mensaje. Ajuste para Aguja Doble Aparece este mensaje cuando se activa el - Singer Legacy C440Q | Instruction Manual and Troubleshooting Guide - Page 90
m A reducir elriesgo de choque electrico, desconecte la clavila del tomacorriente antes de realizar cualquier labor de mantenimiento. LIMPIEZA Si se acumulan restos de hilo y pelusa en el gancho, esto interterira con una buena operaciOn de la maquina. Revise con regularidad y limpie el - Singer Legacy C440Q | Instruction Manual and Troubleshooting Guide - Page 91
Consejos Utiles PROBLEMA CAUSA CORRECCION Se rompe el hilo superior Maquina mal ensartada. Hilo enredado en la bobina. Aguja mal colocada. Demasiada tension en el hilo. Hilo de calibre incorrecto o mala calidad. Vuelva a ensartar la maquina. Quite en enredo y reensarte la bobina. Vuelva a - Singer Legacy C440Q | Instruction Manual and Troubleshooting Guide - Page 92
Voltaje nominal 100-240V -50/60Hz 55W LED 800 rpm m8ximo 241 512 310 8.4 C-9001 DC 15V, max. 3mA Especificacion Tecnica • Las especificaciones tecnicas y este Manual de instrucciones puede cambiar sin previo aviso. 0 - Singer Legacy C440Q | Instruction Manual and Troubleshooting Guide - Page 93
MANUEL D'INSTRUCTIONS C440 C440Q SOCISS Sele08 n D SINGER - Singer Legacy C440Q | Instruction Manual and Troubleshooting Guide - Page 94
etre respectees, y compris les suivantes : Lisez attentivement toutes les instructions avant d'utiliser cette machine a coudre a usage domestique. Conservez ces instructions pres de la machine a titre de commodite. Veillez a les transmettre avec la machine si celle-ci est donnee a une autre personne - Singer Legacy C440Q | Instruction Manual and Troubleshooting Guide - Page 95
par le fabricant ou son agent de service, ou toute autre personne qualifiee, afin d'eviter les risques. • Cette machine est equipee d'une double isolation. N'utilisez que des pieces detachees d'origine. Voir les instructions relatives a l'entretien des appareils a double isolation. CONSERVER - Singer Legacy C440Q | Instruction Manual and Troubleshooting Guide - Page 96
instructions etape-par-etape facile a comprendre. De ('aide supplementaire, selon les regions, peut etre trouvee sur le Web a www.singer.com. Nous sommes press a vous aider et nous esperons que vous aimerez votre machine a coudre SINGER du Pied Presseur Enlever le Support du Pied Presseur 8 8 - Singer Legacy C440Q | Instruction Manual and Troubleshooting Guide - Page 97
Table des Matieres REGLAGE DE LA MACHINE COUTURE COUTURE Demarrage de la Couture O0 Utiliser Contextuels 43 27 27 28 28 30 ENTRETIENT 30 30 Entretient 44 31 Nettoyage 44 31 Support de Canette 44 31 Compartiment du Crochet et des Griffes d'Entrainement 44 31 Conseil Utiles 45 - Singer Legacy C440Q | Instruction Manual and Troubleshooting Guide - Page 98
24. Levier d'enfile-aiguille 25. Levier de deverrouillage du pied presseur 26. Vis du pied presseur 27. Support du pied presseur 28. Pied presseur 29. Griffes d'entraTnement 30. Vis de l'aiguille 31. Guide-fil de raiguille 32. Aiguille 33. Plaque d'aiguille 34. Couvercle de la canette 35. Verrou du - Singer Legacy C440Q | Instruction Manual and Troubleshooting Guide - Page 99
d'aiguilles 2. 5 canettes SINGER type 15 (transparente) (dont une dans la machine) 3. Decouseur 4. Brosse . Pied point droit / patchwork (G) 18. Pied pour coudre un bouton (M) 19. Pied ouvert (N) 20. Guide de piquage 21. Filet pour le fil 22. Rheostat 23. Cordon d'alimentation 1 C) 7 11 12 O - Singer Legacy C440Q | Instruction Manual and Troubleshooting Guide - Page 100
support, remonter le support le plus haut possible a partir du bas de la barre du pied. 4. Serrez la vis du pied presseur solidement a l'aide dun tournevis. Remarque: Cette machine a coudre est de type a pied bas. Lorsque vous magasinez pour des pieds presseurs et des accessoires optionnels SINGER - Singer Legacy C440Q | Instruction Manual and Troubleshooting Guide - Page 101
une grosseur de flu et une aiguille de style et grosseur approprie au tissu 8 coudre. Les aiguilles de marque SINGER° sont recommandees pour cette machine. Tissu Tissus legers: - cotons legers, voile, serge, sole, mousseline etc. Tissus d'epaisseur moyenne: - Lainage , coton, satin, corduroy leger - Singer Legacy C440Q | Instruction Manual and Troubleshooting Guide - Page 102
ensuite la fiche de la prise electrique. 00 S. /I /1 0 2 RENSEIGNEMENT SUR LA FICHE POLARISEE: POUR LES UTILISATEURS DES TATS UNIS ET DU CANADA Cette machine a coudre utilise une fiche polarisee (une lame est plus large que l'autre). Afin de reduire les risques de choc electrique, cette fiche ne - Singer Legacy C440Q | Instruction Manual and Troubleshooting Guide - Page 103
deplace vers la position de la prochaine couture, appuyez sur le bouton du coupe-fil tout en cousant. Les indicateur DEL (A & E) resteront allumes et la machine coupera les fils apres que la couture ou la sequence sera terminee. A • N'appuyez pas sur ce bouton lorsqu'il n'y a pas de tissu sous le - Singer Legacy C440Q | Instruction Manual and Troubleshooting Guide - Page 104
couches de tissu, vous pouvez surelever le pied presseur ce qui permettra d'installer le tissu plus facilement en dessous du pied presseur. Remarque: la machine ne demarrera pas lorsque le pied presseur est love (saufpour le bobinage de la canette). Coupe-fil (I) Utilisez-le si le bouton coupe-fl - Singer Legacy C440Q | Instruction Manual and Troubleshooting Guide - Page 105
normale. Le pied presseur recommande peut changer, dependent du motif selectionne. L'utilisation des pieds presseurs inclus avec votre machine est decrite dans ce manuel d'instruction. d. Largeur du Point/Position d'aiguille e. Longueur du Point/Densite A a B i .a . CD5CDSCD OSCOS b c ito elA - Singer Legacy C440Q | Instruction Manual and Troubleshooting Guide - Page 106
est non valide, vous entendrez un timbre sonore et le dernier motif selectionner sera toujours afficher. OPTIONS DE COUTURE D'UN MOTIF Votre machine selectionnera automatiquement les reglages optimums pour chaque point. Vous pouvez ajuster tous les points selon vos desirs. Le reglage n'affecte que - Singer Legacy C440Q | Instruction Manual and Troubleshooting Guide - Page 107
durable et de belle apparence assurezvous que les fils se rejoignent entre les deux epaisseurs de tissu. Lorsque vous selectionne un point, cette machine regle la tension du fil automatiquement. Cependant, vous pouvez changer le reglage de la tension de la facon suivante: Pour augmenter la tension - Singer Legacy C440Q | Instruction Manual and Troubleshooting Guide - Page 108
a Pecran. Appuyez sur le bouton "v" et refaite la calibration. Version du Logiciel La version du logiciel de cette machine a broder sera indiquee en bas de cet ecran. • ( re 1 >< 4 I • PP- 1 • • • 1k 2 3 4 • • • n cc] • -- 416. 6, O 5 3 CC 0 • • • El 0002 20160107 (exemple - Singer Legacy C440Q | Instruction Manual and Troubleshooting Guide - Page 109
MACHINE Enfilage de Ia Machine PREPARATION DE LA CANETTE Assurez-vous d'utiliser uniquement des canettes (transparentes) SINGER@ Classe 15 dans cette machine fil dans le guide a partir de l'ouverture de devant. 2. Amenez le fil vers la droite et faites-le passer a travers le guide-fil depuis l' - Singer Legacy C440Q | Instruction Manual and Troubleshooting Guide - Page 110
canette dans le support de canette, en vous assurant que la canette tourne dans le sens des aiguilles dune montre. Enfilage de Ia Machine 1.)- ..----1 2. couvercle de canettejusqu'a ce qu'il s'enclenche. Remarque: cette machine peut commencer a coudre sans recuperer manuellement le fil de canette. - Singer Legacy C440Q | Instruction Manual and Troubleshooting Guide - Page 111
le bas le long de la fente. 7. Tirez le fil a travers le guide-fil depuis l'ouverture droite. 8. Passez le fil dans le chas de l'aiguille de l'avant vers l'arriere. Consultez la page suivante pour les instructions sur la facon d'utiliser l'enfile-aigullie integre. FR 4 00000 00000 I I REGLAGE DE - Singer Legacy C440Q | Instruction Manual and Troubleshooting Guide - Page 112
. 5. Inserez le fil dans le guide, en vous assurant que le fil se retrouve sous le crochet d'enfilage. Enfilage de Ia Machine _ 0 0 6. Tenez le fil long, recuperez le fil de canette comme suit. 1. Inserez la canette dans le support de canette, comme indique a la page 18, mais ne coupez pas le fil. - Singer Legacy C440Q | Instruction Manual and Troubleshooting Guide - Page 113
Demarrage de la Couture 00 UTILISER CHAQUE POINT 0. Le point droit position centrale. • Pour la surpiqare, point de couture de base, couture de fermeture glissiere, etc. 1. Point zigzag • Pour le surjet, les appliques, etc. 2. Ourlet Invisible 3. Surjeter 4. Surjeter un tissu extensible, point - Singer Legacy C440Q | Instruction Manual and Troubleshooting Guide - Page 114
fin d'une couture, appuyer sur le bouton de Marche/Arret pour arreter la machine ou relacher le rheostat. 5. Appuyez sur le bouton du Coupe-fil. 6. , utilisez plutot le coupe-fil qui se trouve sur le cote gauche de la machine. (Voir page 12) Ne jamais utiliser le bouton du Coupe-fl lorsque vous - Singer Legacy C440Q | Instruction Manual and Troubleshooting Guide - Page 115
du point d'ArrOt. La lumiOre DEL s'allumera. 2. DObutez la couture. La machine coudra des points d'arrOt et s'arretera automatiquement. O O+, 01) oOce. / recommencer a coudre. Largeur de Ia Distance de Couture Les lignes guide sur la plaque aiguille indique la distance 8 partir de la position - Singer Legacy C440Q | Instruction Manual and Troubleshooting Guide - Page 116
et quelques points vers I'avant et s'arretera de coudre automatiquement. 4. Appuyez et relacher le bouton du Coupe-fil. LA COUTURE AU POINT ZIGZAG Votre machine peut coudre un point zigzag de differente largeurs et longueurs en changeant les reglages de la largeur et de la longueur du point. No - Singer Legacy C440Q | Instruction Manual and Troubleshooting Guide - Page 117
Endroit du tissu. REMARQUE: faites un essai de couture sur une retaille de tissu similaire a celui a coudre de Eason dgterminer le meilleur emplacement du guide du pied presseur. Vous pouvez aussi ajuster la largeur el la longueur du point pour regler le point tel que dgsirer pour le tissu a coudre - Singer Legacy C440Q | Instruction Manual and Troubleshooting Guide - Page 118
(C) REMARQUE: /'illustration a droite montre a quoi ressemble le point lorsque cousu sur le rebord du tissu. Alignez et appuyer le tissu sur la tige guide du pied surjet en vous assurant que l'aiguille transperce le tissu tres pros du rebord. No. 1 (Largeur = 5.0) est utilise pour prevenir que le - Singer Legacy C440Q | Instruction Manual and Troubleshooting Guide - Page 119
Couture RAPIECAGE EN FOLIE Creez des pieces interessantes en cousant des points decoratifs par-dessus des coutures. Essayez de melanger different type de tissu pour plus de varietes. No. 0 Pied Tout-Usage (A) 1. Placez deux pieces de tissu les cOtes endroit ensembles et coudre une longue ligne de - Singer Legacy C440Q | Instruction Manual and Troubleshooting Guide - Page 120
presseur. 5. Tenez le fil superieur, tirez la quantite de tissu requis vers l'arriere et abaisser le levier du pied presseur. 6. Debutez la couture. La machine fera deux points. 7. Repetez cela autant de fois qu'il le Taut pour terminer un rang de couture au point de faufil. REMARQUE: pour prevenir - Singer Legacy C440Q | Instruction Manual and Troubleshooting Guide - Page 121
de soulevement pour obtenir un espacement entre un bouton et le tissu. InsOrez par le devant du pied, une Opingle droite ou une aiguille de machine a coudre dans la rainure centrale du pied, pour obtenir un espace de soulOvement. Coudre au-dessus de l'Opingle ou de l'aiguille. Pour obtenir un - Singer Legacy C440Q | Instruction Manual and Troubleshooting Guide - Page 122
glissiere. Enclenchez la tige du cOte gauche du pied presseur dans le support du pied presseur pour coudre sur le cOte droit de la fermeture glissiere le pied presseur, ce qui pourrait briser l'aiguille ou endommage la machine. Si vous devez changer la position d'aiguille assurez-vous de la - Singer Legacy C440Q | Instruction Manual and Troubleshooting Guide - Page 123
ce qui pourrait avoir comme r6sultat que I'aiguille se brise ou endommage la machine. Joindre des pieces de tissus Joindre des places de tissus en utilisant le le tissu de soutien). Utilisez le guide de piquage ne l'insarant clans le trou du support du pied presseur et ajuster-le a l'espacement desires. a - Singer Legacy C440Q | Instruction Manual and Troubleshooting Guide - Page 124
et autres O applications. Pied a boutonniere. 1. Ajustez Ia plaque-guide du Pied a Boutonniere O dependamment de la longueur de point de renfort En* 4. Abaissez completement le levier de la boutonniere. REMARQUE: la machine ne demarrera pas la couture sile Levier de la Boutonniere n'est pas - Singer Legacy C440Q | Instruction Manual and Troubleshooting Guide - Page 125
vers vous. REMARQUE: nous vous suggerons d'utiliser un entoilage en dessous du tissu. 5. Abaissez completement le levier de la boutonniere. REMARQUE: la machine ne demarrera pas la couture sile Levier de la Boutonniere n'est pas completement abaisse ou quo le Pied a Boutonniere n'est pas dans la - Singer Legacy C440Q | Instruction Manual and Troubleshooting Guide - Page 126
FR 7. La machine va coudre la boutonniere dans l'ordre tel qu'illustre et s'arretera automatiquement a la fin de la couture. 0 34 5 18 19 1 2 3 20 2 3 INT 21 2 3 22 2 Si I g - Singer Legacy C440Q | Instruction Manual and Troubleshooting Guide - Page 127
. a. L'endroit du tissu b. L'envers du tissu 2. Abaissez le levier de la boutonniere et cousez la boutonniere. (Voir la page precedente) La machine va coudre la boutonniere dans l'ordre tel qu'illustre et s'arretera automatiquement a la fin de la couture. 0 3. Soulevez le pied presseur pour - Singer Legacy C440Q | Instruction Manual and Troubleshooting Guide - Page 128
0 30 30 CEillet Pied point Bourdon (B) 1. Inserez le tissu en dessous du pied presseur et abaisser O le pied presseur. Debutez la couture. La machine coudra l'ceillet et s'arretera automatiquement. 2. Appuyez sur le bouton du Coupe-fil et soulevez le pied presseur. 3. Faites un trou dans le - Singer Legacy C440Q | Instruction Manual and Troubleshooting Guide - Page 129
Couture COUTURE EN CONTINUE DE MOTIF DECORATIF Utilisez le Pied point Boudon pour les coutures en continue de motif decoratif. Ce pied a une rainure en dessous ce qui permet aux points Bourdon (ou tout autre point a couture tres rapproche) de glisser facilement en dessous du pied. No. 38-199 Pied - Singer Legacy C440Q | Instruction Manual and Troubleshooting Guide - Page 130
les accidents: a. Utilisez seulement des aiguilles doubles de marque SINGER® sur cette machine. D'autres types d'aiguille pourraient se briser. b. N'utilisez bobine de fil. 6. Accrochez le second fil par l'arriere du guide fil. 7. Enfilez le second fil comme le premier. 8. Pour de meilleur resultat, ne placez - Singer Legacy C440Q | Instruction Manual and Troubleshooting Guide - Page 131
agDOCCXDO CO@C0080 @COXXXE @CDOOCDO 800 (a) a b c Sinrger 980@@MO OCCUD@CO CXDOCCXDOg 0aa0a0(00~0)®(®0, A */ e Cs • • 0 i177 Cs a oescil SS 4,C)0 Aa AB 4 Singer' 0 (@aDOCe0Oco0Mc0Mo0o@mg 000000@0 000 (®) A Iva 4 Singer' 0 00c@a0o0cm0p0um00me0m0ee(o0ameo0) A a CREER UNE SEQUENCE - Singer Legacy C440Q | Instruction Manual and Troubleshooting Guide - Page 132
Curseur. .81 G • pII Inserez un motif ou une lettre. La machine inserera un motif ou une lettre suivant le motif ou la lettre en Appuyez et relacher rapidement (moins de 0.5 sec.) le bouton Supprimer (d). La machine supprimera le motif ou la lettre et le curseur se deplacera sur le motif - Singer Legacy C440Q | Instruction Manual and Troubleshooting Guide - Page 133
4. Editez la lettre telle que decris a la page precedente. Aa AB Singer Sewing 0 ecuaecoc) CODOCOD8 CEMOSCO CO@CDCXD COD ( 43 ) A alma./ Une sequence memoriser demeure dans la memoire meme si vous eteignez la machine. Pour Memorisez ou Sauvegardez une Sequence. 1. Appuyez sur le bouton - Singer Legacy C440Q | Instruction Manual and Troubleshooting Guide - Page 134
couture au debut de la sequence et coudra cette sequence a repetition. REMARQUE: en appuyant, tout en cousant, sur le bouton du Coupe-fil, la machine s'arretera a la fin de la sequence et coupera les fits. Mode de Sequence Unique En appuyant sur le bouton de Sequence Unique, I'icOne se transformera - Singer Legacy C440Q | Instruction Manual and Troubleshooting Guide - Page 135
selectionnez un de ces motifs, un message contextuel apparattra a l'ecran pour vous avertir de ce probleme. Appuyez sur le bouton "✓". ► Surcharge du Moteur Principal Si vous cousez sur un tissu tres epais ou que la machine se bloque, it est possible que le moteur principal soit surcharge et la - Singer Legacy C440Q | Instruction Manual and Troubleshooting Guide - Page 136
n'a pas besoin d'Otre remplacee. Dans le cas improbable oil elle ne s'allumerait pas, alter a www. singer.corn pour plus d'information sur le service de votre machine. II n'est pas n6cessaire de lubrifier cette machine. Support de Canette Enlevez le couvercle de la canette et la canette. Nettoyez le - Singer Legacy C440Q | Instruction Manual and Troubleshooting Guide - Page 137
Conseils Utiles PROBLEM CAUSE CORRECTIF Page Le fil superieur se La machine n'est pas enfilee correctement. Reenfilez la machine. 19 casse Fil entortille . 17 Poussiere ou peluche dans le support de Nettoyez le support. 45 canette. La machine saute des points Aiguille mal inseree. - Singer Legacy C440Q | Instruction Manual and Troubleshooting Guide - Page 138
o Tension nominale 100-240V -50/60Hz Consommation nominale 55W Eclairage DEL Vitesse de couture 800 tr/min maximum Dimensions de la machine Longueur (mm) 241 Largeur (mm) 512 Hauteur (mm) 310 Poids net (kg) 8.4 Rheostat Modele Voltage recommande C-9001 15V DC, max. 3mA - Singer Legacy C440Q | Instruction Manual and Troubleshooting Guide - Page 139
Authorised Representative VSM GROUP AB, SVP Worldwide Drottninggatan 2, SE-56184, Huskvarna, SWEDEN SINGER is the exclusive trademark of The Singer Company Limited S.a.r.l. or its Affiliates. ©2016 The Singer Company Limited S.a.r.l. or its Affiliates. All rights reserved. co Observe por favor que - Singer Legacy C440Q | Instruction Manual and Troubleshooting Guide - Page 140
471 02 47-476 • English / Spanish / French • InHouse • O2016 The Singer Company Limited S.a.r.l. or its Affiliates • All rights reserved • Printed in Taiwan on environmentally friendly paper.
-
 1
1 -
 2
2 -
 3
3 -
 4
4 -
 5
5 -
 6
6 -
 7
7 -
8
-
9
-
10
-
11
-
12
-
13
-
14
-
15
-
16
-
17
-
18
-
19
-
20
-
21
-
22
-
23
-
24
-
25
-
26
-
27
-
28
-
29
-
30
-
31
-
32
-
33
-
34
-
35
-
36
-
37
-
38
-
39
-
40
-
41
-
42
-
43
-
44
-
45
-
46
-
47
-
48
-
49
-
50
-
51
-
52
-
53
-
54
-
55
-
56
-
57
-
58
-
59
-
60
-
61
-
62
-
63
-
64
-
65
-
66
-
67
-
68
-
69
-
70
-
71
-
72
-
73
-
74
-
75
-
76
-
77
-
78
-
79
-
80
-
81
-
82
-
83
-
84
-
85
-
86
-
87
-
88
-
89
-
90
-
91
-
92
-
93
-
94
-
95
-
96
-
97
-
98
-
99
-
100
-
101
-
102
-
103
-
104
-
105
-
106
-
107
-
108
-
109
-
110
-
111
-
112
-
113
-
114
-
115
-
116
-
117
-
118
-
119
-
120
-
121
-
122
-
123
-
124
-
125
-
126
-
127
-
128
-
129
-
130
-
131
-
132
-
133
-
134
-
135
-
136
-
137
-
138
-
139
-
140
 |
 |
a
INSTRUCTION
MANUAL
C440
C440Q
CD
(IP
O
0
O
0
0
SOCISS
SeSOO
n
SINGER