Singer Legacy C440Q Instruction Manual and Troubleshooting Guide - Page 29
Thread, Shank
 |
View all Singer Legacy C440Q manuals
Add to My Manuals
Save this manual to your list of manuals |
Page 29 highlights
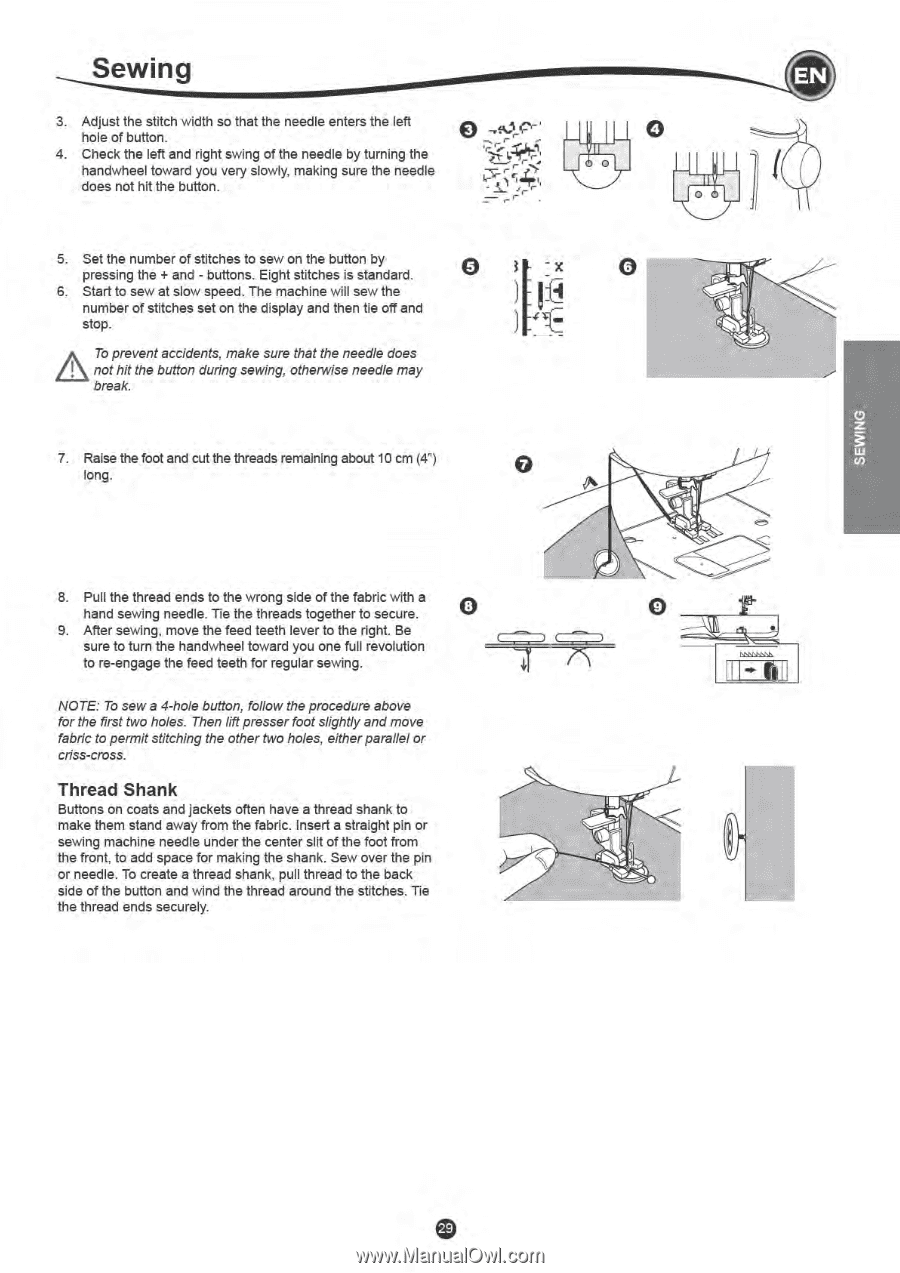
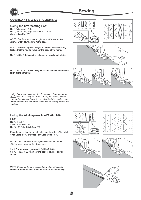
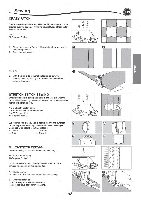
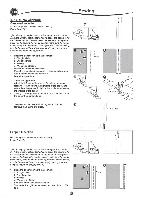
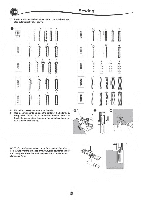
Sewing 3. Adjust the stitch width so that the needle enters the left hole of button. 4. Check the left and right swing of the needle by turning the handwheel toward you very slowly, making sure the needle does not hit the button. 5. Set the number of stitches to sew on the button by pressing the + and - buttons. Eight stitches is standard. 6. Start to sew at slow speed. The machine will sew the number of stitches set on the display and then tie off and stop. A To prevent accidents, make sure that the needle does not hit the button during sewing, otherwise needle may break. O O 0 7. Raise the foot and cut the threads remaining about 10 cm (4") long. 0 8. Pull the thread ends to the wrong side of the fabric with a hand sewing needle. Tie the threads together to secure. 0 9. After sewing, move the feed teeth lever to the right. Be ) sure to turn the handwheel toward you one full revolution to re-engage the feed teeth for regular sewing. yl NOTE: To sew a 4-hole button, follow the procedure above for the first two holes. Then lift presser foot slightly and move fabric to permit stitching the other two holes, either parallel or criss-cross. Thread Shank Buttons on coats and jackets often have a thread shank to make them stand away from the fabric. Insert a straight pin or sewing machine needle under the center slit of the foot from the front, to add space for making the shank. Sew over the pin or needle. To create a thread shank, pull thread to the back side of the button and wind the thread around the stitches. Tie the thread ends securely. IS.NSsCONI.
-
 1
1 -
2
-
3
-
4
-
5
-
6
-
7
-
8
-
9
-
10
-
11
-
12
-
13
-
14
-
15
-
16
-
17
-
18
-
19
-
20
-
21
-
22
-
23
-
 24
24 -
 25
25 -
 26
26 -
 27
27 -
 28
28 -
 29
29 -
 30
30 -
 31
31 -
 32
32 -
 33
33 -
 34
34 -
35
-
36
-
37
-
38
-
39
-
40
-
41
-
42
-
43
-
44
-
45
-
46
-
47
-
48
-
49
-
50
-
51
-
52
-
53
-
54
-
55
-
56
-
57
-
58
-
59
-
60
-
61
-
62
-
63
-
64
-
65
-
66
-
67
-
68
-
69
-
70
-
71
-
72
-
73
-
74
-
75
-
76
-
77
-
78
-
79
-
80
-
81
-
82
-
83
-
84
-
85
-
86
-
87
-
88
-
89
-
90
-
91
-
92
-
93
-
94
-
95
-
96
-
97
-
98
-
99
-
100
-
101
-
102
-
103
-
104
-
105
-
106
-
107
-
108
-
109
-
110
-
111
-
112
-
113
-
114
-
115
-
116
-
117
-
118
-
119
-
120
-
121
-
122
-
123
-
124
-
125
-
126
-
127
-
128
-
129
-
130
-
131
-
132
-
133
-
134
-
135
-
136
-
137
-
138
-
139
-
140
 |
 |