Singer One Instruction Manual 2 - Page 32
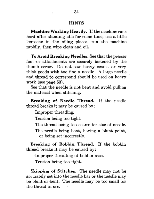
E'3953, Motor, Showing, Grease, Removed
 |
View all Singer One manuals
Add to My Manuals
Save this manual to your list of manuals |
Page 32 highlights
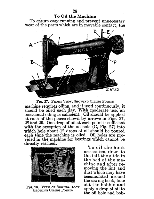
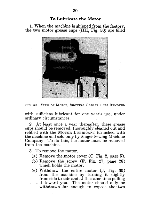
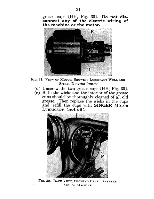
30 To Lubricate the Motor L When the machine is shipped from the factor3r, the two motor grease cups (1111, Fig. 30) are filled E'3953 FIG. 30. VIEW OF MOTOR, SHOWING GREASE CUPS REMOVED with sufficient lubricant for one year's use, under ordinary circumstances. 2. At least once a year thereafter, these grease cups should be removed, thoroughly cleaned out and refilled with the MOTOR LUBRICANT furnished with the machine and sold only by Singer Sewing Machine Company. To do this, the motor must be removed from the machine. 3. To remove the motor. (a) Remove the motor cover (C, Fig. 2, page 5). (b) Remove the screw (F, Fig. 27, page 28) which holds the motor. (c) Withdraw the entire motor (J, Fig. 30) from the machine by turning it slightly from side to side and at the same time pulling it toward. you. The motor should only be withdrawn far enough to expose the two
-
 1
1 -
2
-
3
-
4
-
5
-
6
-
7
-
8
-
9
-
10
-
11
-
12
-
13
-
14
-
15
-
16
-
17
-
18
-
19
-
20
-
21
-
22
-
23
-
24
-
25
-
26
-
 27
27 -
 28
28 -
 29
29 -
 30
30 -
 31
31 -
 32
32 -
 33
33 -
 34
34 -
 35
35 -
 36
36 -
 37
37 -
38
-
39
-
40
-
41
-
42
-
43
-
44
-
45
-
46
-
47
-
48
-
49
-
50
-
51
-
52
-
53
-
54
 |
 |
