Singer One Instruction Manual 17 - Page 44
Adjusting Stitch Length, Adjusting Overedge Cutting Width
 |
View all Singer One manuals
Add to My Manuals
Save this manual to your list of manuals |
Page 44 highlights
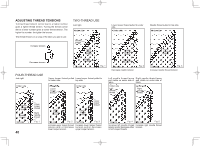
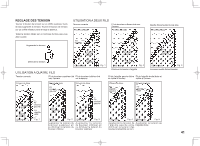
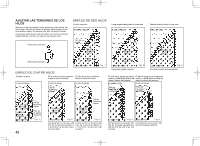
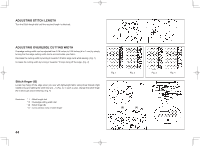
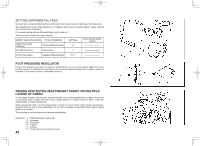
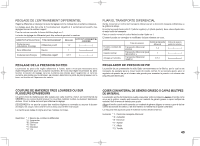
ADJUSTING STITCH LENGTH Turn the Stitch length dial until the required length is obtained. ADJUSTING OVEREDGE CUTTING WIDTH Overedge cutting width can be adjusted from 0.16 inches to 0.28 inches (4 to 7 mm) by simply turning the Overedge cutting width dial to accommodate your fabric. Decrease the cutting width by turning it towards 5 if fabric edge curls while sewing. (Fig. 1) Increase the cutting width by turning it towards 7 if loops hang off the edge. (Fig. 2) Stitch finger (B) Loops may hang off the edge when you sew with lightweight fabric using three threads (right needle only) and setting the width dial at 4 - 5 (Fig. 3). In such a case, change the stitch finger (A) to (B) to get proper stitching. (Fig. 4) Illustration * I : Stitch length dial * II : Overedge cutting width dial * III : Stitch finger (B) * IV : Cross section view of stitch finger Fig. 1 Fig. 2 (B) (A) Fig. 3 Fig. 4 44
-
 1
1 -
2
-
3
-
4
-
5
-
6
-
7
-
8
-
9
-
10
-
11
-
12
-
13
-
14
-
15
-
16
-
17
-
18
-
19
-
20
-
21
-
22
-
23
-
24
-
25
-
26
-
27
-
28
-
29
-
30
-
31
-
32
-
33
-
34
-
35
-
36
-
37
-
38
-
 39
39 -
 40
40 -
 41
41 -
 42
42 -
 43
43 -
 44
44 -
 45
45 -
 46
46 -
 47
47 -
 48
48 -
 49
49 -
50
-
51
-
52
-
53
-
54
-
55
-
56
-
57
-
58
-
59
-
60
-
61
-
62
-
63
-
64
-
65
-
66
-
67
-
68
 |
 |
