Singer Signature Instruction Manual - Page 69
Narrow Braid Cord Foot
 |
View all Singer Signature manuals
Add to My Manuals
Save this manual to your list of manuals |
Page 69 highlights
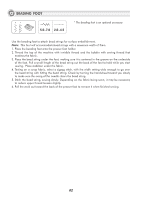
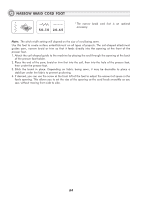
NARROW BRAID CORD FOOT 5 5.0~7.0 2.0~4.5 * The narrow braid cord foot is an optional accessory. Note: The stitch width setting will depend on the size of cord being sewn. Use this foot to create surface embellishment on all types of projects. The coil-shaped attachment guides yarn, narrow braid or trim so that it feeds directly into the opening at the front of the presser foot. 1. Attach the coil-shaped guide to the machine by placing the end through the opening at the back of the presser foot holder. 2. Place the end of the yarn, braid or trim first into the coil, then into the hole of the presser foot, then under the presser foot. 3. Stitch the braid in place. Depending on fabric being sewn, it may be desirable to place a stabilizer under the fabric to prevent puckering. 4. If desired, you can use the screw at the front left of the foot to adjust the amount of space in the foot's opening. This allows you to set the size of the opening so the cord feeds smoothly as you sew, without moving from side to side. 64
-
 1
1 -
2
-
3
-
4
-
5
-
6
-
7
-
8
-
9
-
10
-
11
-
12
-
13
-
14
-
15
-
16
-
17
-
18
-
19
-
20
-
21
-
22
-
23
-
24
-
25
-
26
-
27
-
28
-
29
-
30
-
31
-
32
-
33
-
34
-
35
-
36
-
37
-
38
-
39
-
40
-
41
-
42
-
43
-
44
-
45
-
46
-
47
-
48
-
49
-
50
-
51
-
52
-
53
-
54
-
55
-
56
-
57
-
58
-
59
-
60
-
61
-
62
-
63
-
 64
64 -
 65
65 -
 66
66 -
 67
67 -
 68
68 -
 69
69 -
 70
70 -
 71
71 -
 72
72 -
 73
73 -
 74
74 -
75
-
76
-
77
-
78
-
79
-
80
-
81
-
82
-
83
-
84
-
85
-
86
-
87
-
88
-
89
-
90
-
91
 |
 |
