Singer The SINGER 160 Instruction Manual - Page 28
Control Panel Functions - manual
 |
View all Singer The SINGER 160 manuals
Add to My Manuals
Save this manual to your list of manuals |
Page 28 highlights
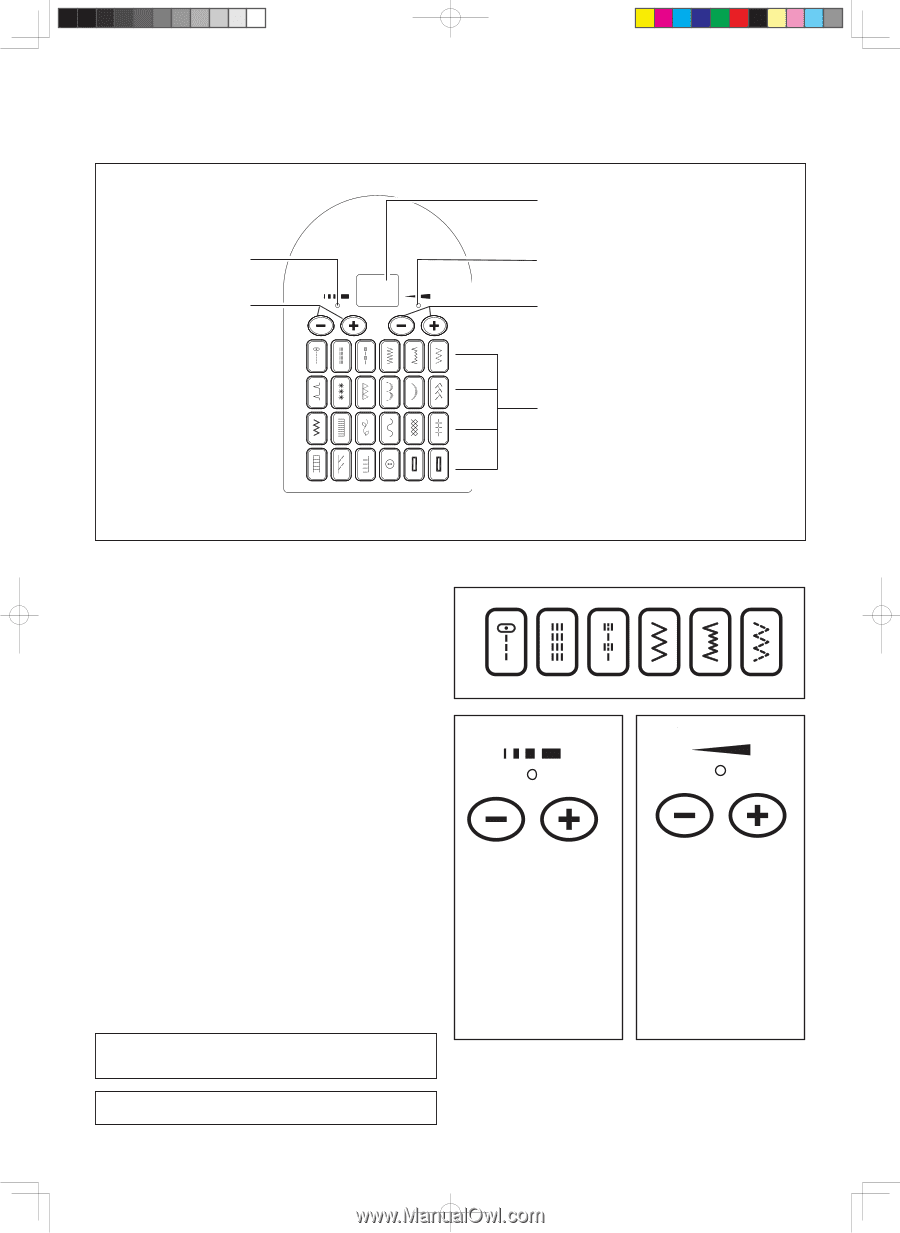
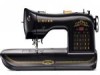
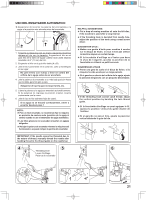
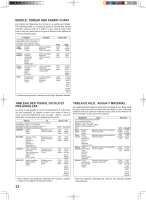
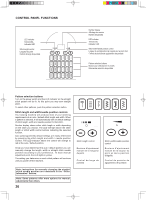
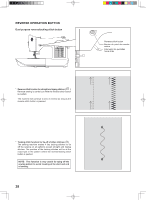
CONTROL PANEL FUNCTIONS LED indicator Témoin DEL Indicador LED Stitch length control Longueur du point Control de largo de puntada Number display Affichage du numéro Número de pantalla LED indicator Témoin DEL Indicador LED Stitch width/needle position control Largeur du point/position de l'aiguille sur le point droit Control de posición de aguja/ancho de puntada Pattern selection buttons Bouton pour sélectionner les motifs Botones de selección de puntada Pattern selection buttons Turn on the power switch and the LED indicator on the straight stitch pattern will be lit. At this point you may sew straight stitch. To select other patterns, push the pattern selection button. Stitch length and width/needle position controls Your sewing machine will produce most of your stitching requirements at an auto / default stitch length and width. When a pattern is selected, it will automatically sew at default settings of stitch length, width and needle position for that stitch. Number display shows either stitch length or width depending on the stitch you choose. The LED will light above the stitch length or stitch width control buttons indicating the selected function. Auto (preprogrammed) default settings are easily determined by pressing the stitch length and width / needle position Control. The LED indicator above the control will change to red at the auto / default position. Once you have determined the auto / default position you can manually change the length, width or straight stitch needle postition according to your preference. At each manual adjustment point, the LED lights in yellow. The setting you determine on each stitch pattern will continue until you power off the machine. Note: Instructions for manually changing the straight stitch needle position are contained in the "Other Information" Section. Note: Some patterns offer more options for manual adjustments than others. 26 Stitch length control Boutons d'ajustement manuel de la longueur du point. Control de largo de puntada Stitch width/needle position control Boutons d'ajustement manuel de la largeur du point et de la position d'aiguille. Control de posición de aguja/ancho de puntada
-
 1
1 -
2
-
3
-
4
-
5
-
6
-
7
-
8
-
9
-
10
-
11
-
12
-
13
-
14
-
15
-
16
-
17
-
18
-
19
-
20
-
21
-
22
-
 23
23 -
 24
24 -
 25
25 -
 26
26 -
 27
27 -
 28
28 -
 29
29 -
 30
30 -
 31
31 -
 32
32 -
 33
33 -
34
-
35
-
36
-
37
-
38
-
39
-
40
-
41
-
42
-
43
-
44
-
45
-
46
-
47
-
48
-
49
-
50
-
51
-
52
-
53
-
54
-
55
-
56
-
57
-
58
-
59
-
60
 |
 |