Snapper RP217250 Operation Manual - Page 21
Maintenance, Mower Blade Replacement, WARNING - ninja mower
 |
View all Snapper RP217250 manuals
Add to My Manuals
Save this manual to your list of manuals |
Page 21 highlights
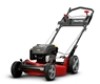
Maintenance Mower Blade Replacement ! WARNING ! DO NOT attempt any maintenance, adjustments or service with engine and blade running. STOP engine and blade. Disconnect spark plug wire and secure away from spark plug. Engine and components are HOT. Avoid serious burns, allow sufficient time for all components to cool. Wear heavy leather gloves when handling or working around cutting blades. Blades are extremely sharp and can cause severe injury. A B C Standard Blade Wear Limit 1. Inspect the blade (Figure 19) frequently for signs Figure 20: Ninja blade wear limits of excessive wear or damage: (A) New blade Blade Sharpening (B) Wear limit (notch starts) 1. Disconnect the spark plug wire and secure the end (C) Dangerous condition! Do not use on the away from the plug. mower! Replace with a new blade. n A tio B for uc C Not prod Figure 19: Standard blade wear limits e Ninja Blade Wear Limit R 1. Inspect the blade (Figure 20) frequently for signs 2. Tilt the mower up on its rear wheels. Do not tilt the mower with the spark plug or carburetor down. IMPORTANT: Drain the fuel tank before tipping the mower. DO NOT tip the machine with the carburetor or spark plug down. Oil from the crankcase will saturate the air filter and cause the engine to be hard to start or not start at all. If contamination does occur, the air filter will have to be replaced. 3. Remove the blade (B, Figure 21). Make sure that blade hub is seated between flanges A C of excessive wear or damage: (A) New blade (B) Wear limit (cracks or notches begin to appear on tip) (C) Dangerous condition! Do not use on the B mower! Replace with a new blade. ! WARNING ! DO NOT use a cutting blade that shows signs of excessive wear or damage. Refer to the Section enti- tled "MOWER BLADE REPLACEMENT" for proper blade inspection and service procedures. D E Figure 21: Removing the mower blade en 21
-
 1
1 -
2
-
3
-
4
-
5
-
6
-
7
-
8
-
9
-
10
-
11
-
12
-
13
-
14
-
15
-
 16
16 -
 17
17 -
 18
18 -
 19
19 -
 20
20 -
 21
21 -
 22
22 -
 23
23 -
 24
24 -
 25
25 -
 26
26 -
27
-
28
-
29
-
30
-
31
-
32
-
33
-
34
-
35
-
36
-
37
-
38
-
39
-
40
-
41
-
42
-
43
-
44
-
45
-
46
-
47
-
48
-
49
-
50
-
51
-
52
-
53
-
54
-
55
-
56
-
57
-
58
-
59
-
60
-
61
-
62
-
63
-
64
 |
 |
