Snapper RP217250 Operation Manual - Page 23
Maintenance, Driven and Drive Disc Service, WARNING
 |
View all Snapper RP217250 manuals
Add to My Manuals
Save this manual to your list of manuals |
Page 23 highlights
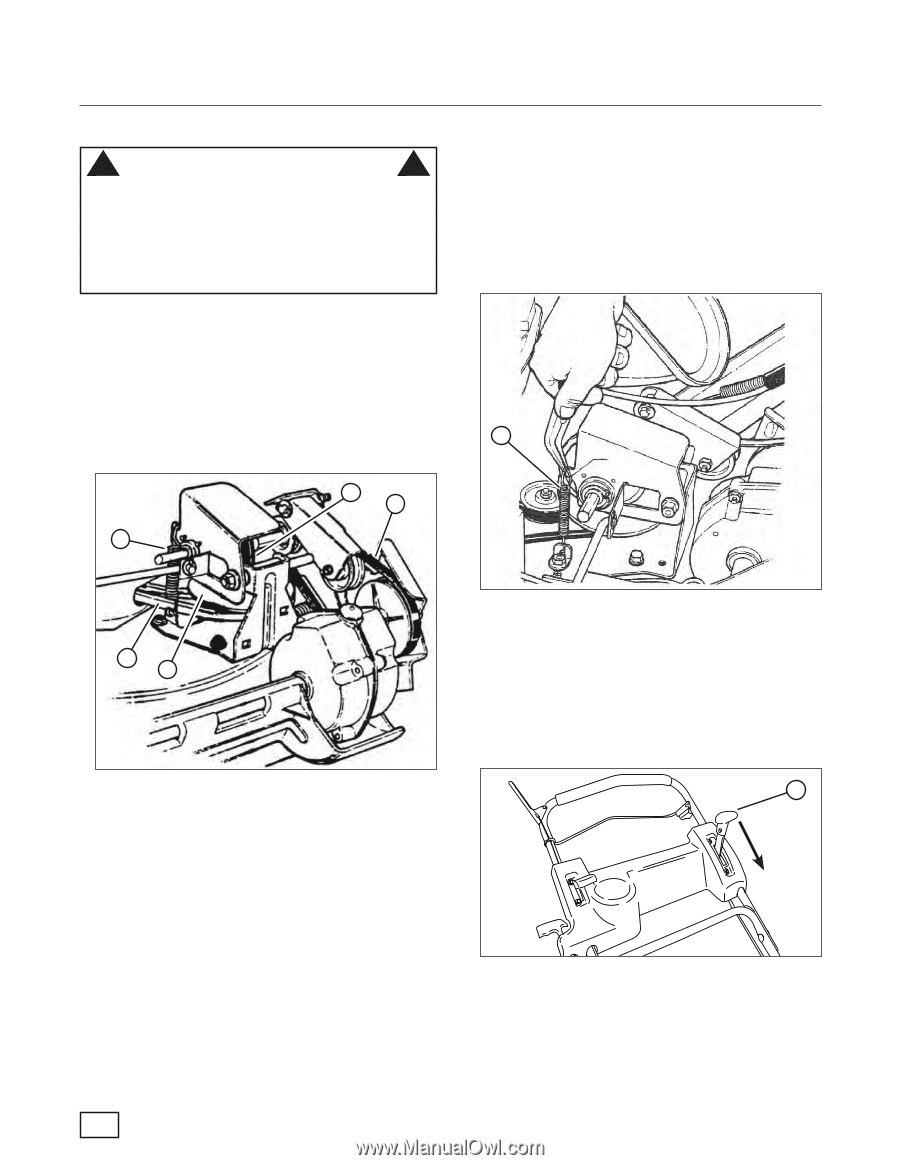
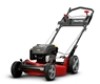
Maintenance Driven and Drive Disc Service ! WARNING ! DO NOT attempt any maintenance, adjustments or service with engine and blade running. STOP engine and blade. Disconnect spark plug wire and secure away from spark plug. Engine and components are HOT. Avoid serious burns, allow sufficient time for all components to cool. Drive Spring Repair/Replacement If the drive spring (A, Figure 25) is loose, reconnect. If the spring is broken, replace with a new spring. NOTE: Use a pair of needle nose pliers to install the drive spring. IMPORTANT: If the drive system continues slipping, refer to the Troubleshooting section. If the mower does not propel itself properly, check for the following problems: 1. Grease on the drive disc (A, Figure 24) causing slippage. 2. Broken or disconnected drive spring (B). 3. Driven disc (C) is out of adjustment. 4. Driven disc rubber is worn - does not contact drive disc properly. A 5. Worn Poly-V belt (D) or engine drive belt (E). C n D tio B t for duc E o o A N Repr Figure 24: Wheel drive components Figure 25: Replacing the drive spring Driven Disc Adjustment If the drive disc and driven disc are clean and the mower drive is still slipping, adjust the driven disc as follows: 1. Move the ground speed control (A, Figure 26) into the 'fast' position. C If any of the above (1 thru 5) are causing problems, service as follows: Cleaning Drive Disc & Driven Disc If oil or grease on the drive disc or driven disc is causing slippage, clean the discs as follows: 1. Wipe away any oil or grease with a clean cloth. 2. Use either an approved grease solvent or hot, soapy water to clean drive disc or driven disc. 3. Rinse components with clean water. 4. Dry components with a clean cloth. Figure 26: The ground speed control en 23
-
 1
1 -
2
-
3
-
4
-
5
-
6
-
7
-
8
-
9
-
10
-
11
-
12
-
13
-
14
-
15
-
16
-
17
-
 18
18 -
 19
19 -
 20
20 -
 21
21 -
 22
22 -
 23
23 -
 24
24 -
 25
25 -
 26
26 -
 27
27 -
 28
28 -
29
-
30
-
31
-
32
-
33
-
34
-
35
-
36
-
37
-
38
-
39
-
40
-
41
-
42
-
43
-
44
-
45
-
46
-
47
-
48
-
49
-
50
-
51
-
52
-
53
-
54
-
55
-
56
-
57
-
58
-
59
-
60
-
61
-
62
-
63
-
64
 |
 |