Sony Ericsson HBH-IV835 User Guide - Page 57
Synchronizing, Sony Ericsson PC Suite software, Remote synchronization using, Internet
 |
View all Sony Ericsson HBH-IV835 manuals
Add to My Manuals
Save this manual to your list of manuals |
Page 57 highlights
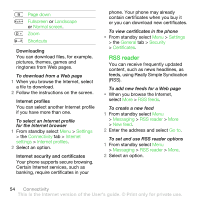
Synchronizing You can synchronize phone contacts, appointments, tasks and notes. You can use Bluetooth wireless technology, Internet services or the USB cable. Sony Ericsson PC Suite software In order to synchronize, you need to install the synchronization software for your computer. This is found in the Sony Ericsson PC Suite on the CD included with your phone. The software includes help information. You can also go to www.sonyericsson.com/support to download the software. Remote synchronization using Internet You can synchronize online using an Internet service. If Internet settings are not in your phone, see Settings on page 52. Before you use Sony Ericsson PC Suite You must enter settings for remote synchronization and register a synchronization account online. Settings that are required are: • Server address - server URL. • Username - account username. • Password - account password. • Connection - select an Internet profile. • Applications - mark applications to synchronize. • App. settings - select an application and enter a database name, and if required, username and password. • Sync. interval - set how often to synchronize. • Remote initiation - select an option to use when you start synchronization from a service. • Remote security - enter a server ID and a server password. To enter settings for remote synchronization 1 From standby select Menu > Organizer > Synchronization > Yes. 2 Enter a name for the new account and select Continue. 3 Enter the settings and select Save. To start remote synchronization 1 From standby select Menu > Organizer > Synchronization. 2 Scroll to an account and select Start. Connectivity 55 This is the Internet version of the User's guide. © Print only for private use.
-
 1
1 -
2
-
3
-
4
-
5
-
6
-
7
-
8
-
9
-
10
-
11
-
12
-
13
-
14
-
15
-
16
-
17
-
18
-
19
-
20
-
21
-
22
-
23
-
24
-
25
-
26
-
27
-
28
-
29
-
30
-
31
-
32
-
33
-
34
-
35
-
36
-
37
-
38
-
39
-
40
-
41
-
42
-
43
-
44
-
45
-
46
-
47
-
48
-
49
-
50
-
51
-
 52
52 -
 53
53 -
 54
54 -
 55
55 -
 56
56 -
 57
57 -
 58
58 -
 59
59 -
 60
60 -
 61
61 -
 62
62 -
63
-
64
-
65
-
66
-
67
-
68
-
69
-
70
-
71
-
72
-
73
-
74
-
75
-
76
-
77
-
78
-
79
-
80
-
81
-
82
-
83
-
84
-
85
-
86
 |
 |
