Sony BDP-S1000ES Operating Instructions - Page 6

Table of Contents - remote

Page 6 highlights

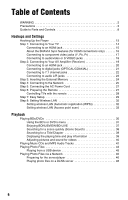
Table of Contents WARNING 2 Precautions 3 Guide to Parts and Controls 8 Hookups and Settings Hooking Up the Player 13 Step 1: Connecting to Your TV 14 Connecting to an HDMI jack 15 About the BRAVIA Sync features (for HDMI connections only 16 Connecting to component video jacks (Y, Pb, Pr 17 Connecting to audio/video or S VIDEO jacks 18 Step 2: Connecting to Your AV Amplifier (Receiver 19 Connecting to an HDMI jack 20 Connecting to digital jacks (OPTICAL/COAXIAL 21 Connecting to 7.1 channel jacks 22 Connecting to audio L/R jacks 23 Step 3: Inserting the External Memory 24 Step 4: Connecting to the Network 25 Step 5: Connecting the AC Power Cord 27 Step 6: Preparing the Remote 27 Controlling TVs with the remote 28 Step 7: Easy Setup 29 Step 8: Setting Wireless LAN 32 Setting wireless LAN (Automatic registration (WPS 32 Setting wireless LAN (Access point scan 33 Playback Playing BDs/DVDs 35 Using the BD's or DVD's menu 37 Enjoying BONUSVIEW/BD-LIVE 37 Searching for a scene quickly (Scene Search 38 Searching for a Title/Chapter 39 Displaying the playing time and play information 39 Adjusting pictures and sound for videos 40 Playing Music CDs and MP3 Audio Tracks 42 Playing Photo Files 43 Playing from a USB device 45 Playing Photo Files via a Network 46 Preparing for the server/player 46 Playing photo files on a DLNA server 46 6

  • 1
  • 2
  • 3
  • 4
  • 5
  • 6
  • 7
  • 8
  • 9
  • 10
  • 11
  • 12
  • 13
  • 14
  • 15
  • 16
  • 17
  • 18
  • 19
  • 20
  • 21
  • 22
  • 23
  • 24
  • 25
  • 26
  • 27
  • 28
  • 29
  • 30
  • 31
  • 32
  • 33
  • 34
  • 35
  • 36
  • 37
  • 38
  • 39
  • 40
  • 41
  • 42
  • 43
  • 44
  • 45
  • 46
  • 47
  • 48
  • 49
  • 50
  • 51
  • 52
  • 53
  • 54
  • 55
  • 56
  • 57
  • 58
  • 59
  • 60
  • 61
  • 62
  • 63
  • 64
  • 65
  • 66
  • 67
  • 68
  • 69
  • 70
  • 71
  • 72
  • 73
  • 74
  • 75
  • 76
  • 77
  • 78
  • 79
  • 80
  • 81
  • 82
  • 83
  • 84
  • 85
  • 86
  • 87
  • 88
  • 89
  • 90
  • 91
  • 92
  • 93
  • 94
  • 95

6
Table of Contents
WARNING . . . . . . . . . . . . . . . . . . . . . . . . . . . . . . . . . . . . . . . . . . . . . . . . . . . . 2
Precautions . . . . . . . . . . . . . . . . . . . . . . . . . . . . . . . . . . . . . . . . . . . . . . . . . . . 3
Guide to Parts and Controls
. . . . . . . . . . . . . . . . . . . . . . . . . . . . . . . . . . . . . . 8
Hookups and Settings
Hooking Up the Player
. . . . . . . . . . . . . . . . . . . . . . . . . . . . . . . . . . . . . . . . . 13
Step 1: Connecting to Your TV
. . . . . . . . . . . . . . . . . . . . . . . . . . . . . . . . . . . 14
Connecting to an HDMI jack . . . . . . . . . . . . . . . . . . . . . . . . . . . . . . . . . 15
About the BRAVIA Sync features (for HDMI connections only)
. . . . . . 16
Connecting to component video jacks (Y, P
b
, P
r
) . . . . . . . . . . . . . . . . . 17
Connecting to audio/video or S VIDEO jacks . . . . . . . . . . . . . . . . . . . . 18
Step 2: Connecting to Your AV Amplifier (Receiver) . . . . . . . . . . . . . . . . . . . 19
Connecting to an HDMI jack . . . . . . . . . . . . . . . . . . . . . . . . . . . . . . . . . 20
Connecting to digital jacks (OPTICAL/COAXIAL) . . . . . . . . . . . . . . . . . 21
Connecting to 7.1 channel jacks . . . . . . . . . . . . . . . . . . . . . . . . . . . . . . 22
Connecting to audio L/R jacks
. . . . . . . . . . . . . . . . . . . . . . . . . . . . . . . 23
Step 3: Inserting the External Memory
. . . . . . . . . . . . . . . . . . . . . . . . . . . . . 24
Step 4: Connecting to the Network
. . . . . . . . . . . . . . . . . . . . . . . . . . . . . . . . 25
Step 5: Connecting the AC Power Cord
. . . . . . . . . . . . . . . . . . . . . . . . . . . . 27
Step 6: Preparing the Remote . . . . . . . . . . . . . . . . . . . . . . . . . . . . . . . . . . . . 27
Controlling TVs with the remote
. . . . . . . . . . . . . . . . . . . . . . . . . . . . . . 28
Step 7: Easy Setup
. . . . . . . . . . . . . . . . . . . . . . . . . . . . . . . . . . . . . . . . . . . . 29
Step 8: Setting Wireless LAN
. . . . . . . . . . . . . . . . . . . . . . . . . . . . . . . . . . . . 32
Setting wireless LAN (Automatic registration (WPS)) . . . . . . . . . . . . . . 32
Setting wireless LAN (Access point scan)
. . . . . . . . . . . . . . . . . . . . . . 33
Playback
Playing BDs/DVDs
. . . . . . . . . . . . . . . . . . . . . . . . . . . . . . . . . . . . . . . . . . . . 35
Using the BD’s or DVD’s menu . . . . . . . . . . . . . . . . . . . . . . . . . . . . . . . 37
Enjoying BONUSVIEW/BD-LIVE
. . . . . . . . . . . . . . . . . . . . . . . . . . . . . 37
Searching for a scene quickly (Scene Search) . . . . . . . . . . . . . . . . . . . 38
Searching for a Title/Chapter
. . . . . . . . . . . . . . . . . . . . . . . . . . . . . . . . 39
Displaying the playing time and play information
. . . . . . . . . . . . . . . . . 39
Adjusting pictures and sound for videos . . . . . . . . . . . . . . . . . . . . . . . . 40
Playing Music CDs and MP3 Audio Tracks . . . . . . . . . . . . . . . . . . . . . . . . . . 42
Playing Photo Files
. . . . . . . . . . . . . . . . . . . . . . . . . . . . . . . . . . . . . . . . . . . . 43
Playing from a USB device . . . . . . . . . . . . . . . . . . . . . . . . . . . . . . . . . . 45
Playing Photo Files via a Network . . . . . . . . . . . . . . . . . . . . . . . . . . . . . . . . . 46
Preparing for the server/player . . . . . . . . . . . . . . . . . . . . . . . . . . . . . . . 46
Playing photo files on a DLNA server . . . . . . . . . . . . . . . . . . . . . . . . . . 46