Sony CCD-TR517 Primary User Manual - Page 14
Step 2 Inserting a cassette
 |
View all Sony CCD-TR517 manuals
Add to My Manuals
Save this manual to your list of manuals |
Page 14 highlights
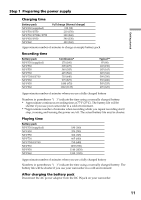
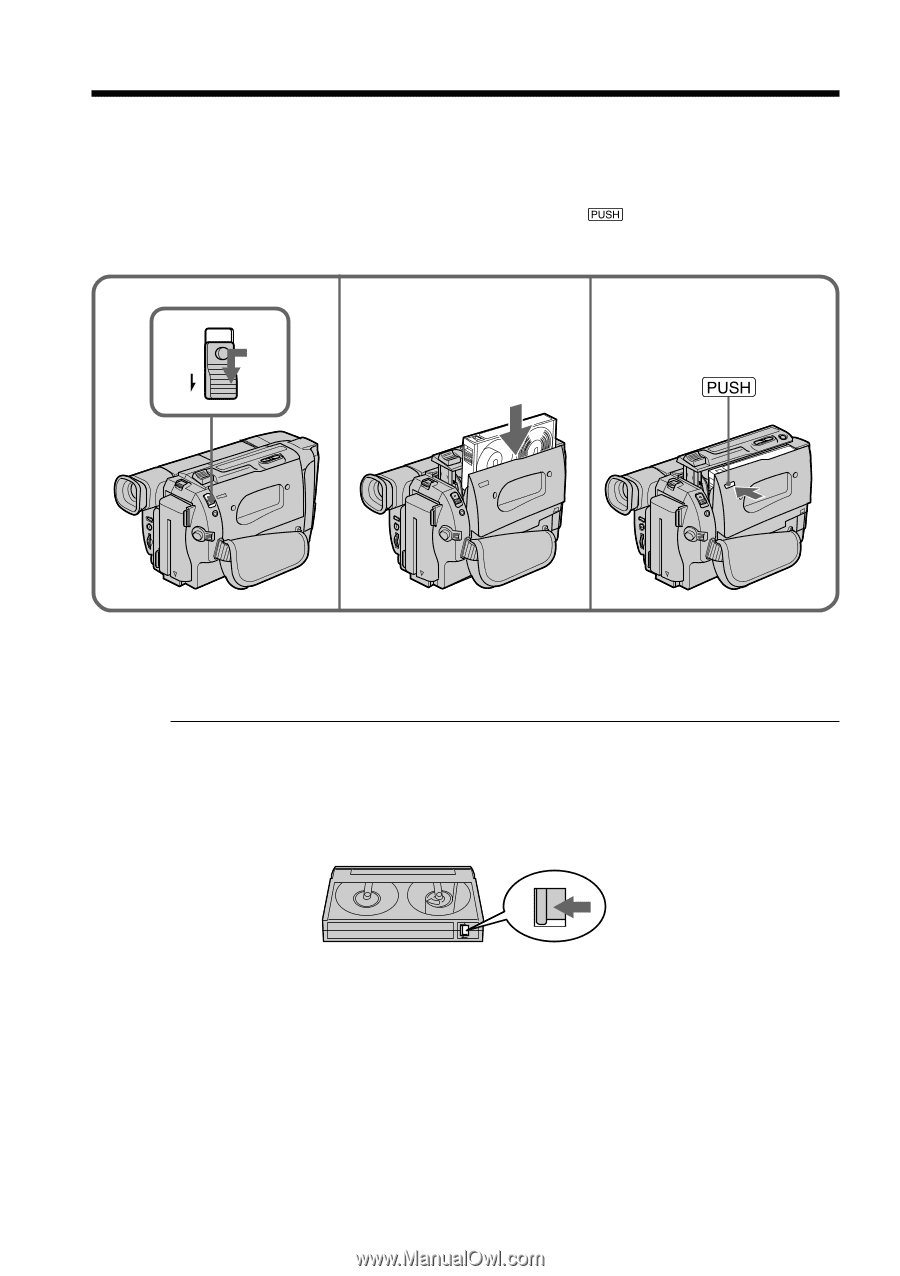
Step 2 Inserting a cassette (1) Prepare the power supply (p. 8). (2) Slide EJECT in the direction of the arrow while pressing the small blue button. The cassette compartment automatically lifts up and opens. (3) Insert a cassette with its window facing out and the tab on the cassette up. (4) Close the cassette compartment by pressing the mark on the cassette compartment. The cassette compartment automatically goes down. 2 3 4 EJECT To eject a cassette Slide EJECT in the direction of the arrow while pressing the small blue button. Note Do not press the cassette compartment down. Doing so may cause malfunction. To prevent accidental erasure Slide the write-protect tab on the cassette to expose the red mark. 14
-
 1
1 -
2
-
3
-
4
-
5
-
6
-
7
-
8
-
 9
9 -
 10
10 -
 11
11 -
 12
12 -
 13
13 -
 14
14 -
 15
15 -
 16
16 -
 17
17 -
 18
18 -
 19
19 -
20
-
21
-
22
-
23
-
24
-
25
-
26
-
27
-
28
-
29
-
30
-
31
-
32
-
33
-
34
-
35
-
36
-
37
-
38
-
39
-
40
-
41
-
42
-
43
-
44
-
45
-
46
-
47
-
48
-
49
-
50
-
51
-
52
-
53
-
54
-
55
-
56
-
57
-
58
-
59
-
60
-
61
-
62
-
63
-
64
-
65
-
66
-
67
-
68
 |
 |
14
Step 2
Inserting a cassette
(
1
)
Prepare the power supply (p. 8).
(
2
)
Slide EJECT in the direction of the arrow while pressing the small blue button.
The cassette compartment automatically lifts up and opens.
(
3
)
Insert a cassette with its window facing out and the tab on the cassette up.
(
4
)
Close the cassette compartment by pressing the
mark on the cassette
compartment. The cassette compartment automatically goes down.
To eject a cassette
Slide EJECT in the direction of the arrow while pressing the small blue button.
Note
Do not press the cassette compartment down. Doing so may cause malfunction.
To prevent accidental erasure
Slide the write-protect tab on the cassette to expose the red mark.
2
3
4
EJECT