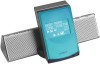
Sony CPF-IX001 Operating Instructions - Page 19
Making network settings manually, Restarting the network unit, Advanced network settings
 |
UPC - 027242689015
View all Sony CPF-IX001 manuals
Add to My Manuals
Save this manual to your list of manuals |
Page 19 highlights
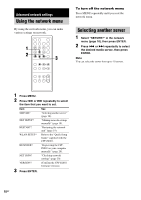
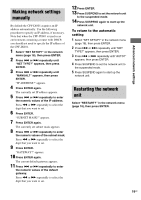
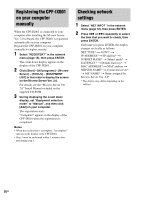
Advanced network settings Making network settings manually By default the CPF-IX001 acquires an IP address automatically. Use the following procedure to specify an IP address, if necessary. Note that when the CPF-IX001 is used in an environment containing a router with DHCP, you should not need to specify the IP address of the CPF-IX001. 1 Select "NET SETUP?" in the network menu (page 18), then press ENTER. 2 Press . or > repeatedly until "NET TYPE?" appears, then press ENTER. 3 Press . or > repeatedly until "MANUAL?" appears, then press ENTER. "IP ADDRESS?" appears. 4 Press ENTER again. The currently set IP address appears. 5 Press . or > repeatedly to enter the numeric values of the IP address. Press m or M repeatedly to select the digit that you want to set. 6 Press ENTER. "SUBNET MASK?" appears. 7 Press ENTER again. The currently set subnet mask appears. 8 Press . or > repeatedly to enter the numeric values of the subnet mask. Press m or M repeatedly to select the digit that you want to set. 9 Press ENTER. "GATEWAY?" appears. 10 Press ENTER again. The current default gateway appears. 11 Press . or > repeatedly to enter the numeric values of the default gateway. Press m or M repeatedly to select the digit that you want to set. 12 Press ENTER. 13 Press SUSPEND to set the network unit to the suspended mode. 14 Press SUSPEND again to start up the network unit. To return to the automatic setting 1 Select "NET SETUP?" in the network menu (page 18), then press ENTER. 2 Press . or > repeatedly until "NET TYPE?" appears, then press ENTER. 3 Press . or > repeatedly until "AUTO?" appears, then press ENTER. 4 Press SUSPEND to set the network unit to the suspended mode. 5 Press SUSPEND again to start up the network unit. Restarting the network unit Select "RESTART?" in the network menu (page 18), then press ENTER. 19GB
-
 1
1 -
2
-
3
-
4
-
5
-
6
-
7
-
8
-
9
-
10
-
11
-
12
-
13
-
 14
14 -
 15
15 -
 16
16 -
 17
17 -
 18
18 -
 19
19 -
 20
20 -
 21
21 -
 22
22 -
 23
23 -
 24
24 -
25
-
26
-
27
-
28
-
29
-
30
-
31
-
32
-
33
-
34
-
35
 |
 |
