Sony CPF-IX001 Operating Instructions - Page 20
Registering the CPF-IX001 on your computer manually, Checking network settings - mac
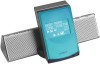 |
UPC - 027242689015
View all Sony CPF-IX001 manuals
Add to My Manuals
Save this manual to your list of manuals |
Page 20 highlights
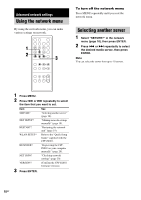
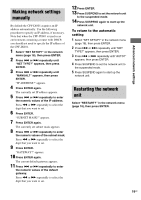
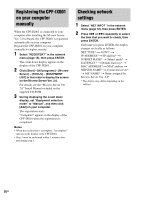
Registering the CPF-IX001 on your computer manually When the CPF-IX001 is connected to your computer after installing the M-crew Server Ver. 2.0 software, the CPF-IX001 is registered automatically on your computer. Register the CPF-IX001 on your computer manually for higher security. 1 Select "REGISTER?" in the network menu (page 18), then press ENTER. The count down display appears in the display of the CPF-IX001. 2 Click [Start] - [All programs] - [M-crew Server] - [TOOLS] - [EQUIPMENT LIST] in that order to display the screen on the M-crew Server Ver. 2.0. For details, see the "M-crew Server Ver. 2.0" Install Manual included on the supplied CD-ROM. 3 During displaying the count down display, set "Equipment selection mode" to "Manual", and then click [Add] on your computer. The registration starts. "Complete!" appears in the display of the CPF-IX001 when the registration is completed. Notes • When the registration is incomplete, "Incomplete!" appears in the display of the CPF-IX001. • Step 3 must be performed within 5 minutes after performing step 1. Checking network settings 1 Select "NET INFO?" in the network menu (page 18), then press ENTER. 2 Press . or > repeatedly to select the item that you want to check, then press ENTER. Each time you press ENTER, the display changes cyclically as follows: NET TYPE? t AUTO* t IP ADDRESS? t IP address* t SUBNET MASK? t Subnet mask* t GATEWAY? t Default Gateway* t MAC ADDRESS? t MAC address t SERVER NAME? t Connected server* t MY NAME? t Name assigned by M-crew Server Ver. 2.0* * The display may differ depending on the settings. 20GB
-
 1
1 -
2
-
3
-
4
-
5
-
6
-
7
-
8
-
9
-
10
-
11
-
12
-
13
-
14
-
 15
15 -
 16
16 -
 17
17 -
 18
18 -
 19
19 -
 20
20 -
 21
21 -
 22
22 -
 23
23 -
 24
24 -
 25
25 -
26
-
27
-
28
-
29
-
30
-
31
-
32
-
33
-
34
-
35
 |
 |
