Sony DAV-FX100W DAVFX100W Instructions (entire component system) - Page 22
Installing the speakers on the wall, Examples of poor conditions of the speaker cord
 |
View all Sony DAV-FX100W manuals
Add to My Manuals
Save this manual to your list of manuals |
Page 22 highlights
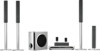
Examples of poor conditions of the speaker cord Stripped speaker cord is touching another speaker terminal. Stripped cords are touching each other due to excessive removal of insulation. After connecting all the components, speakers, and AC power cord (mains lead), output a test tone to check that all the speakers are connected correctly. For details on outputting a test tone, see page 87. If no sound is heard from a speaker while outputting a test tone, or a test tone is output from a speaker other than the one currently displayed on the Setup Display, the speaker may be short-circuited. If this happens, check the speaker connection again. Note • Be sure to match the speaker cord to the appropriate terminal on the components: 3 to 3, and # to #. If the cords are reversed, the sound will lack bass and may be distorted. Installing the speakers on the wall 1 Prepare screws (not supplied) that are suitable for the hole on the back of each speaker. See the illustrations below. 25 mm (1 inch) 4 mm (5/32 inch) 4.6 mm (3/16 inch) 10 mm (13/32 inch) Hole on the back of the speaker 2 Fasten the screws to the wall. The screws should protrude 7 to 8 mm (9/32 to 11/32 inch). 165 mm (6 1/2 inch) 7 to 8 mm (9/32 to 11/32 inch) 3 Peel the seals off the two screw points on the rear of the speaker. 22US
-
 1
1 -
2
-
3
-
4
-
5
-
6
-
7
-
8
-
9
-
10
-
11
-
12
-
13
-
14
-
15
-
16
-
 17
17 -
 18
18 -
 19
19 -
 20
20 -
 21
21 -
 22
22 -
 23
23 -
 24
24 -
 25
25 -
 26
26 -
 27
27 -
28
-
29
-
30
-
31
-
32
-
33
-
34
-
35
-
36
-
37
-
38
-
39
-
40
-
41
-
42
-
43
-
44
-
45
-
46
-
47
-
48
-
49
-
50
-
51
-
52
-
53
-
54
-
55
-
56
-
57
-
58
-
59
-
60
-
61
-
62
-
63
-
64
-
65
-
66
-
67
-
68
-
69
-
70
-
71
-
72
-
73
-
74
-
75
-
76
-
77
-
78
-
79
-
80
-
81
-
82
-
83
-
84
-
85
-
86
-
87
-
88
-
89
-
90
-
91
-
92
-
93
-
94
-
95
-
96
-
97
-
98
-
99
-
100
-
101
-
102
-
103
-
104
-
105
-
106
-
107
-
108
-
109
-
110
-
111
-
112
 |
 |
