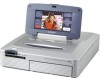
Sony DPP SV77 Operating Instructions - Page 70
D:\Setup.exe, Installing the printer driver and reader software - windows 7 driver
 |
UPC - 027242590410
View all Sony DPP SV77 manuals
Add to My Manuals
Save this manual to your list of manuals |
Page 70 highlights
Using your printer with Windows computers Installing the printer driver and reader software 1 Insert the supplied CD-ROM into your CD-ROM drive and click "Start," and then click "Run." The "Run" dialog box is displayed. 2 Input "D:\Setup.exe" (When your CD-ROM drive is the D: drive) then click "OK." If your CD-ROM drive is not the D: drive, input the appropriate drive name. You can also input the location of the installer by clicking the "Browse" button. The installer automatically starts, and the language selection dialog box appears. 3 Select the language for the application, then click "OK." The "Welcome" dialog box appears. 4 Click "Next." The "Choose Destination Location" dialog box is displayed. The files are factory-set to install the "C:\Program Files\Sony\DPPSV77" folder. If you want to install them to another folder, input the destination folder or specify the destination folder by clicking the "Browse" button. 5 Click "Next." "Add Printer Wizard" starts up. 6 Click "Next." The dialog box used to select the printer connection is displayed. 70 GB
-
 1
1 -
2
-
3
-
4
-
5
-
6
-
7
-
8
-
9
-
10
-
11
-
12
-
13
-
14
-
15
-
16
-
17
-
18
-
19
-
20
-
21
-
22
-
23
-
24
-
25
-
26
-
27
-
28
-
29
-
30
-
31
-
32
-
33
-
34
-
35
-
36
-
37
-
38
-
39
-
40
-
41
-
42
-
43
-
44
-
45
-
46
-
47
-
48
-
49
-
50
-
51
-
52
-
53
-
54
-
55
-
56
-
57
-
58
-
59
-
60
-
61
-
62
-
63
-
64
-
 65
65 -
 66
66 -
 67
67 -
 68
68 -
 69
69 -
 70
70 -
 71
71 -
 72
72 -
 73
73 -
 74
74 -
 75
75 -
76
-
77
-
78
-
79
-
80
-
81
-
82
-
83
-
84
-
85
-
86
-
87
-
88
-
89
-
90
-
91
-
92
 |
 |
