Sony DPP SV77 Operating Instructions - Page 80
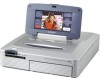
Printing from a software application, Sony DPP-SV77 - photo
 |
UPC - 027242590410
View all Sony DPP SV77 manuals
Add to My Manuals
Save this manual to your list of manuals |
Page 80 highlights
Using your printer with Macintosh computers Printing from a software application You can use a software application to print images stored in your computer's hard disk using the DPP-SV77 Digital Photo Printer. Notes • This sections explains the settings and operations using a typical application as an example. Depending on the application, print settings and operations may differ. For the details, refer to the manual of your application. • To get the print you expect, we suggest you use software application that allows you to check a print preview. Otherwise, set the image size to 1664 (dots) x 2466 (dots) and the resolution to 403 dpi. 1 Start the application software that you use to print with, and select the image to be printed. 2 Select "Chooser" from the Apple menu, click "Sony DPP-SV77" in the "Chooser," and then close the "Chooser." 3 Click "Print Setup" from the "File" menu of the application. The "Print Setup" dialog box appears. 4 Choose the printer settings. Paper/Margin To make Post Card Size borderless prints, click "Post Card" and the no margin icon . To make border Post Card Size print, click "Post Card" and the margin icon . To make Small Size prints, click "Small." Orientation To print a wide image, click the landscape icon . To print a tall image, click the portrait icon . Overcoat Select the overcoat type ("Glossy"/"Texture"). Enlarge/Reduce Select the size to be print: enlarged or reduced. 80 GB
-
 1
1 -
2
-
3
-
4
-
5
-
6
-
7
-
8
-
9
-
10
-
11
-
12
-
13
-
14
-
15
-
16
-
17
-
18
-
19
-
20
-
21
-
22
-
23
-
24
-
25
-
26
-
27
-
28
-
29
-
30
-
31
-
32
-
33
-
34
-
35
-
36
-
37
-
38
-
39
-
40
-
41
-
42
-
43
-
44
-
45
-
46
-
47
-
48
-
49
-
50
-
51
-
52
-
53
-
54
-
55
-
56
-
57
-
58
-
59
-
60
-
61
-
62
-
63
-
64
-
65
-
66
-
67
-
68
-
69
-
70
-
71
-
72
-
73
-
74
-
 75
75 -
 76
76 -
 77
77 -
 78
78 -
 79
79 -
 80
80 -
 81
81 -
 82
82 -
 83
83 -
 84
84 -
 85
85 -
86
-
87
-
88
-
89
-
90
-
91
-
92
 |
 |
