Sony DVP-NC655PB Operating Instructions - Page 75
Additional Information, Troubleshooting, Power, Picture, Sound
 |
View all Sony DVP-NC655PB manuals
Add to My Manuals
Save this manual to your list of manuals |
Page 75 highlights
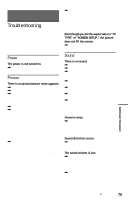
Additional Information Troubleshooting , Even if your TV is compatible with progressive format (480p) signals, the image may be affected when you set "COMPONENT OUT" to "PROGRESSIVE." In this case, set "COMPONENT OUT" to "INTERLACE." If you experience any of the following difficulties while using the player, use this troubleshooting guide to help remedy the problem before requesting repairs. Should any problem persist, consult your nearest Sony dealer. Power The power is not turned on. , Check that the AC power cord is connected securely. Picture There is no picture/picture noise appears. , Re-connect the connecting cord securely. , The connecting cord is damaged. , Check the connection to your TV (page 18) and switch the input selector on your TV so that the signal from the player appears on the TV screen. , The disc is dirty or flawed. , If the picture output from your player goes through your VCR to get to your TV or if you are connected to a combination TV/ VIDEO player, the copy-protection signal applied to some DVD programs could affect picture quality. If you still experience problems even when you connect your player directly to your TV, please try connecting your player to your TV's S VIDEO input (page 18). , You have selected "PROGRESSIVE" in "COMPONENT OUT" even though your TV cannot accept the signal in progressive format. In this case, set the COMPONENT VIDEO OUT/SCAN SELECT switch on the back panel of the player to INTERLACE. When you can see the TV screen correctly, set "COMPONENT OUT" to "INTERLACE" and reset the COMPONENT VIDEO OUT/SCAN SELECT switch to SELECTABLE. Even though you set the aspect ratio in "TV TYPE" of "SCREEN SETUP," the picture does not fill the screen. , The aspect ratio of the disc is fixed on your DVD. Sound There is no sound. , Re-connect the connecting cord securely. , The connecting cord is damaged. , The player is connected to the wrong input jack on the amplifier (receiver) (page 22, 23, 24). , The amplifier (receiver) input is not correctly set. , The player is in pause mode or in Slowmotion Play mode. , The player is in fast forward or fast reverse mode. , If the audio signal does not come through the DIGITAL OUT (COAXIAL or OPTICAL) jack, check the audio settings (page 73). Sound is noisy. , When playing a CD with DTS sound tracks, noise will come from the LINE OUT L/R (AUDIO) 1/2 jacks or DIGITAL OUT (COAXIAL or OPTICAL) jack (page 28). Sound distortion occurs. , Set "AUDIO ATT" in "AUDIO SETUP" to "ON" (page 72). The sound volume is low. , The sound volume is low on some DVDs. The sound volume may improve if you set "AUDIO DRC" to "TV MODE" (page 72) and set "DOWNMIX" to "NORMAL" (page 73). , Set "AUDIO ATT" in "AUDIO SETUP" to "OFF" (page 72). Additional Information c continued 75
-
 1
1 -
2
-
3
-
4
-
5
-
6
-
7
-
8
-
9
-
10
-
11
-
12
-
13
-
14
-
15
-
16
-
17
-
18
-
19
-
20
-
21
-
22
-
23
-
24
-
25
-
26
-
27
-
28
-
29
-
30
-
31
-
32
-
33
-
34
-
35
-
36
-
37
-
38
-
39
-
40
-
41
-
42
-
43
-
44
-
45
-
46
-
47
-
48
-
49
-
50
-
51
-
52
-
53
-
54
-
55
-
56
-
57
-
58
-
59
-
60
-
61
-
62
-
63
-
64
-
65
-
66
-
67
-
68
-
69
-
 70
70 -
 71
71 -
 72
72 -
 73
73 -
 74
74 -
 75
75 -
 76
76 -
 77
77 -
 78
78 -
 79
79 -
 80
80 -
81
-
82
-
83
-
84
 |
 |