Sony DVWM2000P Product Manual (Operation Manual 1st Edition (Revised 6)) - Page 63
Selecting the Editing Mode, 5-1-4 Setting Edit Points, To set an edit point
 |
View all Sony DVWM2000P manuals
Add to My Manuals
Save this manual to your list of manuals |
Page 63 highlights
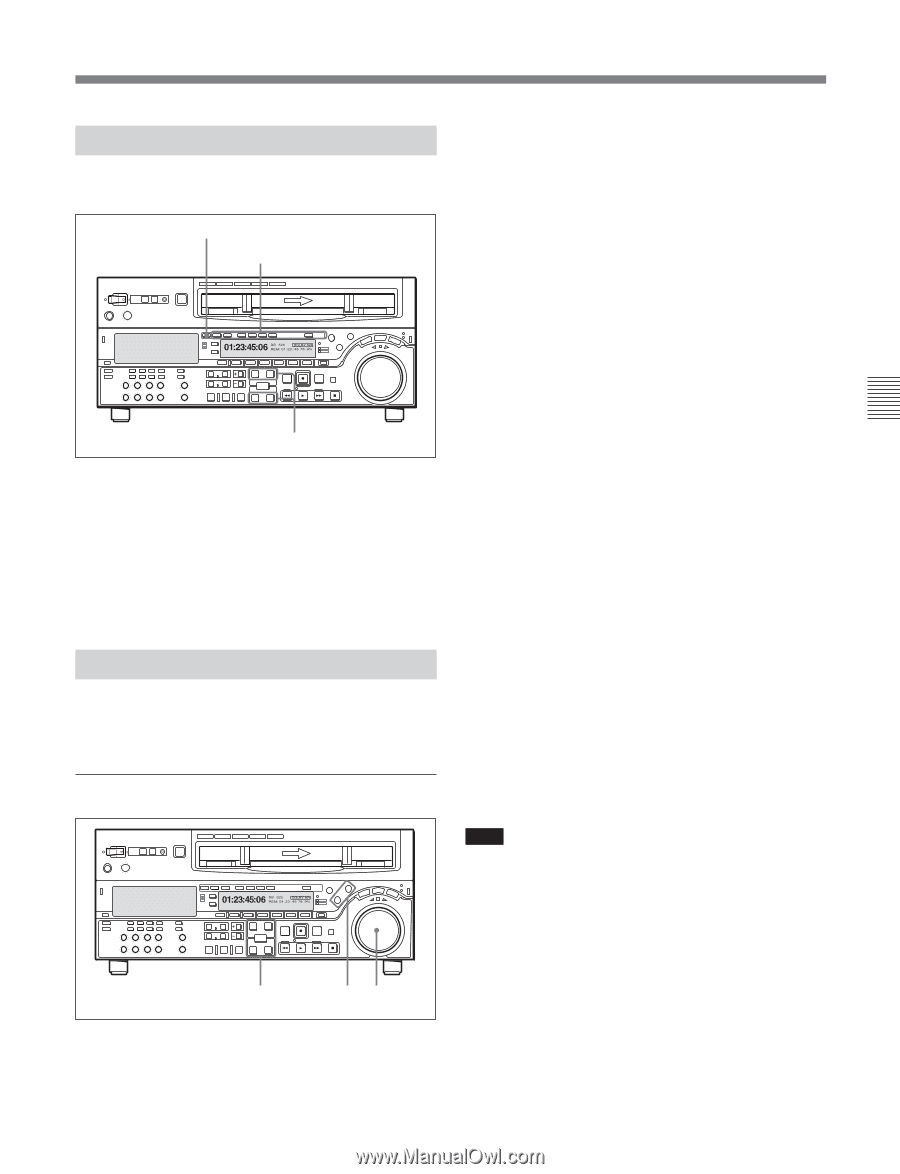
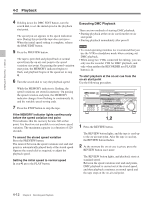
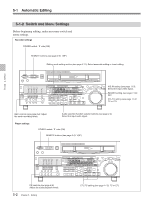
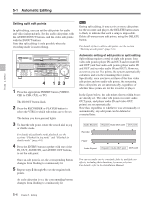
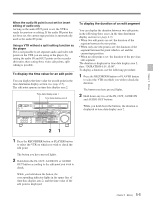
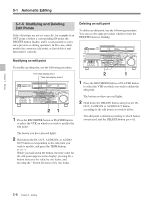
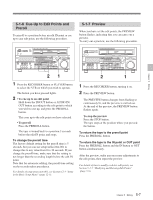
Chapter 5 Editing 5-1-3 Selecting the Editing Mode To select the editing mode Select assemble editing or insert editing. ASSEMBLE button INSERT buttons Z IN/OUT buttons Depending on the editing mode, press the following button or buttons. • For assemble editing: ASSEMBLE button • For insert editing: the desired INSERT buttons (VIDEO, CH1 to CH4, CUE, TC) When you select the editing mode, the IN/OUT buttons begin to flash, indicating that the edit points require setting. 5-1-4 Setting Edit Points Set the edit points (IN and OUT points). To use split editing in insert mode, you can set the audio and video edit points separately. To set an edit point Z 3 12 1 Press the RECORDER button or PLAYER button to select the VTR on which you will set the edit point. The button which you have pressed lights. 2 Turn the search dial in jog or shuttle mode, and position the tape at the required edit point. For details of playback in jog or shuttle mode, see the sections "Playback in jog mode" and "Playback in shuttle mode" (page 4-8). 3 At the point at which you wish to set the IN point or OUT point, hold down the ENTRY button and press the IN button or OUT button as the case may be. When the IN point or OUT point is set, the IN button or OUT button respectively lights. 4 Repeat steps 1 to 3 until all the necessary edit points are set. When the IN points on both the recorder and player are set, the PREVIEW button and AUTO EDIT button flash, and it becomes possible to carry out a preview or editing operation. Automatic setting of edit points Editing requires four edit points: the IN and OUT points on both the recorder and player. However, once any three of these points are defined, the last point is set automatically. For example, if you set the recorder IN and OUT points, and the player IN point, the player OUT point is set automatically. Note In the following cases, the DELETE button begins to flash and you cannot carry out automatic editing. • The OUT point is before the IN point. • All four of the recorder IN and OUT points and the player IN and OUT points have been set. Use the DELETE button to delete a redundant edit point, or set the edit points correctly. For details of deleting edit points, see the section "Deleting an edit point" (page 5-6). 5-3 Chapter 5 Editing
-
 1
1 -
2
-
3
-
4
-
5
-
6
-
7
-
8
-
9
-
10
-
11
-
12
-
13
-
14
-
15
-
16
-
17
-
18
-
19
-
20
-
21
-
22
-
23
-
24
-
25
-
26
-
27
-
28
-
29
-
30
-
31
-
32
-
33
-
34
-
35
-
36
-
37
-
38
-
39
-
40
-
41
-
42
-
43
-
44
-
45
-
46
-
47
-
48
-
49
-
50
-
51
-
52
-
53
-
54
-
55
-
56
-
57
-
 58
58 -
 59
59 -
 60
60 -
 61
61 -
 62
62 -
 63
63 -
 64
64 -
 65
65 -
 66
66 -
 67
67 -
 68
68 -
69
-
70
-
71
-
72
-
73
-
74
-
75
-
76
-
77
-
78
-
79
-
80
-
81
-
82
-
83
-
84
-
85
-
86
-
87
-
88
-
89
-
90
-
91
-
92
-
93
-
94
-
95
-
96
-
97
-
98
-
99
-
100
-
101
-
102
-
103
-
104
-
105
-
106
-
107
-
108
-
109
-
110
-
111
-
112
-
113
-
114
-
115
-
116
-
117
-
118
-
119
-
120
-
121
-
122
-
123
-
124
-
125
-
126
-
127
-
128
-
129
-
130
-
131
-
132
-
133
-
134
-
135
-
136
-
137
-
138
-
139
-
140
-
141
-
142
-
143
-
144
-
145
-
146
-
147
-
148
-
149
-
150
-
151
-
152
-
153
-
154
-
155
-
156
-
157
-
158
-
159
-
160
-
161
-
162
-
163
-
164
 |
 |