Sony FA-WRC1M Help Guide - Page 7
Turning on the power
 |
View all Sony FA-WRC1M manuals
Add to My Manuals
Save this manual to your list of manuals |
Page 7 highlights
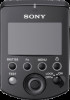
1. Communication channel 2. Wireless flash mode is displayed when the product is in wireless flash mode. Otherwise, is displayed. 3. Shooting mode 4. Flash compensation 5. Communication mode 6. High-speed sync shooting 7. Low-battery indicator Appears when the batteries are low. It is recommended that you change the batteries shortly. 8. Ratio setting 9. Lighting ratio 10. Flash level 11. Group settings (flash mode and flash compensation/flash level) Quick Navi screen Press the Fn button to switch the display to the settings adjustment screen (Quick Navi). You can change the values quickly using the control wheel. Menu screen The menu screen is displayed when you press the MENU button. You can change various settings for the product. [6] Preparations Turning on the power You can use the following types of batteries with this product. Two LR6 (AA-sized) alkaline batteries Two AA-sized rechargeable nickel-metal hydride (Ni-MH) batteries Always ensure that rechargeable nickel-metal hydride batteries are charged with the specified charger. 1. Open the battery cover and insert batteries (sold separately). Insert the batteries into the battery chamber as illustrated ( ). ( indicates the direction of the batteries.) 2. Attach the product to the camera. Ensure that the product is turned off. Remove the caps from the Multi Interface foot of the product and from the Multi
-
 1
1 -
 2
2 -
 3
3 -
 4
4 -
 5
5 -
 6
6 -
 7
7 -
 8
8 -
 9
9 -
 10
10 -
 11
11 -
 12
12 -
13
-
14
-
15
-
16
-
17
 |
 |
