Sony HCD-GS100 Operating Instructions - Page 7
the system turns on, When you press
 |
View all Sony HCD-GS100 manuals
Add to My Manuals
Save this manual to your list of manuals |
Page 7 highlights
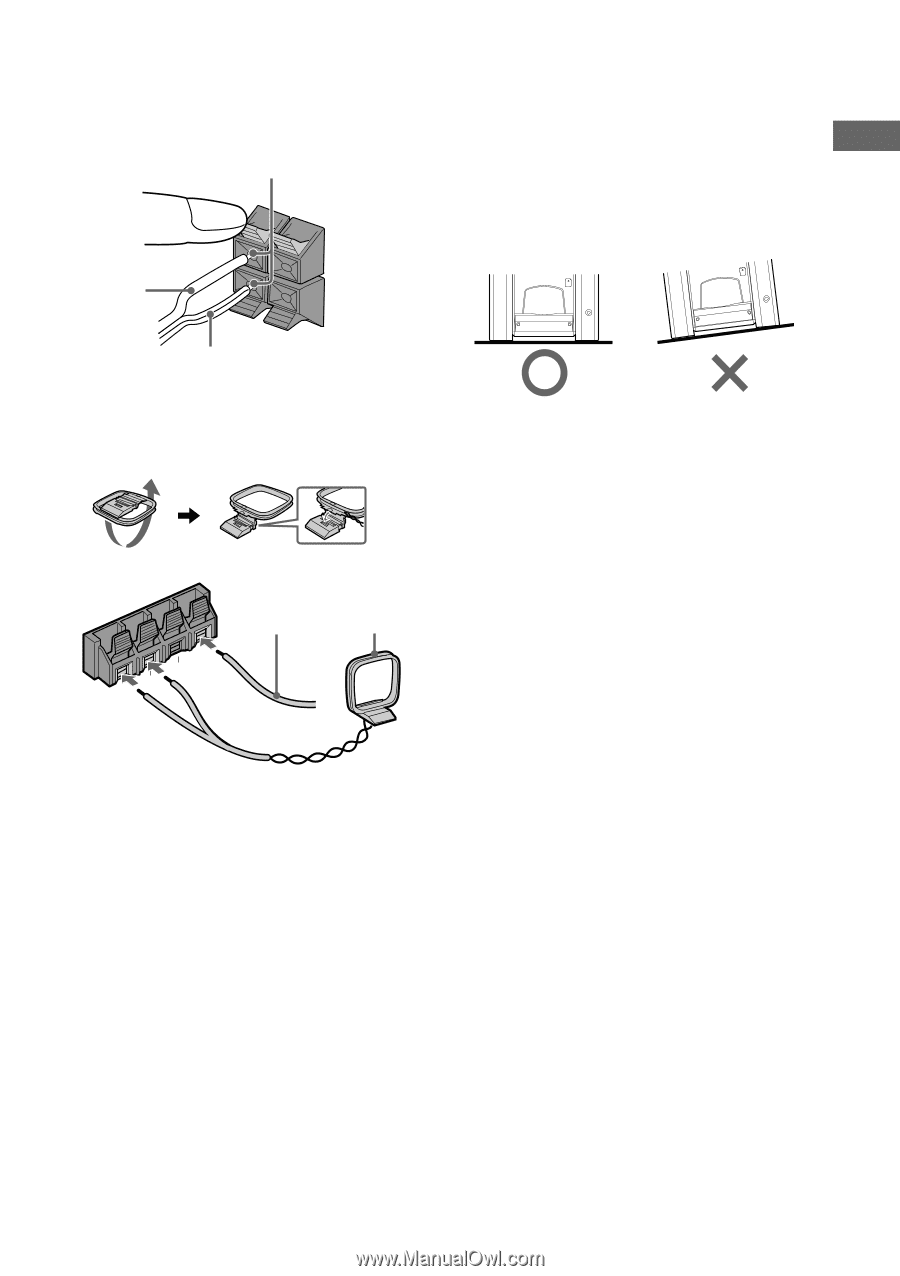
Getting Started 1 Connect the front speakers. Connect the speaker cords to the SPEAKER jacks on the unit as shown below. Insert only the stripped portion R L + Solid (3) - 3 Connect the power cord to a wall outlet. The demonstration appears in the display. When you press ?/1, the system turns on and the demonstration automatically ends. Note on placement Be sure to place this unit on a horizontal place. If the unit is slanted, it may cause malfunction or damage to the system. Stripe (#) 2 Connect the FM/AM antennas. Set up the AM loop antenna, then connect it. ANATMENNA U FM75Ω U Extend the FM antenna horizontally AM loop antenna To connect optional components See page 24 for details. Note Keep the speaker cords away from the antennas to prevent noise. 7US
-
 1
1 -
 2
2 -
 3
3 -
 4
4 -
 5
5 -
 6
6 -
 7
7 -
 8
8 -
 9
9 -
 10
10 -
 11
11 -
 12
12 -
13
-
14
-
15
-
16
-
17
-
18
-
19
-
20
-
21
-
22
-
23
-
24
-
25
-
26
-
27
-
28
-
29
-
30
-
31
-
32
 |
 |