Sony HDR-CX160 Handycam® Handbook - Page 45
Dividing a movie, Capturing a photo from a movie, Photo Capture] - pmb software
 |
UPC - 027242820210
View all Sony HDR-CX160 manuals
Add to My Manuals
Save this manual to your list of manuals |
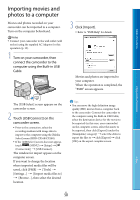
Page 45 highlights
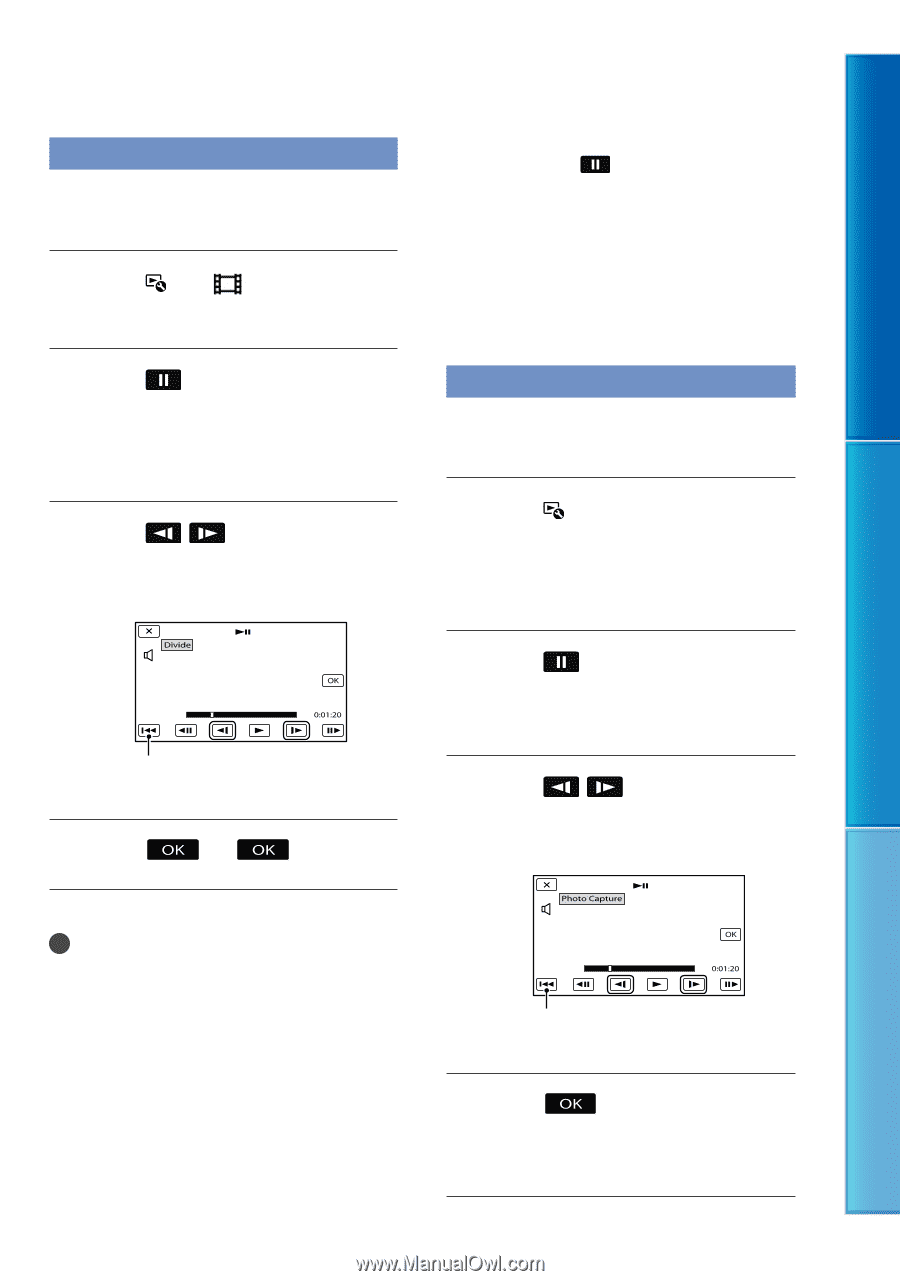
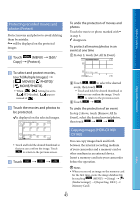
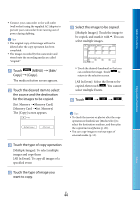
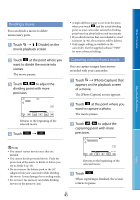
Table of Contents Dividing a movie You can divide a movie to delete unnecessary parts. Touch [ Divide] on the movie playback screen. Touch at the point where you want to divide the movie into scenes. The movie pauses. Touch / to adjust the dividing point with more precision. Returns to the beginning of the selected movie Touch . A slight difference may occur from the point where you touch and the actual dividing point, as your camcorder selects the dividing point based on about half-second increments. If you divide movies that are included in saved scenarios (p. 40), the scenarios will be deleted. Only simple editing is available on the camcorder. Use the supplied software "PMB" for more advanced editing. Capturing a photo from a movie You can capture images from movies recorded with your camcorder. Touch [Photo Capture] that appears on the playback screen of a movie. The [Photo Capture] screen appears. Touch at the point where you want to capture a photo. The movie pauses. Touch / to adjust the capturing point with more precision. Enjoy Useful Functions Index Notes You cannot restore movies once they are divided. You cannot divide protected movie. Undo the protection of the movie to divide it, before you try to divide it (p. 43). Do not remove the battery pack or the AC Adaptor from your camcorder while dividing the movie. It may damage the recording media. Do not eject the memory card while dividing movies on the memory card. Returns to the beginning of the selected movie Touch . When capturing is finished, the screen returns to pause. US 45
-
 1
1 -
2
-
3
-
4
-
5
-
6
-
7
-
8
-
9
-
10
-
11
-
12
-
13
-
14
-
15
-
16
-
17
-
18
-
19
-
20
-
21
-
22
-
23
-
24
-
25
-
26
-
27
-
28
-
29
-
30
-
31
-
32
-
33
-
34
-
35
-
36
-
37
-
38
-
39
-
 40
40 -
 41
41 -
 42
42 -
 43
43 -
 44
44 -
 45
45 -
 46
46 -
 47
47 -
 48
48 -
 49
49 -
 50
50 -
51
-
52
-
53
-
54
-
55
-
56
-
57
-
58
-
59
-
60
-
61
-
62
-
63
-
64
-
65
-
66
-
67
-
68
-
69
-
70
-
71
-
72
-
73
-
74
-
75
-
76
-
77
-
78
-
79
-
80
-
81
-
82
-
83
-
84
-
85
-
86
-
87
-
88
-
89
-
90
-
91
-
92
-
93
-
94
-
95
-
96
-
97
-
98
-
99
-
100
-
101
-
102
-
103
-
104
-
105
-
106
-
107
-
108
 |
 |