Sony HDR HC1 Operating Instructions - Page 27
To make the subject stand out clearer (TELE MACRO), To use the AUTO LOCK switch
 |
UPC - 027242681330
View all Sony HDR HC1 manuals
Add to My Manuals
Save this manual to your list of manuals |
Page 27 highlights
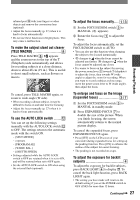
infrared port with your fingers or other objects and remove the conversions lens (optional). • Adjust the focus manually (p. 27) when it is hard to focus automatically. • Do not use these functions in bright places. This may cause a malfunction. To make the subject stand out clearer (TELE MACRO Press TELE MACRO . appears and the zoom moves to the top of the T (Telephoto) side automatically and allows for recording subjects at a close distance, down to about 48 cm (19 in.). This is useful to shoot small subjects, such as flowers or insects. To cancel, press TELE MACRO again, or zoom to wide-angle (W side). • When recording a distant subject, it may be difficult to focus on and take time for focusing. • Adjust the focus manually (p. 27) when it is hard to focus automatically. To use the AUTO LOCK switch ...... You can set up the following settings manually with the AUTO LOCK switch to OFF. The settings return to the automatic mode with the switch ON. - [SPOT METER] - exposure - [PROGRAM AE] - [WHITE BAL.] - [SHUTTR SPEED] • Settings adjusted while the AUTO LOCK switch is OFF are retained when it is set to ON, and will be restored when set to OFF again. • Set the AUTO LOCK switch to ON when using the external flash (optional). To adjust the focus manually.... Set the FOCUS/ZOOM switch to MANUAL ( appears). Rotate the focus ring to adjust the focus. To adjust the focus automatically, set the FOCUS/ZOOM switch to AUTO. • You can also use this function when changing the subject to be focused intentionally. • changes to when the focus cannot be adjusted any farther. changes to when the focus cannot be adjusted any closer. • It is easier to focus on the subject by moving the power zoom lever towards T (telephoto) to adjust the focus, then towards W (wide angle) to adjust the zoom for recording. When you want to record a subject at close range, move the power zoom lever to W (wide angle), then adjust the focus. To enlarge and focus on the image (Expanded focus Set the FOCUS/ZOOM switch to MANUAL in standby mode. Press EXPANDED FOCUS to double the size of the picture. When you finish focusing, the screen automatically returns to the normal picture display. To cancel the expanded focus, press EXPANDED FOCUS again. • Press [SET] on the LCD screen of your camcorder during expanded focus for setting up the peaking function. Press [ON] to enhance the outline of the subject for easier focusing. • The peaking is not recorded on a tape. To adjust the exposure for backlit subjects To adjust the exposure for backlit subjects, press BACK LIGHT to display . To cancel the back light function, press BACK LIGHT again. • The setting you have made will return to the default setting if you set the POWER switch to OFF (CHG) for more than 12 hours. Continued 27 Recording/Playback
-
 1
1 -
2
-
3
-
4
-
5
-
6
-
7
-
8
-
9
-
10
-
11
-
12
-
13
-
14
-
15
-
16
-
17
-
18
-
19
-
20
-
21
-
 22
22 -
 23
23 -
 24
24 -
 25
25 -
 26
26 -
 27
27 -
 28
28 -
 29
29 -
 30
30 -
 31
31 -
 32
32 -
33
-
34
-
35
-
36
-
37
-
38
-
39
-
40
-
41
-
42
-
43
-
44
-
45
-
46
-
47
-
48
-
49
-
50
-
51
-
52
-
53
-
54
-
55
-
56
-
57
-
58
-
59
-
60
-
61
-
62
-
63
-
64
-
65
-
66
-
67
-
68
-
69
-
70
-
71
-
72
-
73
-
74
-
75
-
76
-
77
-
78
-
79
-
80
-
81
-
82
-
83
-
84
-
85
-
86
-
87
-
88
-
89
-
90
-
91
-
92
-
93
-
94
-
95
-
96
-
97
-
98
-
99
-
100
-
101
-
102
-
103
-
104
-
105
-
106
-
107
-
108
-
109
-
110
-
111
-
112
-
113
-
114
-
115
-
116
-
117
-
118
-
119
-
120
-
121
-
122
-
123
 |
 |
