Sony HT-8800DP Operating Instructions (RDR-GX300 DVD Recorder) - Page 66
No More and press ENTER., Select Capture
 |
View all Sony HT-8800DP manuals
Add to My Manuals
Save this manual to your list of manuals |
Page 66 highlights
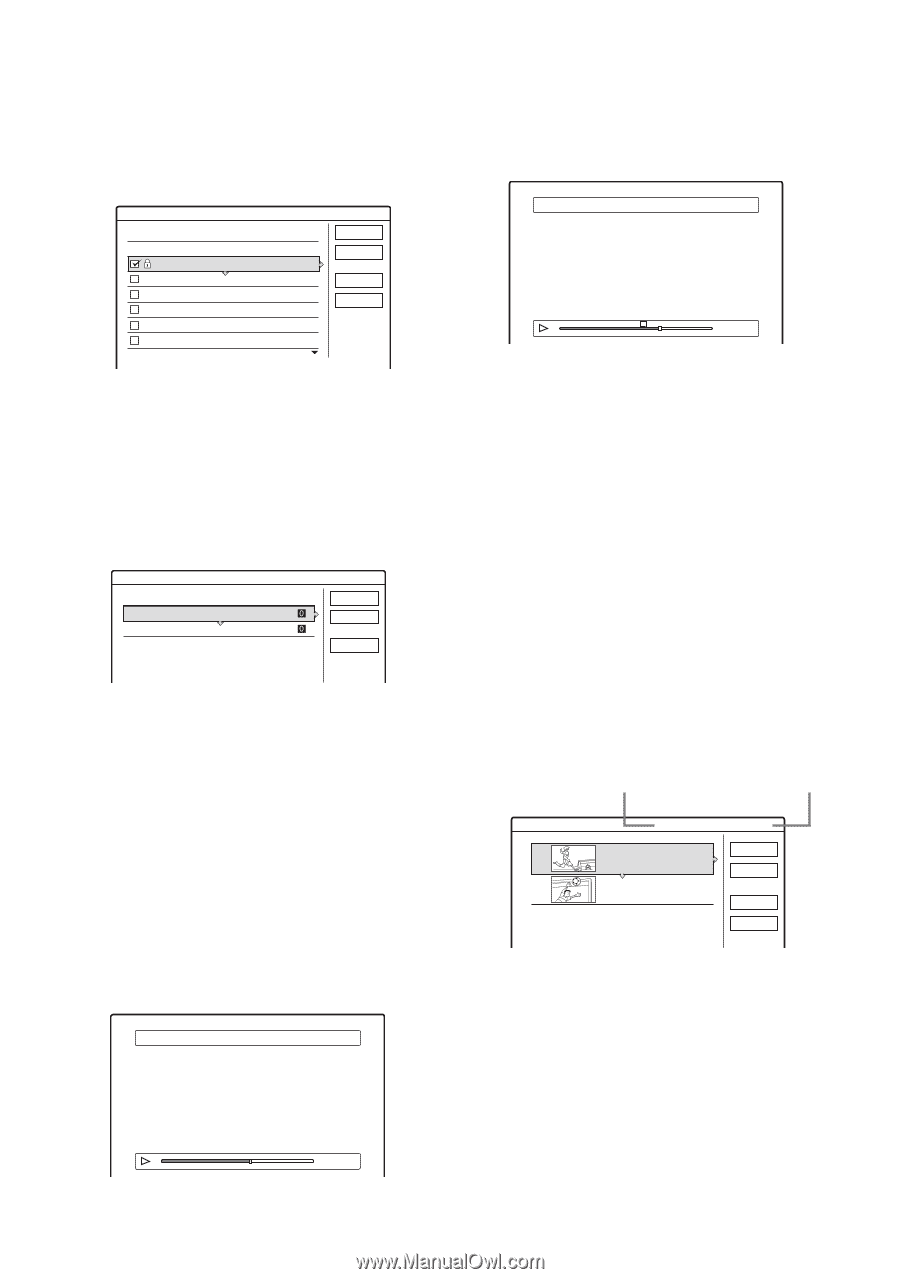
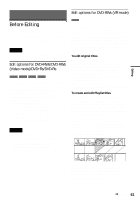
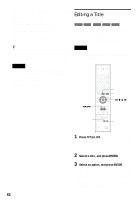
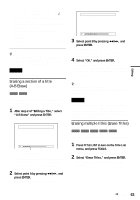
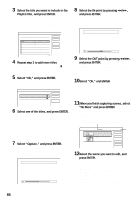
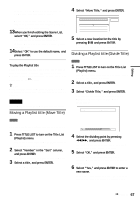
3 Select the title you want to include in the Playlist title, and press ENTER. A check mark appears in the check box next to the selected title. To clear the check mark, press ENTER again. To select all of the titles, select "Select All." Create Playlist Select the titles you want to capture. Original 1 2ch 1:00PM - 2:00PM 2 5ch 3 12ch 8:00PM - 9:00PM 9:00AM - 9:30AM 4 3ch 5 25ch 8:00PM - 8:30PM 8:00PM - 8:30PM 6 L2 9:00PM - 9:30PM 9/15 9/17 9/25 9/25 10/15 10/19 OK Cancel Select All Reset All 4 Repeat step 3 to add more titles. To go to the next page of titles, press m. To clear all of the check marks, select "Reset All." 5 Select "OK," and press ENTER. The list of selected titles appears. To add another title, select "Add Title." Create Playlist - Selected Titles Select a title to start capturing. 1 2ch 2 5ch 1:00PM - 2:00PM 9/15 8:00PM - 9:00PM 9/17 Scene List Cancel Add Title 6 Select one of the titles, and press ENTER. The sub-menu appears. "Capture": Adds a section of the title to the Playlist title as one scene. "Capture All": Adds the entire title to the Playlist title as one scene. After capturing the title, select "Scene List" and go to step 12. "Check Scenes": Allows you to check the captured scene. 7 Select "Capture," and press ENTER. The display for setting the start point (IN) appears. The title starts to play in the background. Capture (Set IN point) 2 5ch 8:00PM - 9:00PM IN 0:10:26 OUT 8 Select the IN point by pressing m/M, and press ENTER. The display for setting the end point (OUT) appears, and the title continues to play in the background. Capture (Set OUT point) 2 5ch 8:00PM - 9:00PM IN IN 0:10:26 OUT 0:23:45 9 Select the OUT point by pressing m/M, and press ENTER. The display asks for confirmation. To reset the IN or OUT point, select "Change IN" or "Change OUT" and repeat step 8 or 9. To view the selected scene, select "Preview." 10Select "OK," and ENTER. The selected section is captured as a scene, and the display asks whether you want to continue. To continue, select "More," and repeat the steps above. To capture a scene from another title, select "New Title." 11When you finish capturing scenes, select "No More" and press ENTER. The Scene List menu appears with all of the selected scenes. Total duration of the selected scene Total number of scenes Scene List 1 2 Total 0:33:28 Scenes 2 5ch 8:00PM - 9:00PM 0:10:26 - 0:23:45 5ch 8:00PM - 9:00PM 0:25:00 - 0:45:08 OK Quit Add Preview 12Select the scene you want to edit, and press ENTER. The sub-menu appears. "Move": Changes the scene order. "Erase": Erases the scene. The selection is canceled. "Preview": Displays thumbnail pictures of the scenes. "Change IN": Allows you to change the IN point, and repeat from step 8. 66
-
 1
1 -
2
-
3
-
4
-
5
-
6
-
7
-
8
-
9
-
10
-
11
-
12
-
13
-
14
-
15
-
16
-
17
-
18
-
19
-
20
-
21
-
22
-
23
-
24
-
25
-
26
-
27
-
28
-
29
-
30
-
31
-
32
-
33
-
34
-
35
-
36
-
37
-
38
-
39
-
40
-
41
-
42
-
43
-
44
-
45
-
46
-
47
-
48
-
49
-
50
-
51
-
52
-
53
-
54
-
55
-
56
-
57
-
58
-
59
-
60
-
 61
61 -
 62
62 -
 63
63 -
 64
64 -
 65
65 -
 66
66 -
 67
67 -
 68
68 -
 69
69 -
 70
70 -
 71
71 -
72
-
73
-
74
-
75
-
76
-
77
-
78
-
79
-
80
-
81
-
82
-
83
-
84
-
85
-
86
-
87
-
88
-
89
-
90
-
91
-
92
-
93
-
94
-
95
-
96
-
97
-
98
-
99
-
100
-
101
-
102
-
103
-
104
 |
 |