Sony KDL-40W650D Operating Instructions Setup Guide - Page 18
Changing the Viewing Style, Changing the Wide Mode, Setting Scene Select
 |
View all Sony KDL-40W650D manuals
Add to My Manuals
Save this manual to your list of manuals |
Page 18 highlights
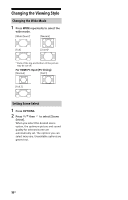
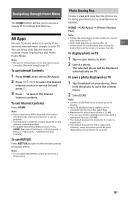
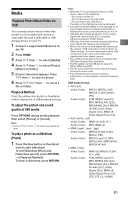
Changing the Viewing Style Changing the Wide Mode 1 Press WIDE repeatedly to select the wide mode. [Wide Zoom]* [Normal] [Full] [Zoom]* * Parts of the top and bottom of the picture may be cut off. For HDMI PC Input (PC timing) [Normal] [Full 1] [Full 2] Setting Scene Select 1 Press OPTIONS. 2 Press / then to select [Scene Select]. When you select the desired scene option, the optimum picture and sound quality for selected scene are automatically set. The options you can select may vary. Unavailable options are greyed out. 18US
-
 1
1 -
2
-
3
-
4
-
5
-
6
-
7
-
8
-
9
-
10
-
11
-
12
-
 13
13 -
 14
14 -
 15
15 -
 16
16 -
 17
17 -
 18
18 -
 19
19 -
 20
20 -
 21
21 -
 22
22 -
 23
23 -
24
-
25
-
26
-
27
-
28
-
29
-
30
-
31
-
32
-
33
-
34
-
35
-
36
-
37
-
38
-
39
-
40
-
41
-
42
-
43
-
44
-
45
-
46
-
47
-
48
-
49
-
50
-
51
-
52
-
53
-
54
-
55
-
56
-
57
-
58
-
59
-
60
-
61
-
62
-
63
-
64
-
65
-
66
-
67
-
68
-
69
-
70
-
71
-
72
-
73
-
74
-
75
-
76
-
77
-
78
-
79
-
80
-
81
-
82
-
83
-
84
-
85
-
86
-
87
-
88
-
89
-
90
-
91
-
92
-
93
-
94
-
95
-
96
-
97
-
98
-
99
-
100
-
101
-
102
-
103
-
104
 |
 |

18
US
Changing the Viewing Style
1
Press
WIDE
repeatedly to select the
wide mode.
For HDMI PC Input (PC timing)
1
Press
OPTIONS
.
2
Press
/
then
to select [Scene
Select].
When you select the desired scene
option, the optimum picture and sound
quality for selected scene are
automatically set. The options you can
select may vary. Unavailable options are
greyed out.
Changing the Wide Mode
[Wide Zoom]*
[Normal]
[Full]
[Zoom]*
* Parts of the top and bottom of the picture
may be cut off.
[Normal]
[Full 1]
[Full 2]
Setting Scene Select