Sony KF-60WE610 Operating Instructions - Page 15
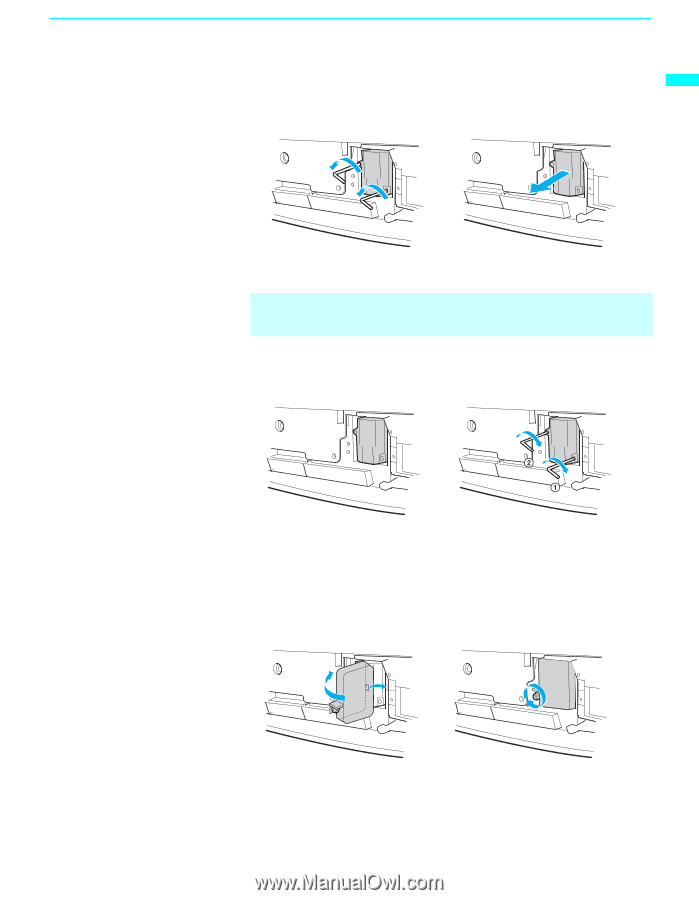
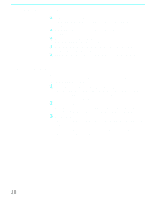
Be sure to attach the new lamp securely., Mount the lamp cover and tighten the screw. - replace lamp
 |
View all Sony KF-60WE610 manuals
Add to My Manuals
Save this manual to your list of manuals |
Page 15 highlights
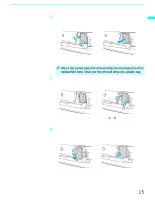
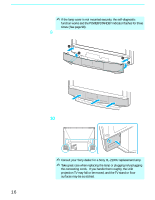
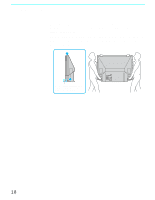
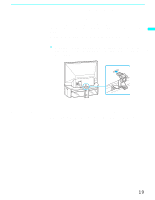
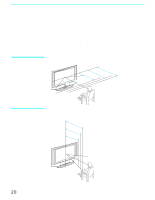
Introducing the Sony LCD Projection TV Introducing the Sony LCD Projection TV 6 Loosen the two screws that secure the lamp, then pull out the lamp. The lamp is very hot immediately after use. Never touch the front glass of the lamp or the surrounding parts. Loosen the two screws with the hex key supplied with the lamp. Hold the handle and pull straight out. ✍ After it has cooled, place the removed lamp into the empty box of the replacement lamp. Never put the removed lamp into a plastic bag. 7 Mount the new lamp. Be sure to attach the new lamp securely. Mount the new lamp securely into the lamp receptacle. Tighten the two screws securely in the order of 1 to 2, as shown in the illustration using the supplied hex key. 8 Mount the lamp cover and tighten the screw. Make sure that the lamp cover is mounted securely, otherwise the power will not turn on. Match the projection of the right side of the lamp cover with the hole of the unit, and replace the lamp cover as it was. (Continued) 15
-
 1
1 -
2
-
3
-
4
-
5
-
6
-
7
-
8
-
9
-
 10
10 -
 11
11 -
 12
12 -
 13
13 -
 14
14 -
 15
15 -
 16
16 -
 17
17 -
 18
18 -
 19
19 -
 20
20 -
21
-
22
-
23
-
24
-
25
-
26
-
27
-
28
-
29
-
30
-
31
-
32
-
33
-
34
-
35
-
36
-
37
-
38
-
39
-
40
-
41
-
42
-
43
-
44
-
45
-
46
-
47
-
48
-
49
-
50
-
51
-
52
-
53
-
54
-
55
-
56
-
57
-
58
-
59
-
60
-
61
-
62
-
63
-
64
-
65
-
66
-
67
-
68
-
69
-
70
-
71
-
72
-
73
-
74
-
75
-
76
-
77
-
78
-
79
-
80
-
81
-
82
-
83
-
84
-
85
-
86
-
87
-
88
-
89
-
90
-
91
-
92
-
93
-
94
-
95
-
96
-
97
-
98
-
99
-
100
-
101
-
102
-
103
 |
 |