Sony KLHW26 Operating Instructions - Page 53
Screen Settings, Wide Mode, Auto Wide
 |
UPC - 027242238817
View all Sony KLHW26 manuals
Add to My Manuals
Save this manual to your list of manuals |
Page 53 highlights
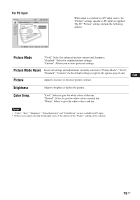
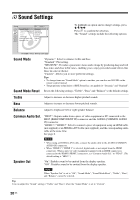
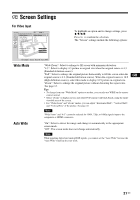
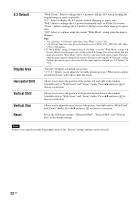
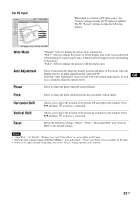
Screen Settings For Video Input To highlight an option and to change settings, press V/v/B/b. Press to confirm the selection. The "Screen" settings include the following options: : : Wide Mode Auto Wide : : "Wide Zoom": Select to enlarge to fill screen with minimum distortion. "4:3": Select to display 4:3 picture in original size when the original source is 4:3 (Standard definition source). "Full": Select to enlarge the original picture horizontally to fill the screen when the original source is 4:3 (Standard definition source). When the original source is 16:9 (High definition source), select this mode to display 16:9 picture in original size. "Zoom": Select to enlarge the original picture without distorting the aspect ratio. See page 13. Tips • To change from one "Wide Mode" option to another, you can also use WIDE on the remote control instead. • Select "Zoom" to display movies and other DVD content with black bands, using the entire viewable area of the screen. • For "Wide Zoom" and "Zoom" modes, you can adjust "Horizontal Shift", "Vertical Shift", and "Vertical Size" of the picture. See page 22. Note "Wide Zoom" and "4:3" cannot be selected for 1080i, 720p, or 1080p signals input to the component or HDMI connectors. GB "On": Select to detect the image and change it automatically to the appropriate screen mode. "Off": The screen mode does not change automatically. Note While inputting digital and analog RGB signals, you cannot set the "Auto Wide" because the "Auto Wide" function does not work. 21 GB
-
 1
1 -
2
-
3
-
4
-
5
-
6
-
7
-
8
-
9
-
10
-
11
-
12
-
13
-
14
-
15
-
16
-
17
-
18
-
19
-
20
-
21
-
22
-
23
-
24
-
25
-
26
-
27
-
28
-
29
-
30
-
31
-
32
-
33
-
34
-
35
-
36
-
37
-
38
-
39
-
40
-
41
-
42
-
43
-
44
-
45
-
46
-
47
-
 48
48 -
 49
49 -
 50
50 -
 51
51 -
 52
52 -
 53
53 -
 54
54 -
 55
55 -
 56
56 -
 57
57 -
 58
58 -
59
-
60
-
61
-
62
-
63
-
64
-
65
-
66
-
67
-
68
-
69
-
70
-
71
-
72
-
73
-
74
-
75
-
76
-
77
-
78
-
79
-
80
-
81
-
82
-
83
-
84
-
85
-
86
-
87
-
88
-
89
-
90
-
91
-
92
-
93
-
94
-
95
-
96
-
97
-
98
-
99
-
100
-
101
-
102
-
103
-
104
-
105
-
106
-
107
-
108
-
109
-
110
-
111
-
112
-
113
-
114
-
115
-
116
-
117
-
118
-
119
-
120
-
121
-
122
-
123
-
124
-
125
-
126
-
127
-
128
-
129
-
130
-
131
-
132
-
133
-
134
-
135
-
136
-
137
-
138
-
139
-
140
-
141
-
142
-
143
-
144
-
145
-
146
-
147
-
148
-
149
-
150
-
151
-
152
-
153
-
154
-
155
-
156
-
157
-
158
-
159
-
160
-
161
-
162
-
163
-
164
-
165
-
166
-
167
-
168
-
169
-
170
-
171
-
172
-
173
-
174
-
175
-
176
-
177
-
178
-
179
-
180
-
181
-
182
-
183
-
184
-
185
-
186
-
187
-
188
-
189
-
190
-
191
-
192
-
193
-
194
-
195
-
196
-
197
-
198
-
199
-
200
-
201
-
202
-
203
-
204
-
205
-
206
-
207
-
208
-
209
-
210
-
211
-
212
-
213
-
214
-
215
 |
 |
