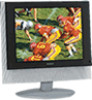
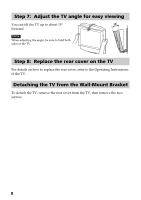
Sony KLV-15SR1 Operating Instructions (SU-W100) - Page 7
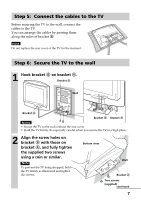
Step 5: Connect the cables to the TV, Step 6: Secure the TV to the wall, Hook bracket
 |
View all Sony KLV-15SR1 manuals
Add to My Manuals
Save this manual to your list of manuals |
Page 7 highlights
Step 5: Connect the cables to the TV Before securing the TV to the wall, connect the cables to the TV. You can arrange the cables by passing them along the sides of bracket B. Note Do not replace the rear cover of the TV for the moment. Step 6: Secure the TV to the wall 1 Hook bracket B on bracket A. Bracket A Wall Bracket B Bracket B Bracket A Notes • Secure the TV to the wall without the rear cover. • Hold the TV firmly. Be especially careful when you secure the TV in a high place. 2 Align the screw holes on bracket B with those on bracket A, and fully tighten the supplied two screws using a coin or similar. Note To prevent the TV being dropped, hold the TV firmly as illustrated and tighten the screws. Bottom view Wall Bracket A Two screws (supplied) continued 7
-
 1
1 -
 2
2 -
 3
3 -
 4
4 -
 5
5 -
 6
6 -
 7
7 -
 8
8 -
 9
9 -
 10
10 -
 11
11 -
 12
12 -
13
-
14
-
15
-
16
-
17
-
18
-
19
-
20
-
21
-
22
-
23
-
24
-
25
-
26
-
27
-
28
 |
 |
