Sony KLV32BX300 User Manual - Page 25
Set-up, Video 1 Input/Output
 |
View all Sony KLV32BX300 manuals
Add to My Manuals
Save this manual to your list of manuals |
Page 25 highlights
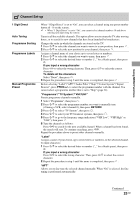
Using MENU Functions Set-up USB Auto Start Favourites Timer Settings AV Set-up Automatically enter photo thumbnail view when the TV is turned on and a digital still camera or other device storing photo files is connected to the USB port then turned on. Allows you to set your favourite channels and/or external input by assigning the desired channel numbers and/or external input. To watch a channel or external input Press F/f to select the channel number or external input, then press . To turn off the Favourite list Press RETURN to return to the previous screen. Add a current channel or external input to the Favourite list Press F/f to select "Add to Favourites", then press . • When you continue to add items beyond the 10th item, the bottom item in the list will be automatically removed from the Favourite list. Sets the timer to turn on/off the TV. "Sleep Timer" Sets the TV to automatically switch to standby mode after a certain amount of time. z • If you turn off the TV and turn it on again, "Sleep Timer" is reset to "Off". "On Timer" Sets the TV to automatically turn on from standby mode. "Clock Set" Allows you to adjust the clock manually. • "Clock Set" will automatically reset when you turn off the AC power. • When the "Sleep Timer" or "On Timer" is activated, the (Timer) indicator on the TV front panel lights up in amber. "Video Labels" Assigns a name to any equipment connected to the side and rear jacks. The name will be displayed briefly on the screen when the equipment is selected. 1 Press F/f to select the desired input source, then press . 2 Press F/f to select the desired option below, then press . Equipment labels: Uses one of the preset labels to assign a name to connected equipment. "Edit": Creates your own label. Follow steps 2 to 3 of "Programme Labels" (page 23). "Skip": Skips an unnecessary input source. "Colour System" Selects the colour system ("Auto", "PAL", "SECAM", "NTSC3.58", "NTSC4.43" or "PAL60") according to the composite video signal from the input source. "Video 1 Input/Output" Switches the video jack 1 and audio jack 1 between input and output modes. When set to "Output", outputs whatever is being viewed on the screen (except signals from the / , HDMI IN 1 or 2 and / PC IN jacks). "Video 3/Component Input" Select "Auto" to have the TV detect and switch between the component video jack or the video jack 3 when component video jack or video jack 3 is connected. • You cannot use the component video jack and the video jack 3 at the same time. Continued 25 GB
-
 1
1 -
2
-
3
-
4
-
5
-
6
-
7
-
8
-
9
-
10
-
11
-
12
-
13
-
14
-
15
-
16
-
17
-
18
-
19
-
 20
20 -
 21
21 -
 22
22 -
 23
23 -
 24
24 -
 25
25 -
 26
26 -
 27
27 -
 28
28 -
 29
29 -
 30
30 -
31
-
32
 |
 |