Sony LBT-LX90AV Operating Instructions - Page 6
VOLTAGE, SELECTOR, Inserting two R6 size AA - lbt lx9av
 |
View all Sony LBT-LX90AV manuals
Add to My Manuals
Save this manual to your list of manuals |
Page 6 highlights
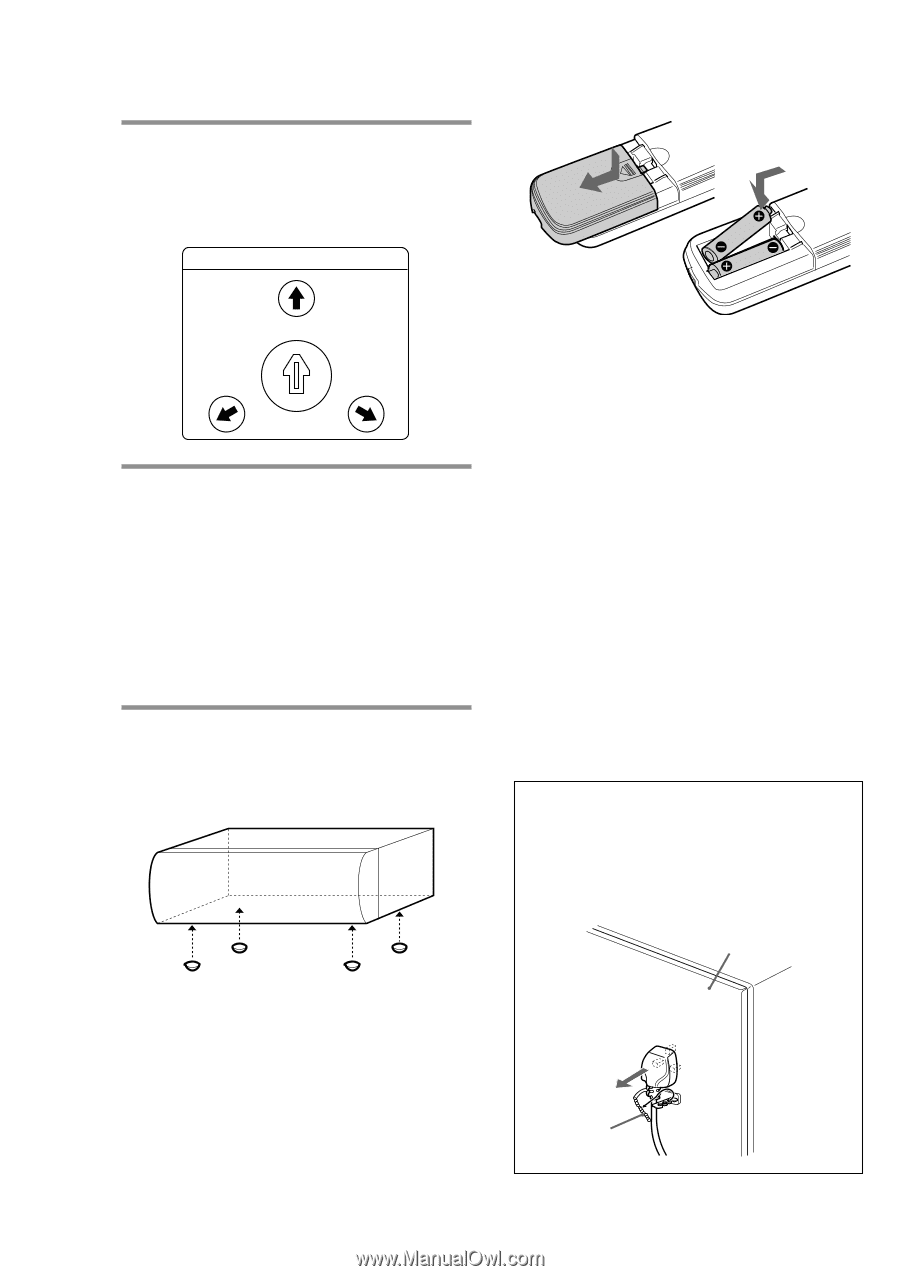
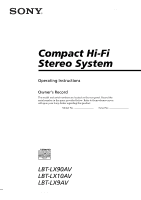
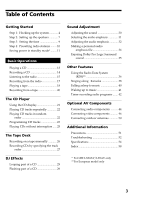
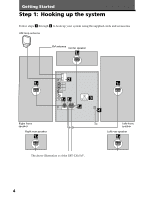
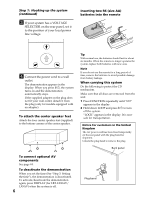
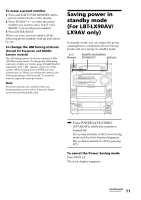
Step 1: Hooking up the system (continued) 3 If your system has a VOLTAGE SELECTOR on the rear panel, set it to the position of your local power line voltage. VOLTAGE SELECTOR Inserting two R6 (size AA) batteries into the remote 120V 230 - 240V 4 Connect the power cord to a wall outlet. The demonstration appears in the display. When you press ?/1, the system turns on and the demonstration automatically stops. If the supplied adapter on the plug does not fit your wall outlet, detach it from the plug (only for models equipped with an adapter). To attach the center speaker feet Attach the four center speaker feet (supplied) to the bottom corners of the center speaker. 220V Tip With normal use, the batteries should last for about six months. When the remote no longer operates the system, replace both batteries with new ones. Note If you do not use the remote for a long period of time, remove the batteries to avoid possible damage from battery leakage. When carrying this system Do the following to protect the CD mechanism. Make sure that all discs are removed from the unit. 1 Press FUNCTION repeatedly until "CD" appears in the display. 2 Hold down LOOP and press ?/1 to turn off the system. "LOCK" appears in the display. It is now safe for transportation. Notice for customers in the United Kingdom The AC power cord has been fixed temporarily on the rear panel with the plug band for shipment. Unlock the plug band to remove the plug. Back panel To connect optional AV components See page 44. To deactivate the demonstration When you set the time (See "Step 3: Setting the time"), the demonstration is deactivated. To activate/deactivate the demonstration again, press DISPLAY (for LBT-LX90AV/ LX9AV) when the system is off. 6 Plug band
-
 1
1 -
 2
2 -
 3
3 -
 4
4 -
 5
5 -
 6
6 -
 7
7 -
 8
8 -
 9
9 -
 10
10 -
 11
11 -
 12
12 -
13
-
14
-
15
-
16
-
17
-
18
-
19
-
20
-
21
-
22
-
23
-
24
-
25
-
26
-
27
-
28
-
29
-
30
-
31
-
32
-
33
-
34
-
35
-
36
-
37
-
38
-
39
-
40
-
41
-
42
-
43
-
44
-
45
-
46
-
47
-
48
-
49
-
50
-
51
-
52
-
53
-
54
-
55
-
56
-
57
-
58
-
59
-
60
 |
 |