Sony MHC-RX66 Operating Instructions - Page 8
Press TUNER/BAND repeatedly - stereo
 |
View all Sony MHC-RX66 manuals
Add to My Manuals
Save this manual to your list of manuals |
Page 8 highlights
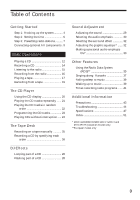
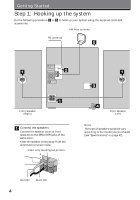
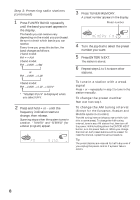
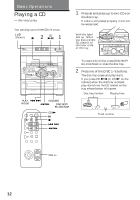
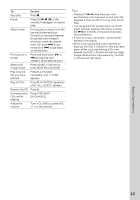
Step 3: Presetting radio stations (continued) 1 Press TUNER/BAND repeatedly until the band you want appears in the display. The bands you can receive vary depending on the model you purchased. Be sure to check which bands you can receive. Every time you press this button, the band changes as follows: 2 band model: FM ˜ AM 3 band model: FM n MW n SW or FM n MW n LW 4 band model: FM n MW n LW n UKV* * "STEREO PLUS" is displayed when you select UKV. n n n 2 Press and hold + or - until the frequency indication starts to change, then release. Scanning stops when the system tunes in a station. "TUNED" and "STEREO" (for a stereo program) appear. ALL DISCS MONO TUNED STEREO VOLUME kHz MHz ß 3 Press TUNER MEMORY. A preset number appears in the display. Preset number ALL DISCS VOLUME ß 4 Turn the jog dial to select the preset number you want. 5 Press ENTER/NEXT. The station is stored. 6 Repeat steps 1 to 5 to store other stations. To tune in a station with a weak signal Press + or - repeatedly in step 2 to tune in the station manually. To change the preset number Start over from step 1. To change the AM tuning interval (Except for the European, Russian and Middle Eastern models) The AM tuning interval is factory set to 9 kHz (10 kHz in some areas). To change the AM tuning interval, tune in any AM station first, then turn off the power. While holding down the ENTER/NEXT button, turn the power back on. When you change the interval, AM preset stations will be erased. To reset the interval, repeat the same procedure. Tip The preset stations are retained for half a day even if you unplug the power cord or if a power failure occurs. 8
-
 1
1 -
2
-
 3
3 -
 4
4 -
 5
5 -
 6
6 -
 7
7 -
 8
8 -
 9
9 -
 10
10 -
 11
11 -
 12
12 -
 13
13 -
14
-
15
-
16
-
17
-
18
-
19
-
20
-
21
-
22
-
23
-
24
-
25
-
26
-
27
-
28
-
29
-
30
-
31
-
32
-
33
-
34
-
35
-
36
-
37
-
38
-
39
-
40
-
41
-
42
-
43
-
44
-
45
-
46
-
47
-
48
-
49
-
50
-
51
-
52
 |
 |