Sony PCV-RS220 Online Help Center (User Guide) - Page 73
About Hard Disk Drive Installation, to Check Out - recovery cd
 |
View all Sony PCV-RS220 manuals
Add to My Manuals
Save this manual to your list of manuals |
Page 73 highlights
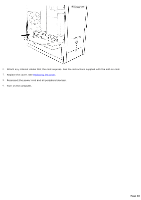
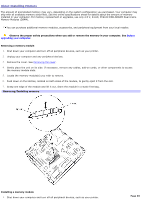
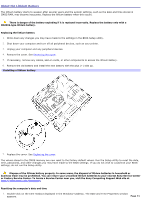
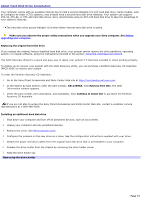
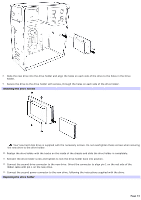
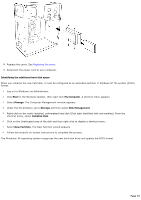
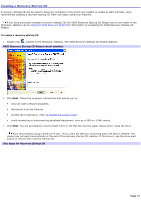
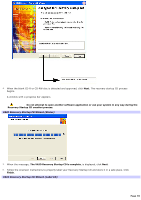
About Hard Disk Drive Installation Your computer comes with an available internal bay to hold a second standard 3.5-inch hard disk drive. Some models, such as Configure-to-Order (CTO) systems, may already have a second hard disk drive installed. Your system can support ATA-33, ATA-66, or ATA-100 hard disk drives. Sony recommends using an ATA-100 hard disk drive to take full advantage of your system's features. The hard disk drive access indicator is lit when either internal hard disk drive is active. Make sure you observe the proper safety precautions when you upgrade your Sony computer. See Before upgrading your computer. Replacing the original hard disk drive If you replace the original, factory-installed hard disk drive, your system cannot restore the drive partitions, operating system, or original software, using the instructions provided in the section, Using the VAIO Recovery Wizard. The VAIO Recovery Wizard is a quick and easy way to repair your system if it becomes unstable or stops working properly. To enable you to recover your system with the VAIO Recovery utility, you can purchase a Partition Recovery CD Assembly (PRCD ASSY) to restore your system. To order the Partition Recovery CD Assembly: 1. Go to the Sony Direct Accessories and Parts Center Web site at http://servicesales.sel.sony.com. 2. In the Search by type section, enter the part number, A8113558A. Click Retrieve Part Info. The Item Information window appears. 3. Verify the part number, item description, and availability. Click Continue to Check Out to purchase the Partition Recovery CD Assembly. If you are not able to access the Sony Direct Accessories and Parts Center Web site, contact a customer service representative at 1-800-488-7669. Installing an additional hard disk drive 1. Shut down your computer and turn off all peripheral devices, such as your printer. 2. Unplug your computer and any peripheral devices. 3. Remove the cover. See Removing the cover. 4. Configure the jumpers on the new drive as a slave. See the configuration instructions supplied with your drive. 5. Detach the power and drive cables from the original hard disk drive that is preinstalled in your computer. 6. Release the drive holder from the chassis by removing the drive holder screw. 7. Slide the drive holder out. Rem ov ing the driv e holder Page 73
-
 1
1 -
2
-
3
-
4
-
5
-
6
-
7
-
8
-
9
-
10
-
11
-
12
-
13
-
14
-
15
-
16
-
17
-
18
-
19
-
20
-
21
-
22
-
23
-
24
-
25
-
26
-
27
-
28
-
29
-
30
-
31
-
32
-
33
-
34
-
35
-
36
-
37
-
38
-
39
-
40
-
41
-
42
-
43
-
44
-
45
-
46
-
47
-
48
-
49
-
50
-
51
-
52
-
53
-
54
-
55
-
56
-
57
-
58
-
59
-
60
-
61
-
62
-
63
-
64
-
65
-
66
-
67
-
 68
68 -
 69
69 -
 70
70 -
 71
71 -
 72
72 -
 73
73 -
 74
74 -
 75
75 -
 76
76 -
 77
77 -
 78
78 -
79
-
80
-
81
-
82
-
83
-
84
-
85
-
86
-
87
-
88
-
89
-
90
-
91
-
92
-
93
-
94
-
95
-
96
-
97
-
98
-
99
-
100
-
101
-
102
-
103
-
104
-
105
-
106
-
107
-
108
-
109
-
110
-
111
-
112
-
113
-
114
 |
 |
