Sony SLT-A58 α Handbook - Page 180
Deleting the USB connection, Safely remove USB Mass Storage Device.
 |
View all Sony SLT-A58 manuals
Add to My Manuals
Save this manual to your list of manuals |
Page 180 highlights
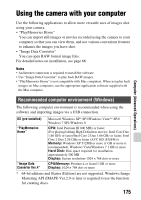
Connecting the camera to a computer 2 Drag and drop the image files to the hard disk icon. The image files are copied to the hard disk. 3 Double-click the hard disk icon t the desired image file in the folder containing the copied files. The image is displayed. Software for Mac computers For details on other software for Mac computers, access the following URL: http://www.sony.co.jp/imsoft/Mac/ Deleting the USB connection Perform steps 1 and 2 below before performing the following operations: • Disconnecting the USB cable. • Removing the memory card. • Turning off the camera. 1 Double-click the disconnect icon in the tasktray. • For Windows 7 or Windows 8, click , then click . Disconnect icon Windows Vista 2 Click (Safely remove USB Mass Storage Device). Notes • With Mac computers, drag and drop the icon of the memory card or the drive icon to the "Trash" icon before you disconnect the camera from the computer. • With Windows 7, the disconnect icon may not be displayed. In that case, you can disconnect without following the above procedure. • Do not disconnect the USB cable when the access lamp is lit. The data may be damaged. 180
-
 1
1 -
2
-
3
-
4
-
5
-
6
-
7
-
8
-
9
-
10
-
11
-
12
-
13
-
14
-
15
-
16
-
17
-
18
-
19
-
20
-
21
-
22
-
23
-
24
-
25
-
26
-
27
-
28
-
29
-
30
-
31
-
32
-
33
-
34
-
35
-
36
-
37
-
38
-
39
-
40
-
41
-
42
-
43
-
44
-
45
-
46
-
47
-
48
-
49
-
50
-
51
-
52
-
53
-
54
-
55
-
56
-
57
-
58
-
59
-
60
-
61
-
62
-
63
-
64
-
65
-
66
-
67
-
68
-
69
-
70
-
71
-
72
-
73
-
74
-
75
-
76
-
77
-
78
-
79
-
80
-
81
-
82
-
83
-
84
-
85
-
86
-
87
-
88
-
89
-
90
-
91
-
92
-
93
-
94
-
95
-
96
-
97
-
98
-
99
-
100
-
101
-
102
-
103
-
104
-
105
-
106
-
107
-
108
-
109
-
110
-
111
-
112
-
113
-
114
-
115
-
116
-
117
-
118
-
119
-
120
-
121
-
122
-
123
-
124
-
125
-
126
-
127
-
128
-
129
-
130
-
131
-
132
-
133
-
134
-
135
-
136
-
137
-
138
-
139
-
140
-
141
-
142
-
143
-
144
-
145
-
146
-
147
-
148
-
149
-
150
-
151
-
152
-
153
-
154
-
155
-
156
-
157
-
158
-
159
-
160
-
161
-
162
-
163
-
164
-
165
-
166
-
167
-
168
-
169
-
170
-
171
-
172
-
173
-
174
-
 175
175 -
 176
176 -
 177
177 -
 178
178 -
 179
179 -
 180
180 -
 181
181 -
 182
182 -
 183
183 -
 184
184 -
 185
185 -
186
-
187
-
188
-
189
-
190
-
191
-
192
-
193
-
194
-
195
-
196
-
197
-
198
-
199
-
200
-
201
-
202
-
203
-
204
-
205
-
206
-
207
-
208
-
209
-
210
-
211
-
212
-
213
-
214
-
215
 |
 |
