Sony SLT-A77V Instruction Manual (Large File - 18.18 MB) - Page 112
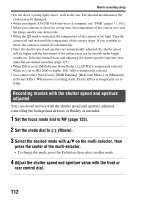
Recording movies with the shutter speed and aperture adjusted, Set the mode dial
 |
View all Sony SLT-A77V manuals
Add to My Manuals
Save this manual to your list of manuals |
Page 112 highlights
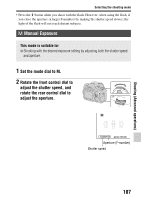
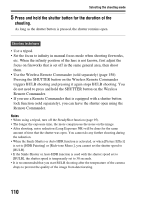
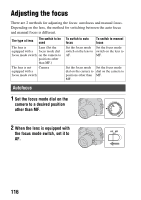
Movie recording setup • Do not shoot a strong light source, such as the sun. The internal mechanism of the camera may be damaged. • When you import AVCHD View movies to a computer, use "PMB" (pages 71, 192). • When you continue to shoot for a long time, the temperature of the camera rises and the image quality may deteriorate. • When the mark is indicated, the temperature of the camera is too high. Turn the camera off and wait until the temperature of the camera drops. If you continue to shoot, the camera is turned off automatically. • Since the shutter speed and aperture are automatically adjusted, the shutter speed will be higher and the movement of the subject may not be smooth under bright conditions. Selecting manual focus and adjusting the shutter speed or aperture may make the movement smoother (page 123). • When ISO is set to [Multi Frame Noise Reduct.], [AUTO] is temporarily selected. When it is set to ISO 2000 or higher, ISO 1600 is temporarily selected. • You cannot select [Soft Focus], [HDR Painting], [Rich-tone Mono.], or [Miniature] in Picture Effect. When movie recording starts, Picture Effect is temporarily set to [Off]. Recording movies with the shutter speed and aperture adjusted You can record movies with the shutter speed and aperture adjusted, controlling the background defocus or fluidity as intended. 1 Set the focus mode dial to MF (page 123). 2 Set the mode dial to (Movie). 3 Select the desired mode with v/V on the multi-selector, then press the center of the multi-selector. • To change the mode, press the Fn button, then select another mode. 4 Adjust the shutter speed and aperture value with the front or rear control dial. 112
-
 1
1 -
2
-
3
-
4
-
5
-
6
-
7
-
8
-
9
-
10
-
11
-
12
-
13
-
14
-
15
-
16
-
17
-
18
-
19
-
20
-
21
-
22
-
23
-
24
-
25
-
26
-
27
-
28
-
29
-
30
-
31
-
32
-
33
-
34
-
35
-
36
-
37
-
38
-
39
-
40
-
41
-
42
-
43
-
44
-
45
-
46
-
47
-
48
-
49
-
50
-
51
-
52
-
53
-
54
-
55
-
56
-
57
-
58
-
59
-
60
-
61
-
62
-
63
-
64
-
65
-
66
-
67
-
68
-
69
-
70
-
71
-
72
-
73
-
74
-
75
-
76
-
77
-
78
-
79
-
80
-
81
-
82
-
83
-
84
-
85
-
86
-
87
-
88
-
89
-
90
-
91
-
92
-
93
-
94
-
95
-
96
-
97
-
98
-
99
-
100
-
101
-
102
-
103
-
104
-
105
-
106
-
 107
107 -
 108
108 -
 109
109 -
 110
110 -
 111
111 -
 112
112 -
 113
113 -
 114
114 -
 115
115 -
 116
116 -
 117
117 -
118
-
119
-
120
-
121
-
122
-
123
-
124
-
125
-
126
-
127
-
128
-
129
-
130
-
131
-
132
-
133
-
134
-
135
-
136
-
137
-
138
-
139
-
140
-
141
-
142
-
143
-
144
-
145
-
146
-
147
-
148
-
149
-
150
-
151
-
152
-
153
-
154
-
155
-
156
-
157
-
158
-
159
-
160
-
161
-
162
-
163
-
164
-
165
-
166
-
167
-
168
-
169
-
170
-
171
-
172
-
173
-
174
-
175
-
176
-
177
-
178
-
179
-
180
-
181
-
182
-
183
-
184
-
185
-
186
-
187
-
188
-
189
-
190
-
191
-
192
-
193
-
194
-
195
-
196
-
197
-
198
-
199
-
200
-
201
-
202
-
203
-
204
-
205
-
206
-
207
-
208
-
209
-
210
-
211
-
212
-
213
-
214
-
215
-
216
-
217
-
218
-
219
-
220
-
221
-
222
-
223
-
224
-
225
-
226
-
227
-
228
-
229
-
230
-
231
-
232
-
233
-
234
-
235
-
236
-
237
-
238
-
239
-
240
-
241
-
242
 |
 |