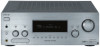
Sony STR-DA2000ES Operating Instructions (primary manual) - Page 4

Table of Contents - specifications

Page 4 highlights

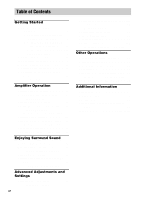
Table of Contents Getting Started 1: Check how to hookup your components 6 1a: Connecting components with digital audio output jacks 8 1b: Connecting components with multi channel output jacks........ 11 1c: Connecting components with only analog audio jacks 13 2: Connecting the antennas 15 3: Connecting speakers 16 4: Connecting the AC power cord ........ 19 5: Setting up the speakers 20 6: Adjusting the speaker levels and balance 23 - TEST TONE Amplifier Operation Selecting the component 24 Listening to multi channel sound.......... 25 - MULTI CH IN Listening to FM/AM radio 25 Storing FM stations automatically ........ 26 - AUTOBETICAL (Models of area code CEL only) Presetting radio stations 27 Using the Radio Data System (RDS).... 28 (Models of area code CEL only) Changing the display 29 About the indications in the display...... 30 Enjoying Surround Sound Using only the front speakers 32 Enjoying higher fidelity sound 32 - AUTO FORMAT DIRECT Selecting a sound field 33 Selecting the surround back decoding mode 35 - SURR BACK DECODING Advanced Adjustments and Settings Assigning the audio input 37 - DIGITAL ASSIGN 4GB Switching the audio input mode for digital components 38 - INPUT MODE Customizing sound fields 38 Adjusting the equalizer 40 Advanced settings 40 Custom install mode 44 (Models of area code U, CA only) Other Operations Naming preset stations and inputs ........ 45 Using the Sleep Timer 46 Selecting the speaker system 46 Recording 47 Listening to the sound in another zone. 48 (Models of area code U, CA only) CONTROL A1II Control System ........ 49 Additional Information Precautions 51 Troubleshooting 52 Specifications 55 List of button locations and reference pages 58 Index back cover

  • 1
  • 2
  • 3
  • 4
  • 5
  • 6
  • 7
  • 8
  • 9
  • 10
  • 11
  • 12
  • 13
  • 14
  • 15
  • 16
  • 17
  • 18
  • 19
  • 20
  • 21
  • 22
  • 23
  • 24
  • 25
  • 26
  • 27
  • 28
  • 29
  • 30
  • 31
  • 32
  • 33
  • 34
  • 35
  • 36
  • 37
  • 38
  • 39
  • 40
  • 41
  • 42
  • 43
  • 44
  • 45
  • 46
  • 47
  • 48
  • 49
  • 50
  • 51
  • 52
  • 53
  • 54
  • 55
  • 56
  • 57
  • 58
  • 59
  • 60

4
GB
Getting Started
1: Check how to hookup your
components
.......................................
6
1a: Connecting components with
digital audio output jacks
...........
8
1b: Connecting components with
multi channel output jacks
........
11
1c: Connecting components with only
analog audio jacks
....................
13
2: Connecting the antennas
...................
15
3: Connecting speakers
.........................
16
4: Connecting the AC power cord
........
19
5: Setting up the speakers
.....................
20
6: Adjusting the speaker levels and
balance
............................................
23
— TEST TONE
Amplifier Operation
Selecting the component
.......................
24
Listening to multi channel sound
..........
25
— MULTI CH IN
Listening to FM/AM radio
....................
25
Storing FM stations automatically
........
26
— AUTOBETICAL
(Models of area code CEL only)
Presetting radio stations
........................
27
Using the Radio Data System (RDS)
....
28
(Models of area code CEL only)
Changing the display
.............................
29
About the indications in the display
......
30
Enjoying Surround Sound
Using only the front speakers
...............
32
Enjoying higher fidelity sound
..............
32
— AUTO FORMAT DIRECT
Selecting a sound field
..........................
33
Selecting the surround back decoding
mode
...............................................
35
— SURR BACK DECODING
Advanced Adjustments and
Settings
Assigning the audio input
.....................
37
— DIGITAL ASSIGN
Switching the audio input mode for digital
components
.....................................
38
— INPUT MODE
Customizing sound fields
.....................
38
Adjusting the equalizer
.........................
40
Advanced settings
.................................
40
Custom install mode
.............................
44
(Models of area code U, CA only)
Other Operations
Naming preset stations and inputs
........
45
Using the Sleep Timer
..........................
46
Selecting the speaker system
................
46
Recording
.............................................
47
Listening to the sound in another zone . 48
(Models of area code U, CA only)
CONTROL A1
II
Control System
........
49
Additional Information
Precautions
...........................................
51
Troubleshooting
....................................
52
Specifications
.......................................
55
List of button locations and reference
pages
...............................................
58
Index
........................................
back cover
Table of Contents