Sony TDM-NC1 Quick Setup Guide - Page 1
Sony TDM-NC1 - Wi-fi Client For Streaming Music Manual
 |
UPC - 027242710900
View all Sony TDM-NC1 manuals
Add to My Manuals
Save this manual to your list of manuals |
Page 1 highlights
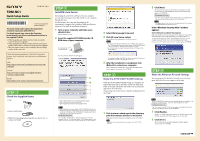
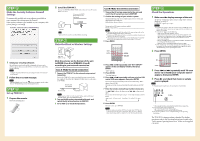
TDM-NC1 Quick Setup Guide 3-198-942-11(1) © 2007 Sony Corporation (1) Printed in Malaysia This Quick Setup Guide explains the preparation needed to enjoy music with TDM-NC1. For details on each step, refer to the Operating Instructions/M-crew Server Installation Instructions in the supplied CD-ROM. When using this unit with a wired network, you need a network cable (not supplied). When using this unit with a wireless network, you need a wireless LAN router or wireless access point (not supplied). This unit cannot connect with a computer directly using a wireless ad-hoc network. Check the following website for TDM-NC1's latest information, FAQ (Frequently Asked Questions), and firmware updates; USA: http://esupport.sony.com/?ref=http%3A//www.sony.com/ index.php Canada: http://www.sony.ca/sonyca/view/english/warranty/ consumer_support.shtml Europe: http://support.sony-europe.com/main/main.asp?l=en STEP Check the Supplied Items Unit Remote with battery TDM-NC1 Operating Instructions/M-crew Server Ver. 2.5 software CD-ROM STEP Install M-crew Server By installing M-crew Server software onto your computer, you can enjoy listening to music files stored on your computer through this unit. Installation may take some time depending on the environment. A progress bar is displayed while installation is underway. Wait until the installation is finished. 1 Turn on your computer and login as an administrator. Wait for Windows to load. 2 Insert the supplied CD-ROM into the CD- ROM drive of your computer. M-crew Server Ver. 2.5 software CD-ROM The "M-crew Server SETUP" window appear. 3 4 1) 2) 3) 1) Click to display the M-crew Server Installation Instructions. 2) Click to start up the WLAN Setup Assistant. 3) Click to display the TDM-NC1 Operating Instructions. Notes If the window does not open, double-click the CD-ROM Setup.exe icon. While the installation is still in progress, do not interrupt the operation or take the CD-ROM out of the CD-ROM drive. Doing so may render it impossible to install the software thereafter. For Windows Vista users The "Auto Play" window appears, click [Run setup.exe] to install the program. Then, the "User Account Control" (UAC) window appears, click [Allow]. If you click [Cancel], you will not be able to start the installation. 3 Select the language to be used. 4 Click [M-crew Server setup]. The installation starts. Follow the on-screen instructions. Notes If ".NET Framework" (2.0 or higher) is not installed on your computer, the ".NET Framework Installer" window appears. Click [Install] to install ".NET Framework 2.0" and follow the displayed instructions. A warning window may appear during installation of Windows Media Format SDK 9.5. To continue installing, click [OK]. For details, refer to the M-crew Server Installation instructions "Installing M-crew Server". 5 After the installation is completed, click [Reboot] to restart your computer. After restarting your computer, the "AUTO LINK FOLDER SETUP" window appears automatically. Go to STEP . STEP Make the AUTO LINK FOLDER Settings When the AUTO LINK FOLDER settings are completed, all supportable music files in the folder and the sub folder that exists on the path indicated in the window are automatically imported to M-crew Server. If many songs are stored on your computer, loading time may take longer. 1 Click to place a check next to the directory path that contains the files to be loaded. Click again to remove checks next to paths that are not to be loaded. Tip Sub-folders of the selected folder are also subject to the AUTO LINK function. 2 Click [Next]. The music files located in the checked directory path(s) are loaded automatically. The "ICF SETTINGS" window should automatically appear. Go to STEP . For Windows Vista users The "User Account Control" (UAC) window appears, click [Allow]. If you click [Cancel], you will not be able to start the installation. Note All supportable music files that exist in the path indicated in the window are automatically loaded to M-crew Server. If the "Windows Security Alert" window appears Click [Unblock] to unblock the program. Make sure that the "M-crew Server task tray icon" appears in "Name", then click [Unblock]. If you click [Keep Blocking], you will be unable to use M-crew Server. For details, refer to "Registering the TDM-NC1 on your computer manually" in the M-crew Server Installation instructions. In some cases, the "Windows Security Alert" window appears in STEP . STEP Make the Windows Firewall Settings This setting opens the Windows Firewall so you can enjoy music files stored on your computer via the unit. Note If the "ICF SETTINGS" window does not automatically appear, click [Start] - [All Programs] - [Mcrew Server] - [TOOLS] - [ICF Settings] in that order. For Windows Vista users The "User Account Control" (UAC) window appears, click [Allow]. If you click [Cancel], you will not be able to start the installation. 1 Click [Enable]. "Enable" or "Disable" appears for each item. If "Disable" appears, click [Enable] repeatedly until "Enable" appears for all status items. 2 Click [Close]. The "Security software Firewall setting guide" window appears automatically. Go to STEP . Continued
-
 1
1 -
 2
2
 |
 |