Sony TDM-NC1 Quick Setup Guide - Page 2
Make the Security Software Firewall, Settings, Set up TDM-NC1, Make the Wired or Wireless Settings, - digital media port server
 |
UPC - 027242710900
View all Sony TDM-NC1 manuals
Add to My Manuals
Save this manual to your list of manuals |
Page 2 highlights
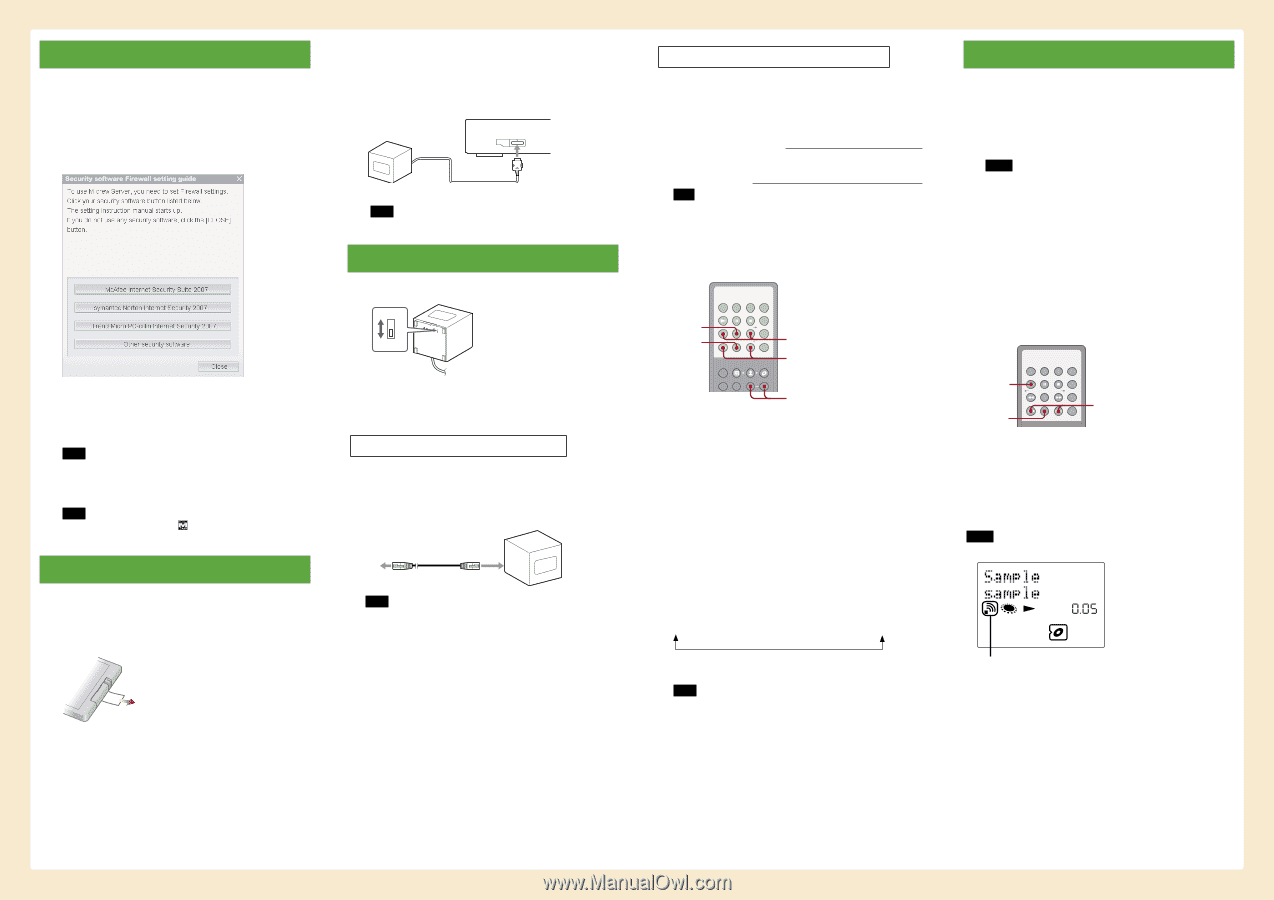
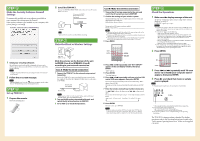
STEP Make the Security Software Firewall Settings If commercially available anti-virus software is installed on your computer, this setting opens the Firewall. If the security software is not installed on your computer, click [Close] then go to STEP . 1 Click your security software. The web browser is activated, and the setting guide of your security software appears. If your security software is not on the list, click [Other security software]. Note To display the guide (web browser), your computer needs to be connected to the Internet. 2 Follow the on-screen message. Note After installing M-crew Server, the task tray icon appears on the taskbar. Refer to "Troubleshooting" in the Operating Instructions. STEP Set up TDM-NC1 1 Prepare the remote. Pull out the insulating sheet. 2 Install the TDM-NC1. Connect the DIGITAL MEDIA PORT cable of this unit to an AV system (DAV series, etc.). AV system with DIGITAL MEDIA PORT interface (back panel) DMPORT TDM-NC1 Note Make sure the AV system is turned off before connecting. STEP Make the Wired or Wireless Settings WIRELESS WIRED WIRELESS/ WIRED selector Slide the selector on the bottom of the unit to WIRED (Case A) or WIRELESS (Case B) according to your network connection. Case A: Make the wired connection 1 Connect the TDM-NC1 to the network using a wired connection. Connect the TDM-NC1 to your router (hub) by using a network cable (not supplied). Check that the WIRELESS/WIRED selector on the unit is set to WIRED. Network cable (not supplied) To router (hub) To LAN port Note When using the TDM-NC1 with a fixed IP address, refer to "Advanced network settings" in the Operating Instructions. 2 Turn on the AV system connected to the unit, and switch the AV system function to DMPORT. 3 Go to STEP to check the operations. Case B: Make the wireless connection 1 Turn on the AV system connected to the unit, and switch the AV system function to DMPORT. 2 Confirm the settings of your wireless system. Check the following items of your wireless LAN router to set the same information for the TDM-NC1. SSID (Wireless Network Name): If your wireless LAN router security is enabled, Wireless Network Key: Tips For details on how to check the wireless LAN router settings, refer to the operation manual of your wireless LAN router. In some case, SSID name and wireless network key numbers/characters are written on the wireless LAN router. Check that your wireless LAN router uses the latest firmware version. For details, refer to the operation manual of your wireless LAN router. 3 Press MENU. MENU ENTER +/- 4 Press or repeatedly until "Wi-Fi SETUP?" appears in the unit display window, then press ENTER. "SSID?" appears. 5 Press ENTER. "Searching" appears. 6 Press or repeatedly until your wireless LAN router SSID name appears, then press ENTER. If you set the wireless network key in the wireless LAN setting, "KEY?" appears. Press ENTER. If you do not set the wireless network key, the unit restarts, go to STEP . 7 Enter the wireless network key numbers/characters. Use / to choose the character, and / to skip entered digits. You can also choose letter types using +/-. Letter types changes as shown below: upper case lower case number symbol space 8 Press ENTER. The unit restarts, go to STEP . Note If you set wireless network key (WEP key) to other than "WEP key No. 1", you need to select the Case C connection. Refer to "Case C: Wireless connection (setting up by the computer)" in the Operating Instructions. STEP Check the Operations 1 Make sure the display message of the unit. The message "Configuring" appears, then "Loading" follows and then disappears. Go to step 4. If "SERVER?" appears, go to step 2. Notes If "Check Net" appears, check the network settings in STEP . Or, the wireless signal may be weak or out of range, move the unit closer to the wireless access point. If "No Server" appears, do the following; - Make sure the Firewall setting are correct. - Right click the M-crew Server task tray icon in the computer's task tray, then select [Stop Music Service], and right click the icon again. Then, select [Start Music Service] to restart the M-crew Server. - Restart your computer. - Execute "DataBaseClear.exe" to initialize the database (usually located in C:\Program Files\Mcrewserver). - Input the wireless network key numbers/characters again. If the "Configuring" or "Loading" messages do not disappear after a few minutes, or other messages mentioned above appear, refer to the "Troubleshooting" in the Operating Instructions. 2 Press ENTER. ENTER / 3 Press or repeatedly until "M-crew Server v2 on XXXX (your computer name)" appears, then press ENTER. 4 Press and check that music or sample music is played. Notes When playing the sample music, the unit display is shown below. This icon appears when connecting the unit by wireless connection. If no sound is heard, check the following; - The connected AV system's volume is zero. - The connected AV system is not in DMPORT function. For any other problems, refer to "Troubleshooting" in the Operating Instructions. The TDM-NC1's setup procedure is finished. For further operations, refer to the Operating Instructions located in the "Audio system Operating Instructions" folder on the supplied CD-ROM.
-
 1
1 -
 2
2
 |
 |