Sony VPCJ112FX VPCJ1 Series Optical Disk Drive Replacement Instructions - Page 2
VPCJ1 Series Optical Disk Drive, Replacement Instructions
 |
UPC - 027242799363
View all Sony VPCJ112FX manuals
Add to My Manuals
Save this manual to your list of manuals |
Page 2 highlights
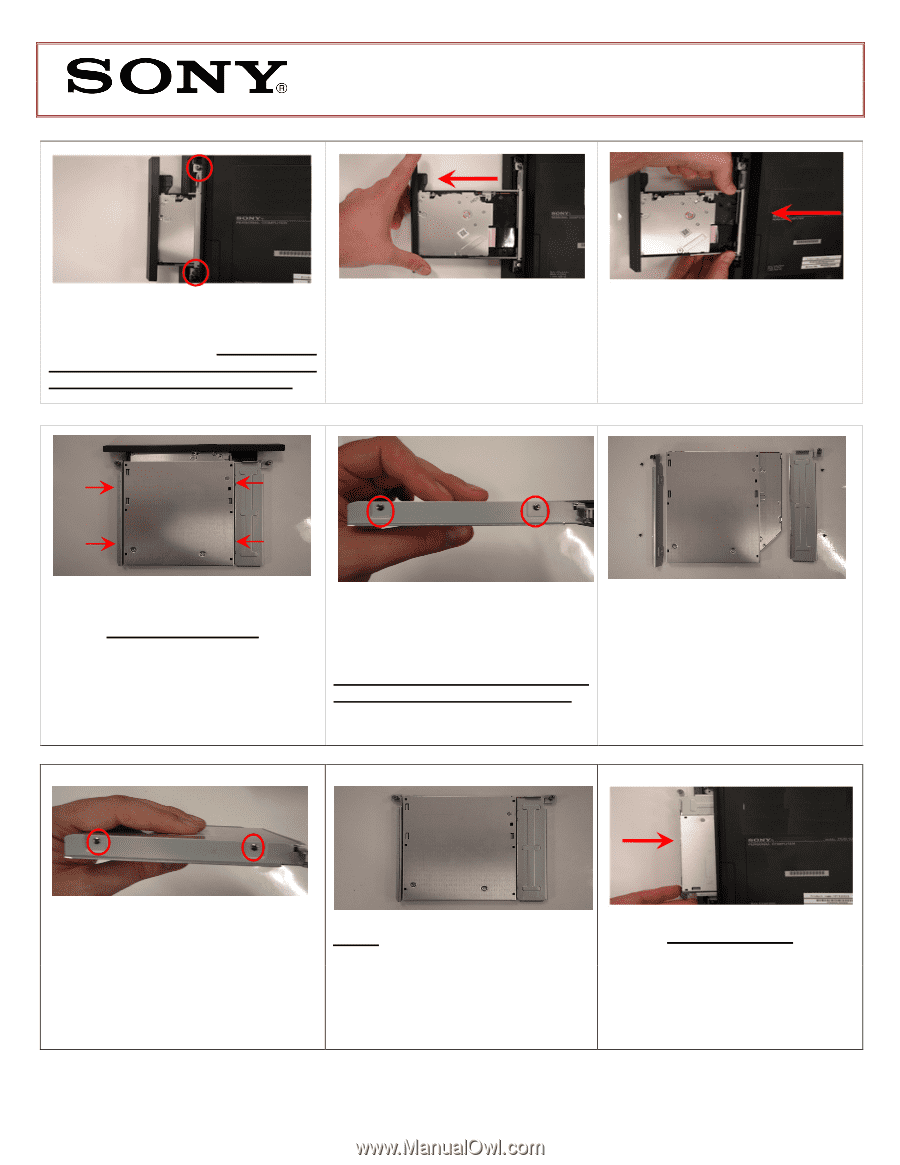
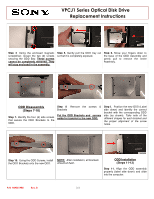
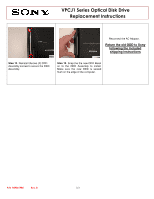
VPCJ1 Series Optical Disk Drive Replacement Instructions Step 4. Using the enclosed magnetic screwdriver, loosen the two (2) screws securing the ODD Bay. These screws cannot be completely removed. They will stay enclosed in the assembly. Step 5. Gently pull the ODD tray out so that it is completely exposed. Step 6. Move your fingers down to the base of the ODD Assembly and gently pull to remove the entire Assembly. ODD Disassembly (Steps 7-10) Step 7. Identify the four (4) side screws that secure the ODD Brackets to the ODD. Step 8. Remove the screws & Brackets Put the ODD Brackets and screws aside for transfer to the new ODD. Step 9. Position the new ODD (Label side down) and identify the correct bracket with the corresponding ODD side (as shown). Take note of the different shapes for each bracket and the proper alignment of the screw holes. Step 10. Using the ODD Screws, install NOTE: After installation, all brackets the ODD Brackets onto the new ODD. should sit flush. ODD Installation (Steps 11-13) Step 11. Align the ODD assembly properly (label side down) and slide into the computer. P/N 989201985 Rev. B 2/3
-
 1
1 -
 2
2 -
 3
3
 |
 |