Sony VPL HS60 Operating Instructions - Page 12
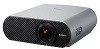
Position the projector so that the lens is parallel to the screen. - video projector
 |
UPC - 027242682498
View all Sony VPL HS60 manuals
Add to My Manuals
Save this manual to your list of manuals |
Page 12 highlights
2 Position the projector so that the lens is parallel to the screen. Top view Screen 3 Project an image on the screen and adjust the picture so that it fits the screen. (1 page 17) To project an image, connect video equipment to the projector. (1 page 13) Note When using a screen with an uneven surface, stripes pattern may rarely appear on the screen depending on the distance between the screen and the projector or the zooming magnifications. This is not a malfunction of the projector. For installation of the projector on a ceiling, see "Ceiling Installation." (1 page 57) 12 Step 1: Installing the Projector
-
 1
1 -
2
-
3
-
4
-
5
-
6
-
 7
7 -
 8
8 -
 9
9 -
 10
10 -
 11
11 -
 12
12 -
 13
13 -
 14
14 -
 15
15 -
 16
16 -
 17
17 -
18
-
19
-
20
-
21
-
22
-
23
-
24
-
25
-
26
-
27
-
28
-
29
-
30
-
31
-
32
-
33
-
34
-
35
-
36
-
37
-
38
-
39
-
40
-
41
-
42
-
43
-
44
-
45
-
46
-
47
-
48
-
49
-
50
-
51
-
52
-
53
-
54
-
55
-
56
-
57
-
58
-
59
-
60
-
61
-
62
-
63
-
64
-
65
-
66
-
67
-
68
 |
 |

12
Step 1: Installing the Projector
2
Position the projector so that the lens is parallel to the screen.
3
Project an image on the screen and adjust the picture so that it
fits the screen. (
1
page 17)
To project an image, connect video equipment to the projector. (
1
page
13)
When using a screen with an uneven surface, stripes pattern may rarely appear on the
screen depending on the distance between the screen and the projector or the zooming
magnifications. This is not a malfunction of the projector.
For installation of the projector on a ceiling, see “Ceiling Installation.” (
1
page 57)
Note
Screen
Top view