Sony VPL HS60 Operating Instructions - Page 7
Connections and Preparations, Unpacking - filter
 |
UPC - 027242682498
View all Sony VPL HS60 manuals
Add to My Manuals
Save this manual to your list of manuals |
Page 7 highlights
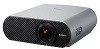
Connections and Preparations Connections and Preparations This section describes how to install the projector and screen, how to connect the equipment from which you want to project the picture, etc. Unpacking Check the carton to make sure it contains the following items: • Remote control (1) • Size AA (R6) batteries (2) • Air filter (for replacement) (1) • AC power cord (1) • CD-ROM (Application software) (VPL-HS51A only) (1) • Operating Instructions (this manual) (1) Inserting the batteries into the remote control Insert the batteries E side first as shown in the illustration. Inserting them forcibly or with the polarities reversed may cause a short circuit and may generate heat. Unpacking 7
-
 1
1 -
 2
2 -
 3
3 -
 4
4 -
 5
5 -
 6
6 -
 7
7 -
 8
8 -
 9
9 -
 10
10 -
 11
11 -
 12
12 -
13
-
14
-
15
-
16
-
17
-
18
-
19
-
20
-
21
-
22
-
23
-
24
-
25
-
26
-
27
-
28
-
29
-
30
-
31
-
32
-
33
-
34
-
35
-
36
-
37
-
38
-
39
-
40
-
41
-
42
-
43
-
44
-
45
-
46
-
47
-
48
-
49
-
50
-
51
-
52
-
53
-
54
-
55
-
56
-
57
-
58
-
59
-
60
-
61
-
62
-
63
-
64
-
65
-
66
-
67
-
68
 |
 |

7
Unpacking
Connections and Preparations
This section describes how to install the projector and screen, how to connect
the equipment from which you want to project the picture, etc.
Unpacking
Check the carton to make sure it contains the following items:
Inserting the batteries into the remote control
Connections and Preparations
• Remote control (1)
• Size AA (R6) batteries (2)
• Air filter (for replacement) (1)
• AC power cord (1)
• CD-ROM (Application software)
(VPL-HS51A only) (1)
• Operating Instructions (this manual) (1)
Insert the batteries
E
side first as shown in the illustration.
Inserting them forcibly or with the polarities reversed may cause
a short circuit and may generate heat.